Google Maps Integration
The Google Maps Integration in EPASS enhances dispatching by incorporating Google’s mapping and routing capabilities directly into the EPASS. It enables address validation, interactive map displays, and route planning, helping ensure accurate location data and more efficient scheduling. With improved visibility and optimized routing, dispatchers can reduce travel time and better manage daily operations.
To use the Google API, you must sign up for your own Google Cloud account and generate a Google Maps API key. (Follow this topic for instructions.)
Once you have setup your Google Cloud account and generated an API key, follow the instructions below to complete the integration.
Enter Your Google API Key
-
Go to Tools > System Maintenance. Click the Variables tab.
-
Select Dispatching, and then click Open.
-
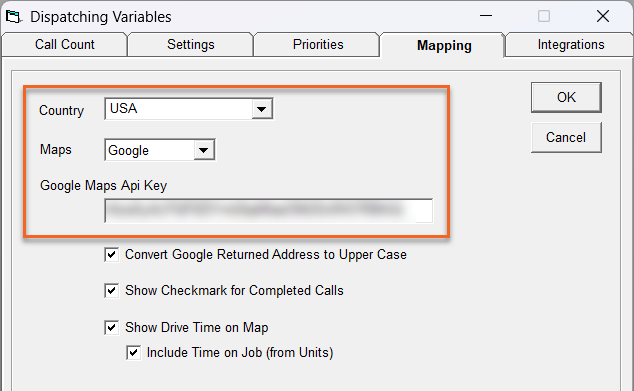
Click the Mapping tab.
-
Do the following:
- Select your Country from the dropdown (USA or Canada).
- In the Maps dropdown, select Google.
- Enter your Google Maps API Key.
-
Click OK.
Configure Customer Address Validation
-
Go to Tools > System Maintenance. Click the Variables tab.
-
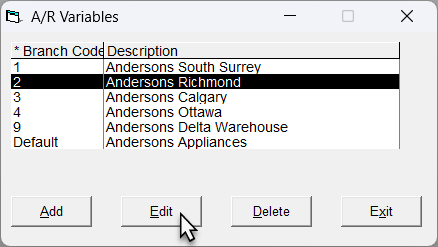
Select Accounts Receivable, and then click Open.
-
Select a branch, and then click Edit.
-
Click the Customer 2 tab.
-
In the Validate Address With dropdown, select Google.

-
Click OK.
-
Repeat steps 3–6 for additional branches.
We recommend that you make sure all branches are validated with Google Maps.
When finished, restart EPASS for all changes to take effect.
Run the Validate Addresses Utility
We recommend that you run this utility first before using the Google Maps integration, as this utility will attempt to automatically validate customer addresses on all open invoices.
This utility only validates addresses on open invoices. It does not edit or make any changes.
Steps
-
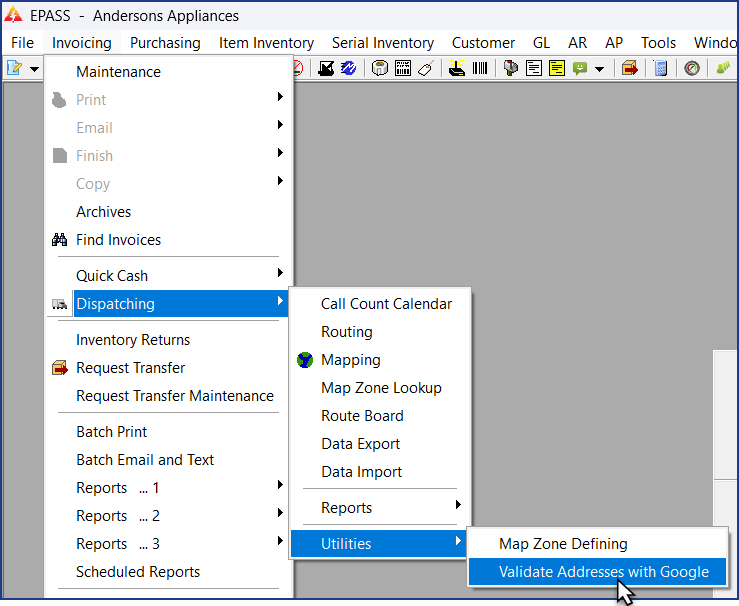
Go to Invoicing > Dispatching > Utilities > Validate Addresses with Google.
-
Click Start.

-
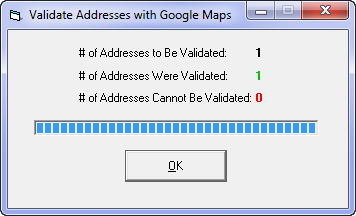
After the utility finishes, a summary of the number of address validated is shown. Click OK.
If there are invoices that the utility is unable to validate, these invoices will need to be manually validated the next time they are opened in EPASS. See Step 4 - Unsolved Addresses of Invoicing Maintenance and Address Validation.
See Also
- Generating Google Maps API Keys
- Customer Address Validation
- Invoicing Maintenance and Address Validation
May 14, 2026