Generating an AR Payment Link
The Click to Pay AR Payment feature enables you to generate secure payment links for customers with outstanding account balances. Customers can use these links to securely pay one or more open invoices associated with their account.
This feature helps streamline collections by providing customers with a convenient online payment experience.
The Click to Pay AR Payment feature is an add-on for EPASS Software. To enable this feature, contact EPASS Support and talk to one of our representatives.
Before You Begin
Enabling Security Options
EPASS Users can only generate AR payment links if they have the appropriate security options. Follow these steps to grant an EPASS User or Group those options.
Steps
-
Go to Tools > System Maintenance.
-
On the Tables tab, click User Security, and then click Open.

-
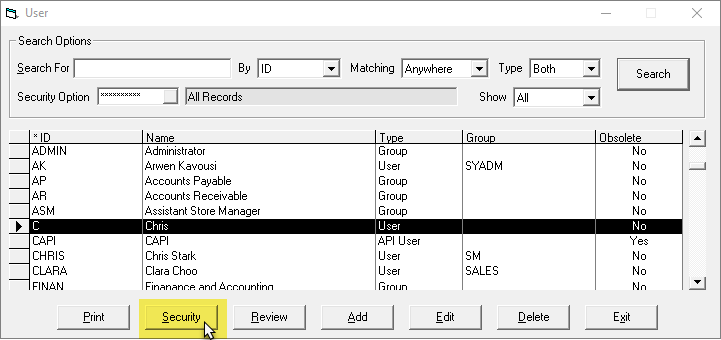
Select a User or Group, and then click Security.
-
In the Keyword field, enter
AR Payment, and select the following options: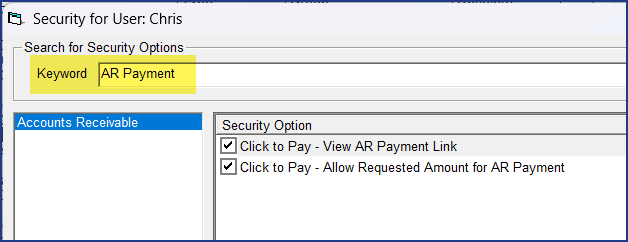
Click to Pay - View AR Payment Link Enables the Generate a Secure Payment Link button on the Toolbar. Without this option, the EPASS User can not generate a payment link for an AR customer. Click to Pay - Allow Requested Amount for AR Payment Allows the EPASS User to generate a Click to Pay link that forces the customer to pay a specific amount. If this is not enabled, the Click to Pay link will request the amount owing, but the customer can choose to pay a lesser amount. 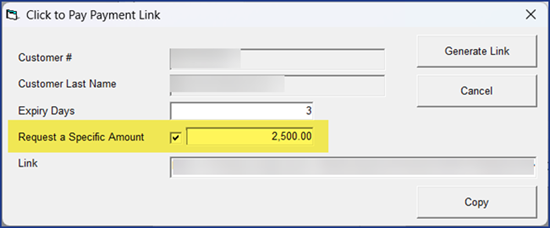
-
Click OK.
Generating an AR Payment Link
You can generate an AR payment link from:
- Customer Maintenance
- Customer Detail
- AR Balance
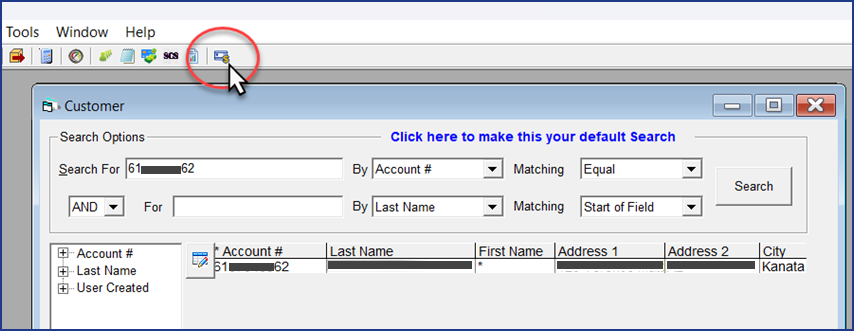
When a customer’s account is active in one of these screens, the Generate a Secure Payment button is enabled on the Toolbar.
Steps
These steps walk you through generating an AR payment link from the Customer Maintenance screen.
-
Go to Tools > Customer > Maintenance, and search for a customer whose account balance needs to be paid.
-
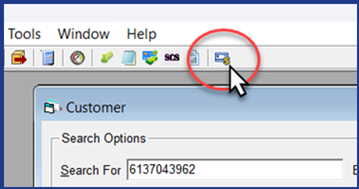
On the Toolbar, click Generate a Secure Payment Link.
-
In the Click to Pay Payment Link window, click Generate Link.
-
Copy the generated link and share it with the customer.
Note- You can send the payment link by batch email or text. See Sending a Payment Link by Batch Email or Text.
- If you want to change how long the link will remain active, enter an amount in the Expiry Days field, and then generate a new link by clicking Generate Link.
- If you want the customer to pay a specific amount, click the Requested Amount checkbox, and enter the amount that you want the customer to pay. On the payment portal, the customer will not be able to change the payment amount when entering their payment information. To use this option, the EPASS User needs the
Click to Pay - Allow Requested Amount for AR Paymentsecurity option. - Customer accounts with an overall negative balance are not currently supported through Click to Pay AR Payments. Payments for those accounts must continue to be processed through standard EPASS workflows.
Customer Payment Experience
Reviewing and Paying Account Balances
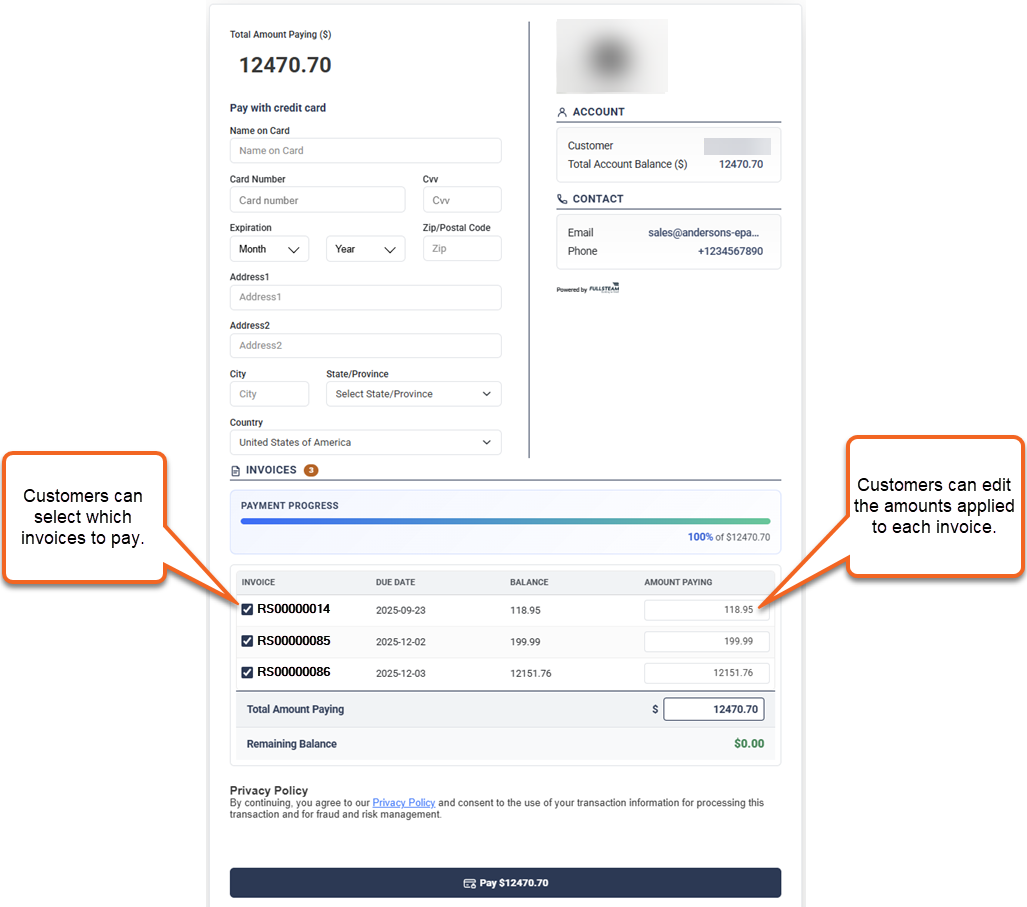
When customers open a valid AR payment link, they are taken to an account payment page where they can view:
- Their total account balance.
- Invoice balances.
- Amounts that are applied to each invoice.
Customers can enter payment information and submit payment directly from this page.
How Payment Distribution Works
When No Specific Amount Is Requested
If no requested amount is defined:
- EPASS automatically distributes the payment across eligible open invoices.
- Invoices with zero or negative balances are skipped.
- Customers may adjust invoice payment amounts.
- Payment amounts cannot be blank or negative.
- Customers may pay more than their current AR balance if desired.
When a Specific Amount Is Requested
If a requested amount was specified when the payment link was created:
- The total payment amount is fixed. Customers can not increase or decrease the amount.
- Customers must pay the requested amount.
- Customers can still decide how the payment is allocated among eligible invoices.
- If you've set up Click to Pay notifications for customers, they'll receive an email or text confirming receipt of their payment.
Viewing Payments in AR Balance
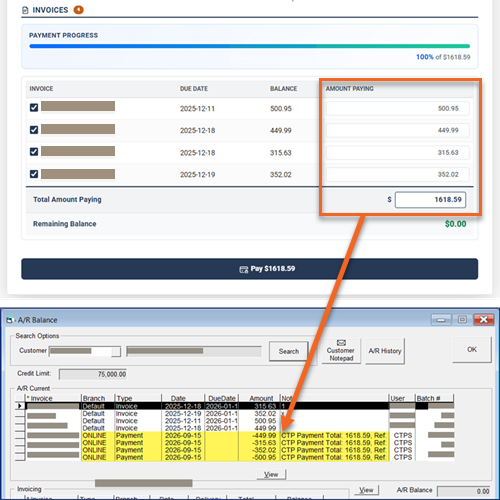
Once the payment has been made and is successful, the paid invoice amounts are applied to the customer's account and reflected in the AR Balance.
Troubleshooting
The Generate a Secure Payment Link button is disabled
Check:
- Click to Pay has been correctly configured.
- EPASS Support has enabled Click to Pay for AR payments.
- The EPASS User account has the required security permissions.
- Click to Pay AR Payments have been disabled for the customer.
The customer cannot complete payment
Verify that:
- The payment link has not expired.
- The account does not have a negative overall balance.