Adding Automatic Clearing House (ACH) Payment Type
EPASS Pay supports direct payments via ACH. Before using ACH as a payment type with your customers, there are several initial setup steps that must be completed. This guide walks you through setting up and taking payments with ACH.
If this is your first time setting up ACH payment processing, contact EPASS Support first. You will need a separate Merchant ID and there are several configuration steps that must be performed on your EPASS server by a support technician.
Authorization for Direct Payment via ACH
Before using EPASS Pay ACH to take payments, you must have a signed ACH Authorization form on file between your business and your customers.
EPASS does not generate ACH Authorization forms. It is your responsibility to create a suitable form that you can use with each ACH customer. Follow your local and state laws and consult with your financial institution to create a form that you can use with your customers before using EPASS Pay ACH.
Once you have an authorization form signed from the customer, you can attach a digital copy to the customer’s record in EPASS. (see Adding an ACH Authorization to a Customer’s Record in EPASS).
For reference, an example of a standard ACH Authorization form can be viewed here: https://www.nacha.org/system/files/2021-07/DP-Authorization-Form.pdf
ACH Setup
Initial set-up for EPASS Pay – ACH follows these steps:
- Adding ACH to your EPASS Payment Types: You’ll need to create a new Payment Type for ACH payments.
- Configuring the ACH Return Event Messaging: EPASS alerts specific users in the event of an ACH payment that is returned or reversed by the bank.
Adding the ACH Payment Type
-
In EPASS, go to Tools > System Maintenance. In the Tables tab, click Payment Type, and then click Open.

-
In the Payment Type window, click Add.

-
Fill in the required fields:

Code Enter a unique identifier code for the payment type. This code is used in multiple areas of EPASS to identify the payment type, including on reports. Description Enter a description of this payment type. G/L Account Select the G/L account to link this payment type to. -
In the Payment Processing area, select EPASS Pay – ACH.
-
Click OK.
Configuring the ACH Return Event Messaging
-
In EPASS, go to Tools > System Maintenance, and then click the Variables tab.

-
Click Message, and then click Open.

-
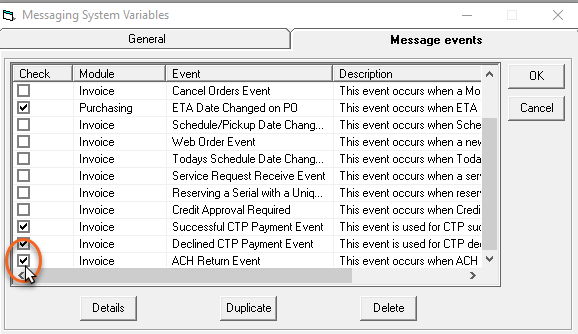
Click the Message Events tab.

-
In the Message Events list, scroll down until you see ACH Return Event. Select its checkbox to activate the event.
-
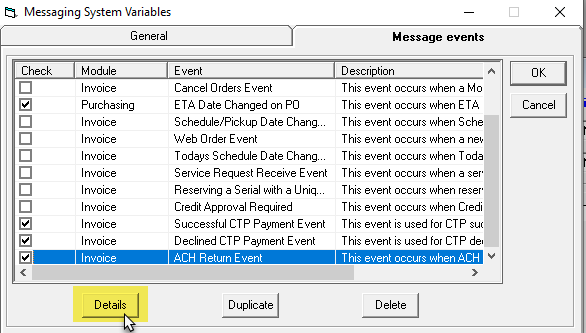
Select the ACH Return Event and then click Details.
-
Do the following:
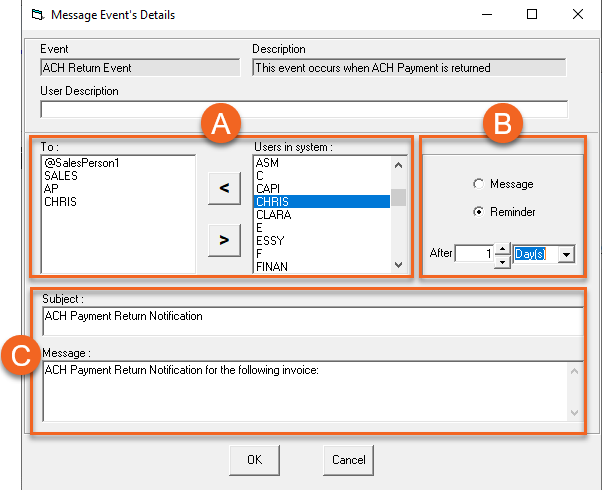
A For each user or group that should receive this message, click their name in the Users in System list, and then click the left arrow to move them into the To list. B Select whether the recipients receive a message in their EPASS Messaging Inbox (select Message) or a notification reminder pop-up when they log in (select Reminder). If Reminder is selected, enter the number of hours or days that will pass before the user receives the pop-up notification. C If necessary, edit the default Subject line and Message body. -
Click OK to close the Message Event’s Details window.
This completes initial setup of ACH in EPASS.
See Also
November 1, 2024