SCS Unified Communications
SCS Unified Communications is a cloud-based, Voice over Internet Protocol (VoIP) telephone solution.
This guide focuses on how EPASS integrates with the service. For more information on the Unified Communications itself, view the video below or visit the SCS website.
Setting Up In EPASS
Before proceeding, submit a support ticket to SCS so that they can verify that your SCS UC users are setup correctly.
Activating SCS UC Services
-
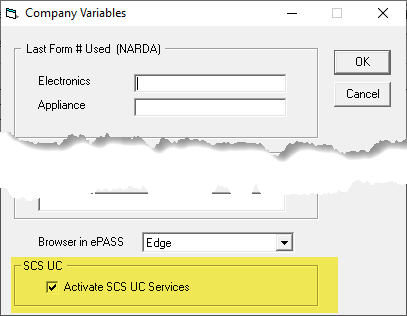
Go to Tools > System Maintenance, and then click the Variables tab.
-
Click Company, and then click Open.
-
Select the Activate SCS UC Services checkbox.
Entering Each User's SCS Credentials:
Each user of the phone system will have an SCS username and password. Enter these credentials into each User's profile in System Maintenance.
-
Go to Tools > System Maintenance.
-
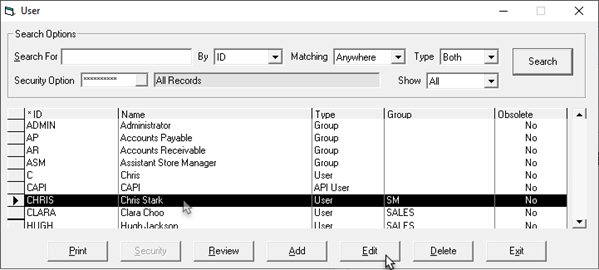
Click User Security, and then click Open.
-
Select a User from the list, and then click Edit.
-
If necessary, enter the User's Email. This is used by the SCS UC system to email phone recordings.

The email address should always be a company email, not an external email address.
-
Click the Settings 2 tab.
-
Enter the User's SCS User Name and Password.

-
Click OK to close the User's profile.
-
Repeat steps 3–6 for each user of the SCS UC system.
Viewing Conversation History
Once the setup is complete, you’ll be able to access the SCS conversation history for any customers or phone numbers. In the Customer screen, in both Customer Maintenance and in Invoice Maintenance, you’ll find a new SCS UC button in the middle of the screen. Click this button to launch the SCS UC History screen, which will show conversation history for any of the phone numbers highlighted below, as well as phone numbers on the Contacts tab.
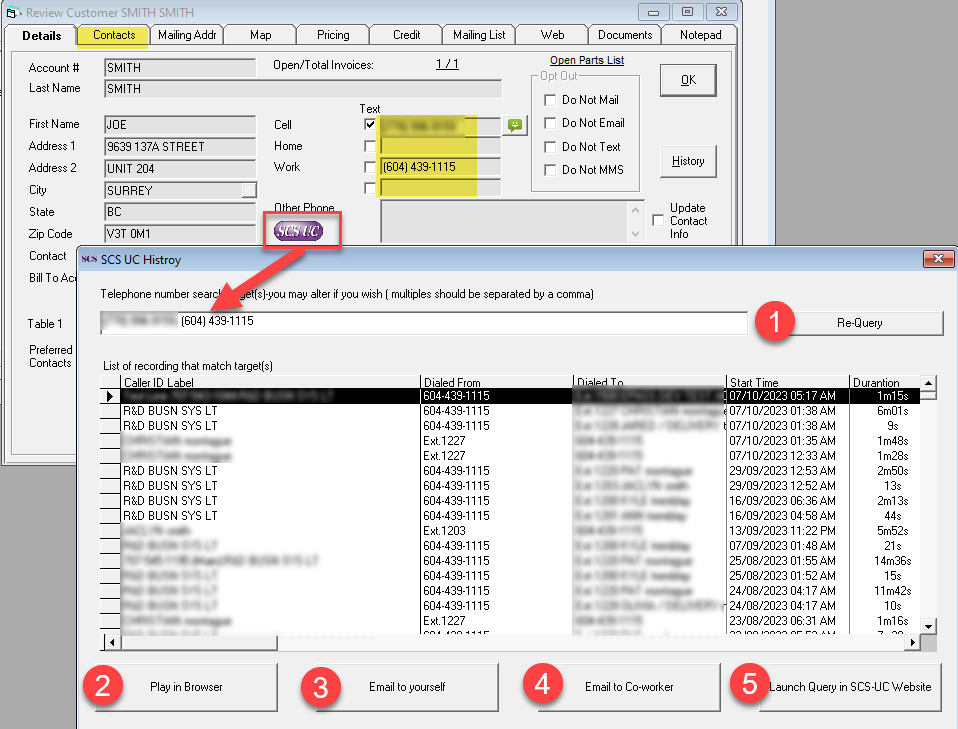
Once you are in the SCS UC History screen there are several actions you can take:
- If you want to manually add a phone numbers to the list of numbers being queried you can enter them in the text box then click the Re-Query button. This will refresh the list below to include the additional numbers you want to search.
- If you would like to listen to the recording you can click Play in Browser, which will launch your default browser and play a recording of the conversation.
- You can email a link to the recording to yourself.
- You can email a link to the recording to another co-worker.
- Selecting the Launch Query in SCS-UC Website opens your default browser and automatically logs you into SCS UC, and executes the same query on their website.
If you do not have security in SCS to do some of these actions then the buttons will be disabled.
Dialing with Click to Call
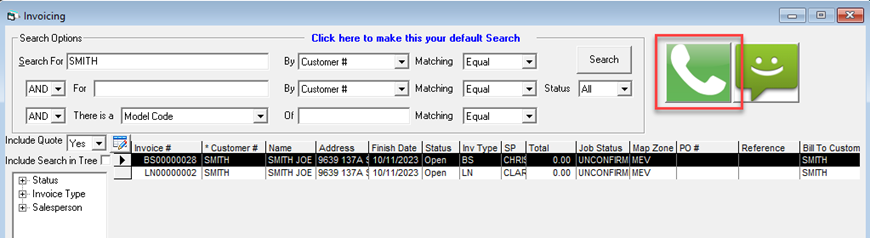
The Click to Call feature allows you to dial a number quickly and easily SCS from EPASS. Any users who have their SCS UC username configured will see a new phone button on both the Customer Maintenance and Invoice Maintenance screens. Simply click the Phone button, choose which of the customer’s phone numbers to call, and click Call to dial out.

Hard phones and softphones work differently. See SCS support for guidance on user preferences.
If you are using a physical phone, your headset and phone will pick up and dial out without any other action needed. If you’re using a softphone, the softphone will send you a call (called a MakeCall) and, upon answering the call, your outbound call will be placed. You can answer the call either from your headset (if your headset supports answering from the headset itself) or by clicking the green button at the bottom of the softphone’s dial pad.

Managing Calls with the Caller ID Log
The Caller ID Call Log is used to view current or recent incoming calls. Clicking the SCS button on the toolbar will open the Call Log which will show any currently ringing calls as well as the last 20 calls to your extension.
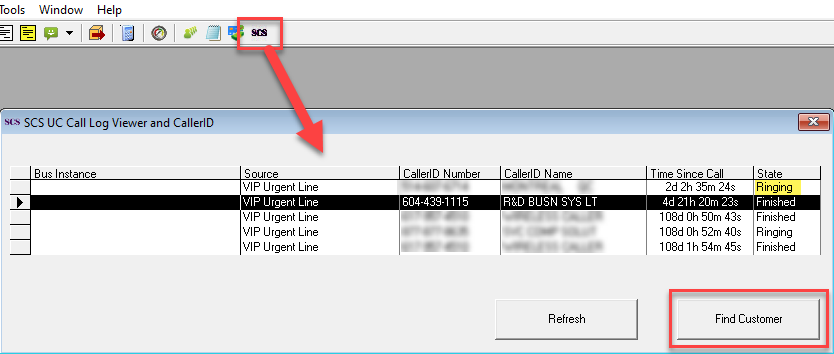
Double-click on a call or highlight a call and click Find Customer to query your EPASS customers and try to find a match for the phone number.
Find Customer will open the following screen with a list of customers that were matched. EPASS searches all phone and contact numbers to find a match.
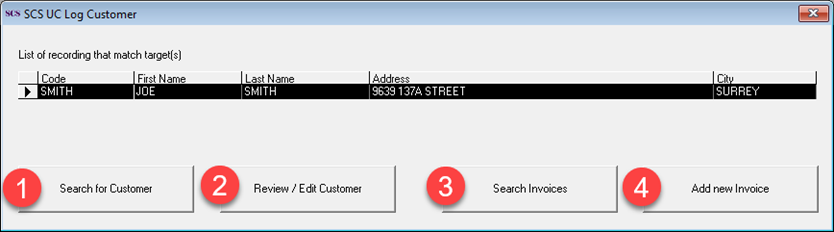
Once a customer match has been found you are presented with four different actions:
- Search for Customer opens the Customer Maintenance screen with the customer selected.
- Review / Edit Customer opens the customer in Edit if you have security to edit, and if you do not have security to edit then it will open in Review.
- Search Invoices opens Invoice Maintenance with all invoices for this customer listed.
- Add new Invoice takes you to Add Invoice with this customer selected, allowing you to quickly create a new invoice for them.