About Invoices in EPASS
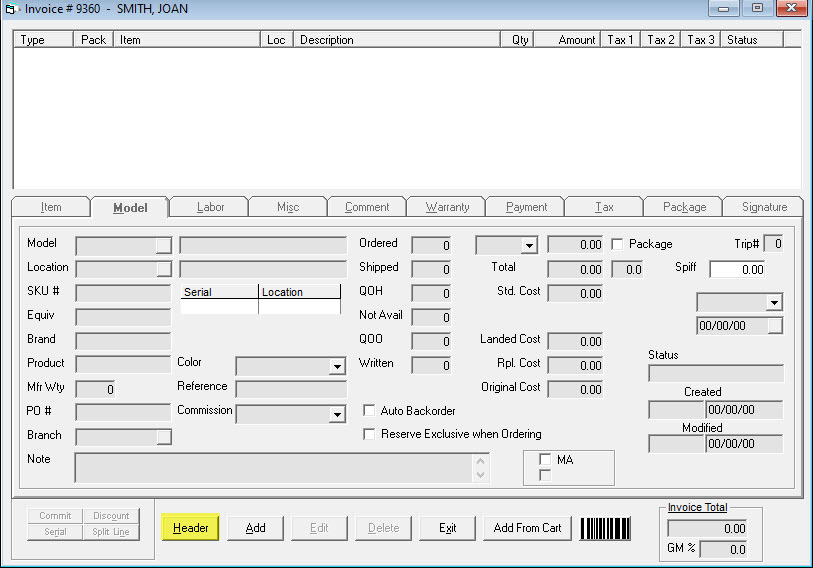
In EPASS, there are two parts to an invoice. The invoice header, which is where you select the invoice type and fill in the customer information, and the invoice detail, which is where you sell the product, extended warranty, delivery charges, etc. The header and detail are both accessed through invoice maintenance, but they are displayed on separate screens.
Usually you would access the invoice header from the invoice maintenance screen. Clicking the add or edit button will take you into the header. Add will take you into the header to create a new invoice, and edit will allow you to modify the header of the currently selected invoice, depending on your security level.
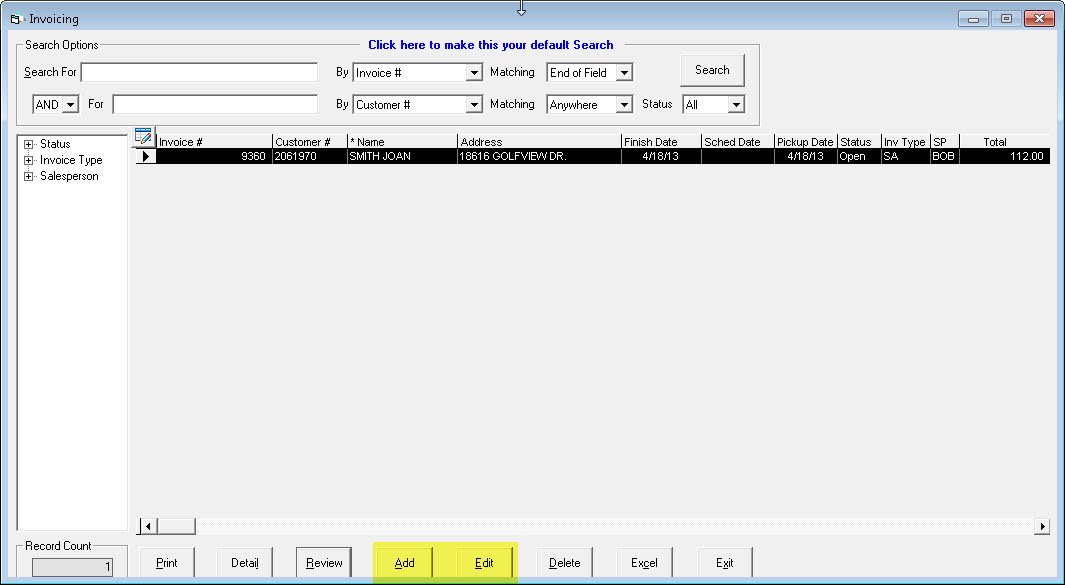
The invoice detail screen can be accessed from two places. The first way is to go directly into the detail from the invoice maintenance screen, the same way you edit an invoice header. Just search for and highlight an invoice, then click on the detail button.
How to Search for an Invoice

- Enter your search term.
- Select which field or area you want to search by (for example, if you are looking for a specific project, you might select Project from the dropdown).
- Select how the search matches your search term with a successful search result. Equal means that the search term must match exactly. Start of Field or End of Field means that a successful search result contains the search term at the start or end of the field. For example, if you are searching by a customer's first name, you would select Start of Field. Anywhere means that a successful search result contains the search term anywhere in the field.
- Create secondary search terms by selecting AND/OR from the dropdown and filling in the search term fields. Leave these fields blank if you just want the search to use your first set of search terms.
- Select the Status of the invoices you want to include in the search: Open, Finished, or All.
- Click Search. All the invoices matching your search appear in the invoice area.

The second way to get to the invoice detail screen is from the invoice header. Whether you are adding or editing the header of an invoice you can click the detail button in the top right to go directly into detail. This will add your initials as the “last modified” user though, so if you don’t want your initials on the invoice, it’s best to click detail directly from the invoice maintenance screen.
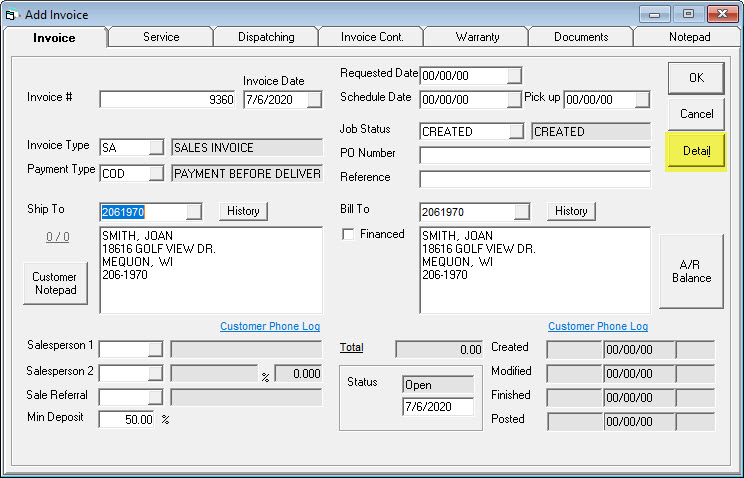
Since you can go directly from the header screen to the detail screen, we also added a way to go directly back from the detail to the header. When in detail just click the header button at the bottom of the screen to go back.
You should now be familiar with how to navigate between the header and detail of an invoice. You’ll use this often so it’s important to get that out of the way before showing you how to create an invoice.