Inventory Return Tracking
The inventory tracking features in EPASS enable you to track the reason serial numbers are returned on invoices, who initiated the return, and what the outcome was. Analyzing this information on the OE-46 Inventory Returns report can provide your staff with key insights into your product returns.
How Inventory Tracking Works
Entering Return Info on the Returned Serial
When a return is initialized by adding a serial to a negative model line, the Return Initiated By, Return Reason, and Return Outcome dropdown fields appear on the Invoice Serials screen. These three dropdowns are populated by their respective tables in the EPASS database. The salesperson that is handling the return would then choose an entry from each of these dropdowns.
In this example, a customer is returning a defective dishwasher that will ultimately be scrapped. The salesperson handling the return selects the appropriate entries from each of the three inventory tracking dropdowns: Return Initiated By, Return Reason, and Return Outcome.

Viewing All Returns on the Inventory Return Screen
You can view all of your returns on the the Inventory Return screen (Invoicing > Inventory Returns), including inventory that just came back on the truck and was taken off the invoice and put back into the warehouse.
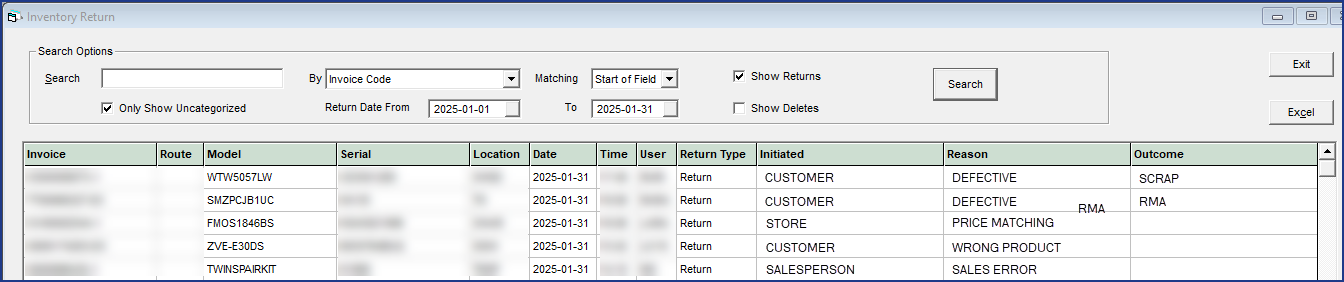
| Search Options | Lets you search by various fields (invoice code, route code, model code, return initiated by, return outcome, return reason, user returned). Any fields that might have been missed can be filled in by your inventory team which, if updated daily, will provide you with optimal reporting results. |
| Show Return | These have been returned on an invoice as a negative line. |
| Show Delete | These have had the serial deleted from an invoice (positive line). Returns will always reflect when a serial number has been returned as a negative line on an invoice because the original invoice it was sold on has a Finished status. (For example, a customer exchanges one serial for another.) Deletes will always reflect when the serial number has been deleted off an invoice that is still has an Open status. (For example, a customer not home at time of delivery.) |
Analyzing Return Data with the OE-46 Report
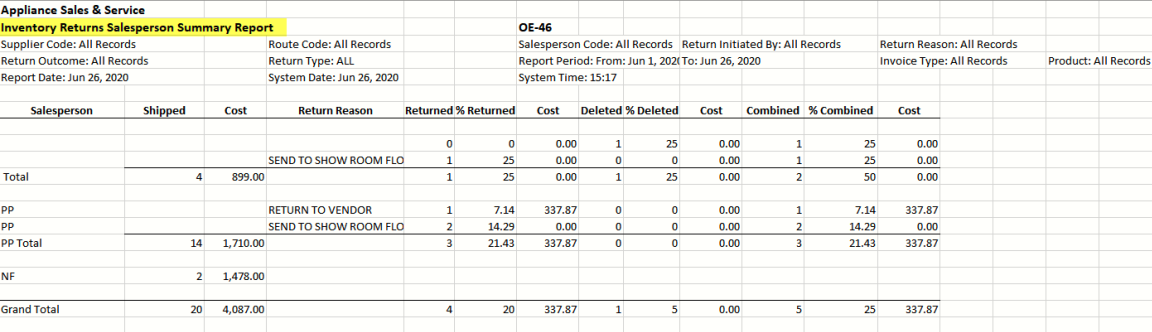
The OE-46 Inventory Returns report provides an analysis of returned or deleted serials, comparing shipped versus returned quantities. It breaks down returns by salesperson, truck, supplier, and reason, including return percentages for each category.
In this example, the OE-46 Inventory Report was used to create an Excel file that summarizes returns initiated by salesperson.
Set Up
Setting up inventory return tracking involves adding entries to the Return Reason, Return Outcome, and Return Initiated By tables.
An EPASS User needs the following security options to view and enter data on these tables.
-
System Maintenace - Tables: Return Reason
-
System Maintenance - Tables: Return Outcome
-
System Maintenance - Tables: ReturnInitiatedBy

To Add Entries to the Return Tables
Return Initiated By
-
Go to Tools > System Maintenance. On the Tables tab, click Return Initiated By, and then click Open.

-
Click Add.

-
Enter a Code and Description.

-
Click OK.
-
Repeat steps 2–4 to add additional codes. When finished, click Exit.
NoteFor this table, create codes to represent all parties that could initiate a product return, such as customers, sales staff, or head office.
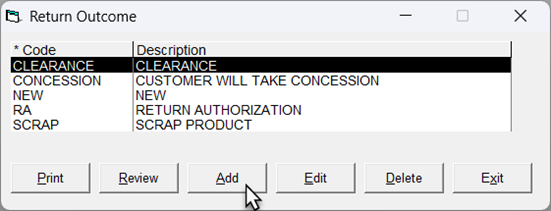
Return Outcome
-
On the Tables tab, click Return Outcome, and then click Open.

-
Click Add.
-
Enter a Code and Description.

-
Click OK.
-
Repeat steps 2–4 to add additional codes. When finished, click Exit.
NoteFor this table, create codes to represent all potential outcomes for the returned product, such as "scrapped", return to vendor, or sent to clearance area.
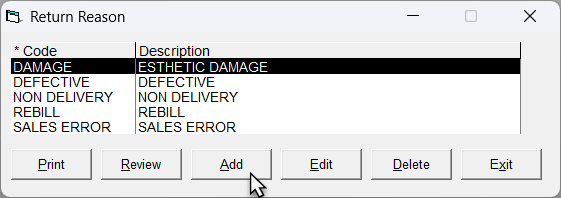
Return Reason
-
On the Tables tab, click Return Reason, and then click Open.

-
Click Add.
-
Enter a Code and Description.

-
Click OK.
-
Repeat steps 2–4 to add additional codes. When finished, click Exit.
Notes-
For this table, create codes to represent all possible reasons for the returned product, such as damaged, sales error, or non-delivery.
-
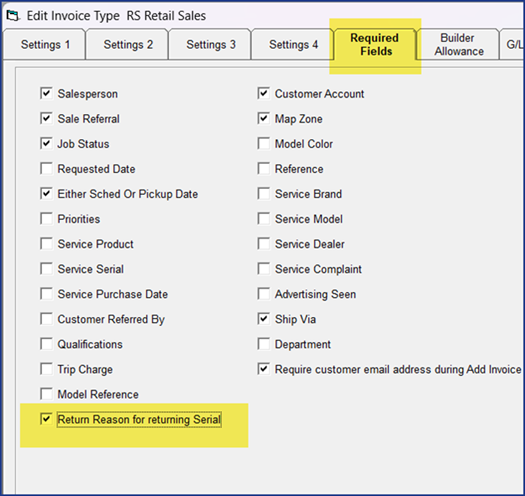
You can force an EPASS User to enter a return reason by selecting its option on the Required Fields tab on the Invoice Type table. (Go to System Maintenance > Tools > Tables > Invoice Type. Edit an Invoice Type and then click the Required Fields tab.)
When the Return Reason is required, EPASS will also write the return reason to the invoice Notepad.
-