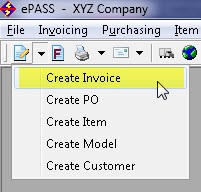
Start by clicking on Invoicing > Maintenance > Add or by clicking on the Quick Add toolbar option:
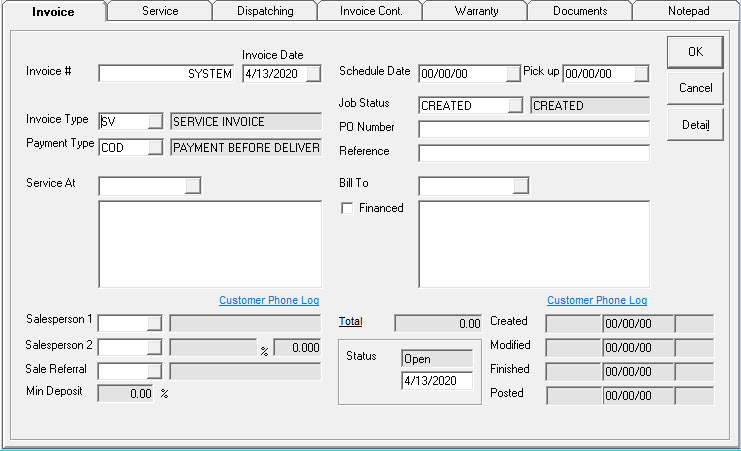
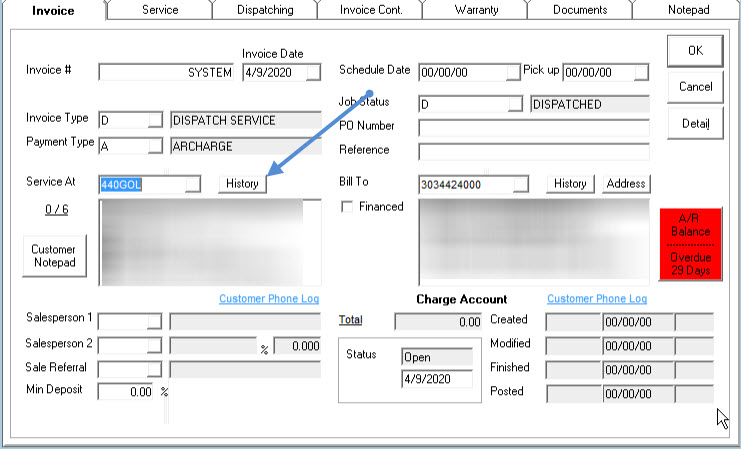
Defaults to “SYSTEM” to take the next available number for this invoice.
Start date for this invoice. This is the date you are logged into in EPASS.
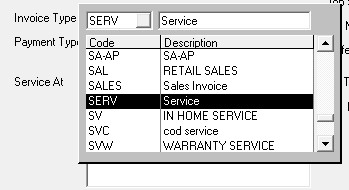
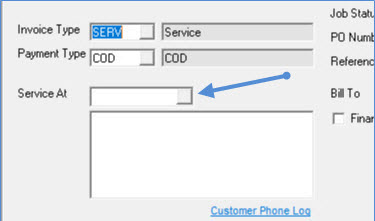
These are the different sale types that your business can use. Typically, you would have at least a Quote/Estimate invoice type, Service, Warranty and a Sales invoice type.
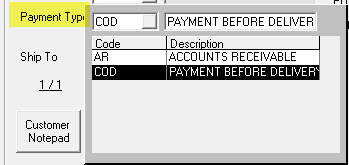
This determines the terms of this invoice. Typically, COD or AR to indicate it is a charge or needs to be paid. It is NOT the method of payment that the customer will use to pay you, which will be used in Invoice Detail. This field is required.
Enter the customer number where the service is to be completed.
If the customer exists, the customer information will populate. If the customer doesn’t exist, you will be presented with an option to create the customer. If you do not want to create the customer, you can search for the customer by clicking the search box beside the field or the F2 key.
There are multiple search options you can use to search for the customer.

Once you have found the correct customer, click Return to return to the invoice screen with the customer detail populated.

Select the salesperson.
If there was a second salesperson for the invoice, add here and enter the percentage for commission, if applicable.
How did the customer hear about your company?
Fill in the schedule or pickup date accordingly. Pickup date can be used for in shop service.
Typically used to tell the ordering person if the product needs to be ordered. It can also control if the invoice will show up on the dispatching schedule; some job statuses will allow the invoice to be dispatched and others will not. Typically, a required field.
If the customer has a PO Number, it would be entered here. If the customer is set to require a PO then you will be forced to enter something in this field.
This is an open field that can be used for whatever reference you choose. This field is searchable in Invoice Maintenance.
Enter the customer number for billing. Same functionality as seen in Service At field.
This is the invoice total including tax. You can click on the Total hyperlink to see a more detailed breakdown.
4 possible statuses:
These are the users and date/time stamps of when the invoice was created, last modified, finished, and posted. This is the system date (the actual date).
Clicking on the History button beside the Service At customer will bring up a list of models for this customer so you can double click or click OK after selecting the model to be serviced.
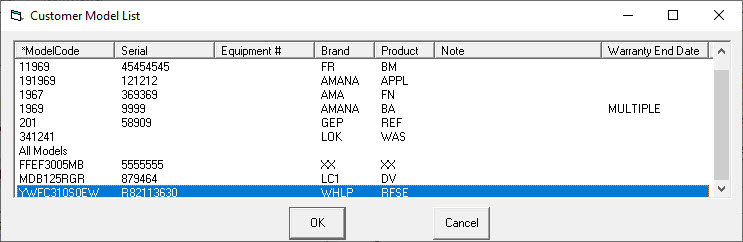
You will be presented with the details about the selected model. Clicking the Return button will populate the Service tab with the information.

If you have pre-defined complaints, type in the complaint code or choose from the drop down to have that complaint added to the invoice. Multiple complaint codes can be used; each description will append in the description box.
If you selected a complaint code then the full complaint will be filled in here. If you do not want to use a complaint code, you can skip to this field and just type in whatever complaint the customer has.
The brand of the model that needs to be serviced.
The model to be serviced.
Where the model was purchased. This will only populate if the model was purchased elsewhere.
When was this model purchased?
The model number to be serviced.
The serial number of the model to be serviced.
The end date for the warranty, if applicable.
If you have pre-defined codes, type in the code or choose from the drop down to have that complaint added to the invoice. Multiple codes can be used; each description will append in the description box.
If you selected a code then the full complaint will be filled in here. If you do not want to use a code, you can skip to this field and just type in whatever service was performed.