PO Detail
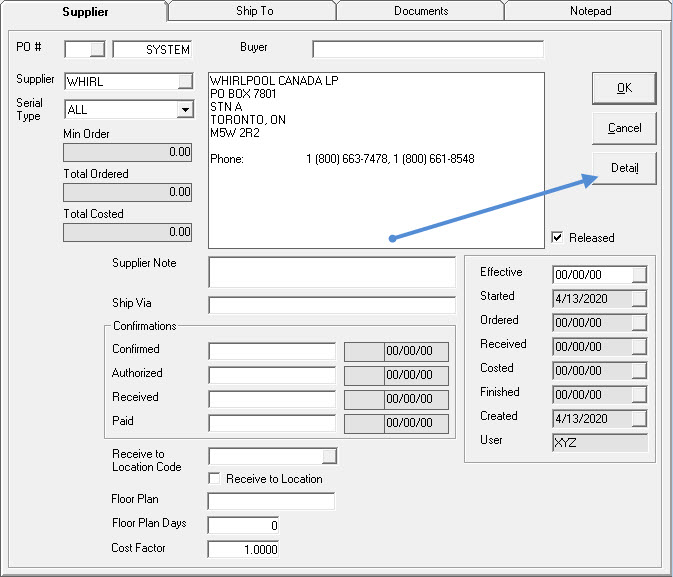
PO Detail is where you purchase what you need to sell and service customers. Click the Detail button on the header to get there.
Po Detail
Going into detail for the first time on a purchase order, a small popup window asks which type of detail line to add.
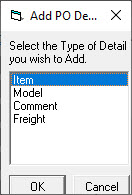
Alternatively, click on the different tabs to add that type of line to the purchase order.

Keep an eye on the title bar (the blue bar at the top of the window) as it will tell you what mode you are in.
- Review: Reviewing or looking without the ability to edit
- Add: Adding a new line item
- Edit: Editing the highlighted line item
- Order Only: Adding line items to the PO
- Order & Receive: Adding and receiving line items on the PO
- Order, Receive & Cost: Adding, receiving, and costing line items on the PO
- Order All: Order all line items on the PO
- Receive Only: Receiving line items on the PO
- Receive & Cost: Receive and cost all line items on the PO
- Receive All: Receive all pieces on the PO
- Cost: For costing the line items on the PO
![]()
Item Detail
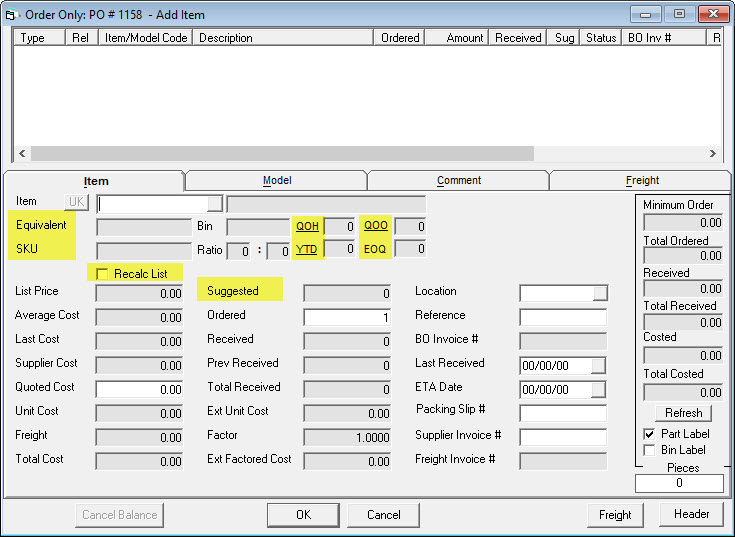
Equivalent
If there is an equivalent item number, it will show up here.
SKU
If you use your own internal SKU numbers, it will show up here. EPASS can generate SKU numbers automatically by enabling them in Tools > System Maintenance > Variables > Item Inventory > Auto Assign SKU Number checkbox.
Recalc List (Checkbox)
This will recalculate the list price. This is defaulted based on Tools > System Maintenance > Variables > Item Inventory > Auto Recalculate List Price checkbox as a global variable for all items. It can be overridden on each item in Item > Maintenance > first tab > Auto Recalculate List Price checkbox.
QOH
This link will open a window to show you Quantity On Hand in all locations. You can see the set Min/Max levels for each location, YTD and Last YTD sales as well as any bin location.
QOO
This link will open a window to show you Quantity On Order. You can see the PO, supplier, supplier invoice, BO (back-ordered) invoice, date ordered, quantity ordered, quantity received, and the ETA date. You have the ability to view the supplier invoice or edit it, if you have the security to do so. You can also edit the PO and update the ETA from this window, if you have the security.
YTD
How many of this piece have been sold in the current year.
EOQ
Economic Order Quantity; if you order by the box, how many are in that box?
Suggested
This is the suggested number to order. This is populated when you run the PO-12 Recommended Purchase Order.
Model Detail
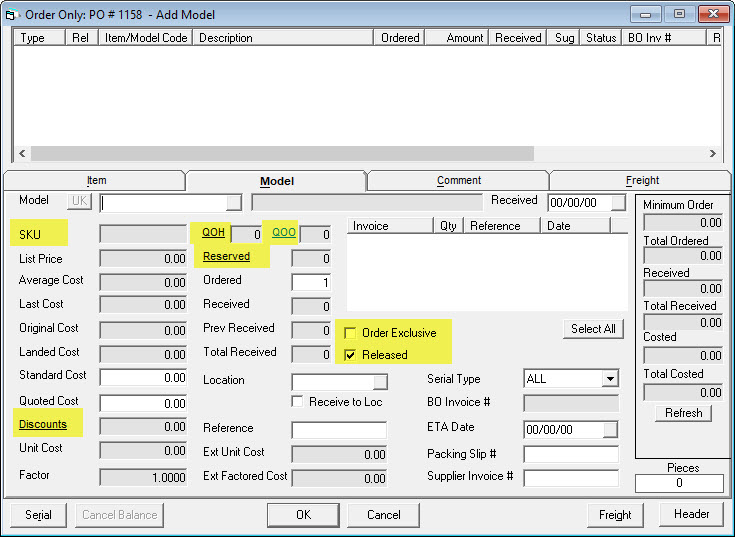
SKU
If you use your own internal SKU numbers, it will show up here. EPASS can generate SKU numbers automatically by enabling them in Tools > System Maintenance > Variables > Serial Inventory > Auto Assign SKU Number checkbox.
QOH
This link will open a window and show you the quantity on hand based on location. It can also show you the quantity on order, how many have been written to invoices, and the serial numbers you have, depending on your security level.
QOO
This link will open a window and show you the quantity on order. You can filter the screen by supplier, location, or serial type. You can show received models or not. This also presents the opportunity to view or edit the invoice or PO, if you have the security.
Reserved
This link will open a window to show you the invoices this is written (reserved) to, based on invoice type.
Order Exclusive (Checkbox)
The pieces on this line are ordered exclusively for the BO invoice # shown which means the exact serial number received must be shipped to that invoice.
Released (Checkbox)
If checked, this defaults this line on the PO to be released. Checked is the default. If unchecked, the line defaults to not released. To release some of those unreleased pieces, the split/release form in the PO detail screen allows lines to be split and marked if they have been released. Releasing can be used for large orders where you want to receive the inventory in stages or you are placing an advance order for seasonal product.
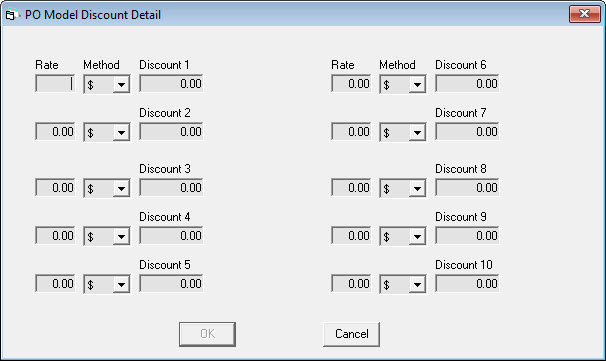
Discounts
You can have up to 10 different discounts such as a truck load, an early payment, or cash back. These are setup in Tools > System Maintenance > Variables > Purchasing > Discount Labels tab.
- Rate: the dollar amount or the percentage for the discount
- Method: either a dollar amount or a percentage.
- Discount 1-10: The titles (Discount 1) can be changed on the Discount Labels tab.
Comment Detail
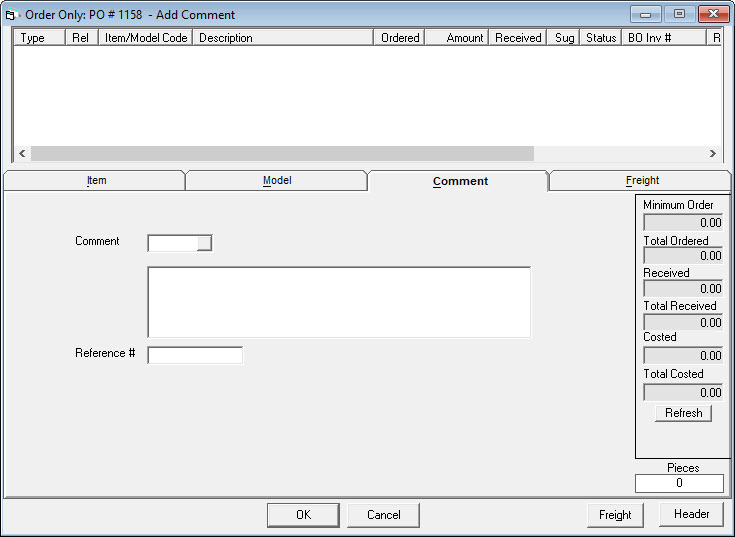
Comment Code
If you have pre-defined comments, type in the comment code or choose from the drop-down to have that comment added to the invoice.
Comment Description
If you selected a comment code then the full comment will be filled in here. If you do not want to use a comment code, you can skip to this field and just type in whatever comment you want. This will print on the PO.
Reference
Reference number for this line.
Freight Detail
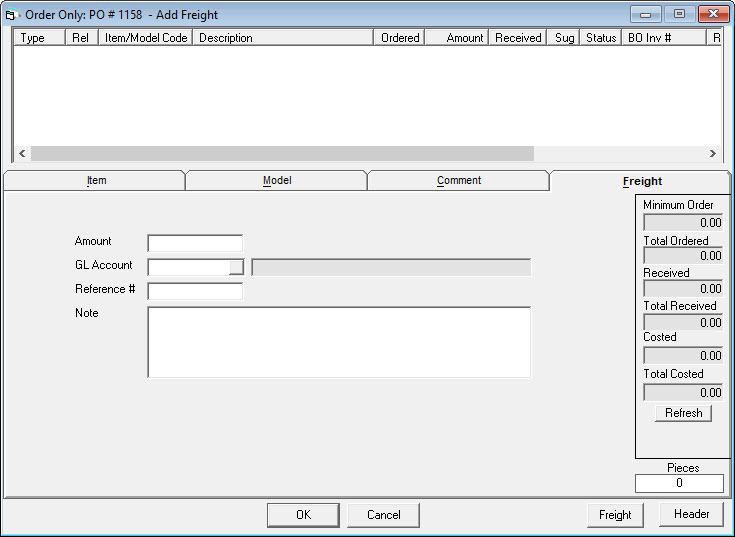
Amount
The amount of the freight charges.
GL Account
The GL account the freight charges are going to. Start typing and the menu will open to select the number you need.
Reference
Reference number for this line.
Note
A place for you to type a note. This will print on the PO.
Toolbar Options
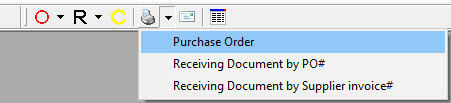
Printer Icon
- Purchase Order: Opens the print selection window for printing the PO.
- Receiving Document by PO#: Prints the receiving document for this PO.
- Receiving Document by Supplier Invoice #: Opens the print window to print the receiving document by supplier invoice number based on the date or date range received.
Envelope Icon
Email the PO.
Column Icon
This toggles auto-scroll in the PO on and off.
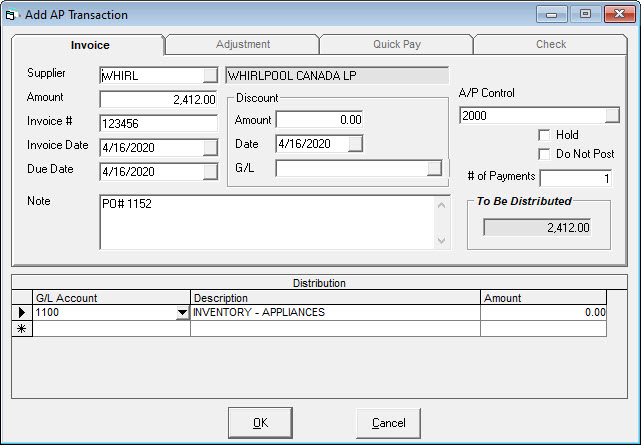
AP Update
If you have enabled the setting in Tools > System Maintenance > Variables > Purchasing > Update Accounts Payable and you have enabled the Update A/P setting on the PO Variables tab in the supplier record, you will have the Add AP Transaction window pop up after costing a PO. It will be populated with the supplier invoice number and the amount as well as the date.