Price Tags
In EPASS, you have the ability to print price tags which are typically customized for each company to look the way you want. We have created many different styles of tags with logos, various colors, brand logos, etc. so, if you have an idea of how you want your tags to look, we can most likely work with you on it. With that said, let’s go over how to identify which tags you need to print, and then how to print them. We’ll also talk about how we integrate with digital price tags.
SN-42 Price Changes
The SN-42 Price Changes report will show you all models where the price has changed within a certain date range. If you just ran your price list imports, then it’s a good idea to run this report afterwards to pick up all the models where the price changed.

You can run the report by Brand/Product/Inventory Type if you only want to tag a certain product line, but one of the key fields is Currently in Locations. This will let you choose your display locations and it will only give you a list of models that are on your display floor where the price changed, since you really only need to print for what is on display.
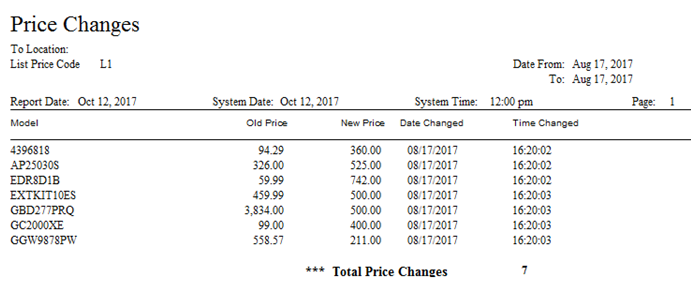
You can see the various models where the price changed along with old and new cost, and the date/time that the price changed. From here you have identified which models need new tags.
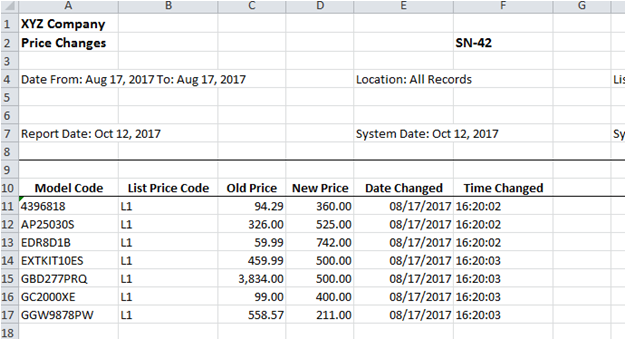
If you have Excel on your computer and you are planning on printing tags now, we recommend exporting this report to Excel. The report is going to look the same (below) but, in the next section, we will cover how you can copy the list of models from Excel and paste them into EPASS to easily print your tags.
Printing Tags
When it’s time to print tags, there are several ways that you can print them. First, click the Price Tag button to open the price tag printing window.

The first thing you’ll choose is your label size (this is the customized price tag format mentioned above). Then there are 5 tabs to choose from and, based on how your tag was designed, it will default to the most likely method that you will use.
By Model Number: This is the most common way to print price tags; all you need is a model number and you can start printing. If you type the model and press Enter (or click the small Add button), it will add this model to the list of tags to print. You can add as many models as needed then print them all at once.
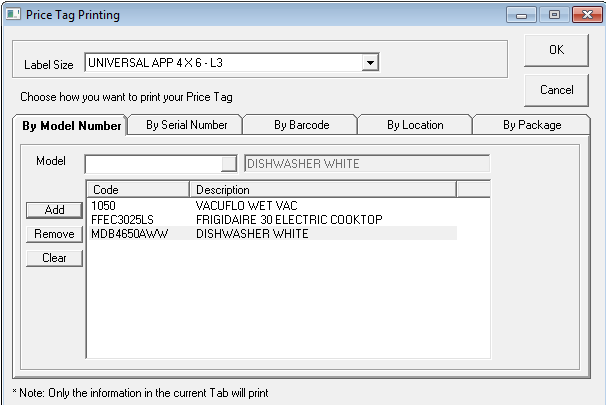
This is a fairly manual way of printing labels though, and you would normally only use this to print one-off price tags. If you want to print everything from the SN-42 report that you exported to Excel, you can simply copy all of the models from the spreadsheet:
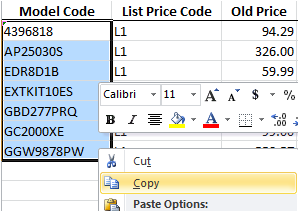
Then right-click in the model list to paste them into EPASS:
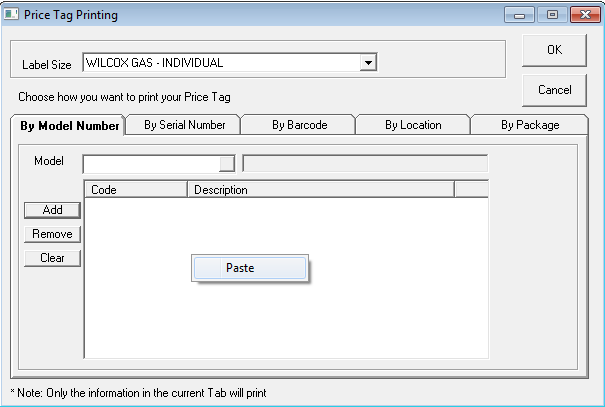
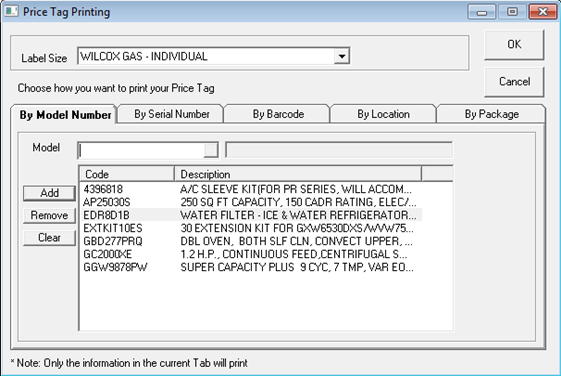
This will add the entire list of models to price tag printing. The only thing left to do is click OK to print them.
By Serial Number: This method is similar to By Model Number, except you are required to select serial numbers as well. If your price tag prints any information specific to the serial number (like the barcode, or serial number features, etc.) then you would be required to select a serial number to print those tags. When we design your tag, we determine if there are any serial number fields that will print and, if so, this option becomes the default for that price tag.
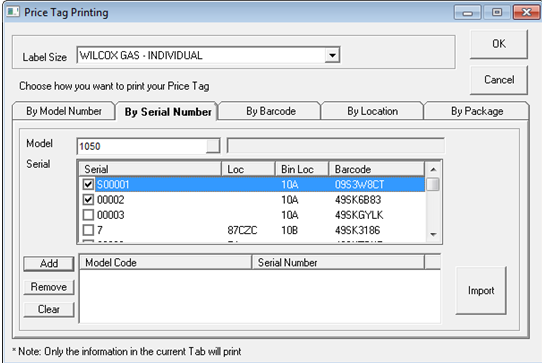
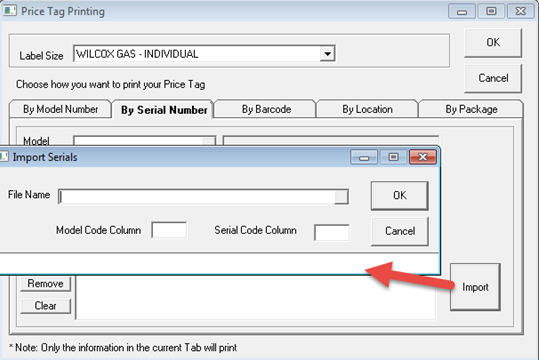
Since the SN-42 only prints model numbers, you can’t use the copy/paste method described above when printing by serial number. This option does have an import function though, which lets you pull in a list of models and serial numbers from an Excel spreadsheet. So you could run the Unique Sell Price Export or another report to get your list of serial numbers, which could then be imported into this list.
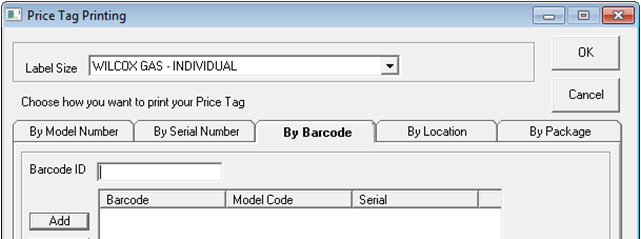
By Barcode: This method lets you enter a barcode (the 8 character EPASS barcode on inventory labels) to print the labels.
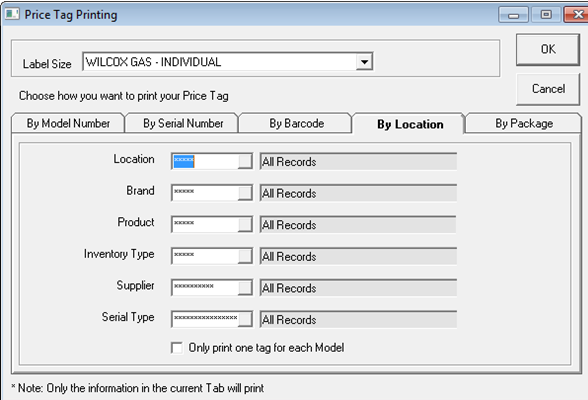
By Location: This method is handy if you just changed your price tag style and want to re-print everything for the floor, or you opened a new store, etc. It will let you print tags for all models in a given location, as well as other criteria.
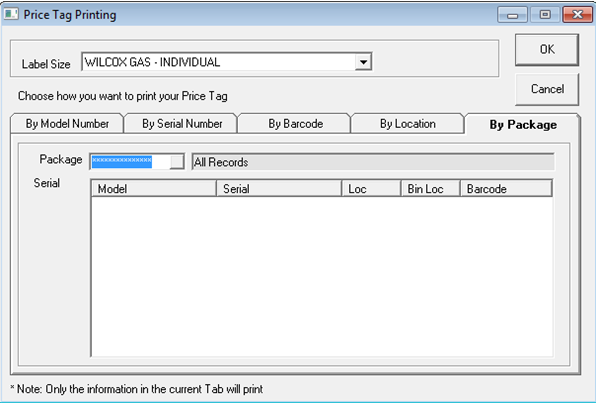
By Package: This method is used primarily for furniture, but it could be used for any situation where you have created packages. The price tag needs to be designed with packages in mind, as typically the tag would be foldable with the package price on the front and details of individual models (or other related packages) on the back.
Digital Tags
We have integrated with a provider of digital price tags. We do not provide the tags or support them (that is all done through the price tag company) but once the system is in place our integration with them is seamless. It does take a few hours for our technical support team to customize the integration for you, set it up on your server, and then test but, once that is done, there is nothing else for you to do. We send pricing updates to the digital tag system every 1-2 hours, so when you change the price of a model in EPASS, you can expect the tag to automatically update when the 1-2 hour interval comes around.
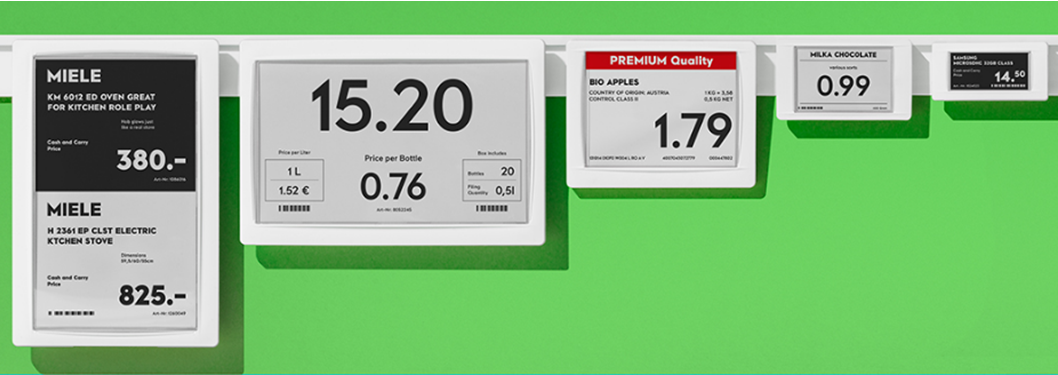
The company that we have integrated with is Imagotag. If you are interested in this integration let us know; we would be happy to refer you to the SES representative who has helped set up other companies who are using EPASS.