Scheduling an Automatic Import of Supplier Data Files
Before following these instructions, we recommend you view About Serial Costing first.
In this method, you'll automate importing a supplier data invoice file (either an Excel file or an EDI file in CSV format) using EPASS Server Engine. EPASS Server Engine will automatically import data files into the Serial Costing utility based on the schedule you create. When you go into Serial Costing, the invoice data will already be there waiting for you.
First, you'll create the automated task in EPASS Server Engine, and then you'll load the imported invoices into the Serial Costing utility for costing.
Before Starting
- Before you can import a supplier invoice data file, you need to create a Supplier Invoice Template for each one of your suppliers.
Creating and Scheduling The Import Task
-
In EPASS, go to Tools > System Maintenance, and then click the Variables tab.
-
Click Server Engine, and then click Open.
-
Click the EDI Services tab.
-
Click Add.
-
In the Add Service section, select EDI810 from the Specification dropdown.

-
In the Code field, enter a unique identifier for the variable. Enter a Description (optional), and in the File Path field, enter the location of ePASSScheduler.exe.

-
In the Import Folder Path field, enter the filepath where the EDI810 files are located.
-
Select Get file type and Supplier Invoice Template Code from file name. With this selected, Server Engine will process all EDI810 files and use the code in the file name to apply the appropriate Supplier Invoice Template.
 info
infoTo use this option, the file name of the EDI810 files must follow this format: [Supplier Invoice Template Code]810[Date Stamp].csv. The import looks at the first part of the filename up to the first underscore (_) and uses that to apply the correct Supplier Invoice template. The file must include '810', otherwise the importer will ignore it.
For example, the ABC Supply Company's Supplier Invoice Template code in EPASS is ABC. The file name of an EDI810 received from them would be ABC_810_050520230800.csv
-
If you want to use Server Engine to schedule the import, in the Interval section, enter how often the variable should run (in hours and minutes) or select a specific time each day from the dropdown.
 info
infoIf you want to test the automatic import with an alternate import method, such as Task Scheduler, set the Interval to 0 Hours and 0 Minutes.

-
Click OK.
infoTo test the import manually, you can run it by entering this command into the command line:
ePASSScheduler.exe [DATABASE NAME] EDI810 [EDI CODE]You can also run this command from the Task Scheduler, the Windows Run command, or by creating a Shortcut.
Scheduling an Import with Task Scheduler
You can use Task Scheduler instead of Server Engine to automate the file import process. However, using this method requires that you create a scheduled task for each of your suppliers, rather than only needing to create one with Server Engine.
-
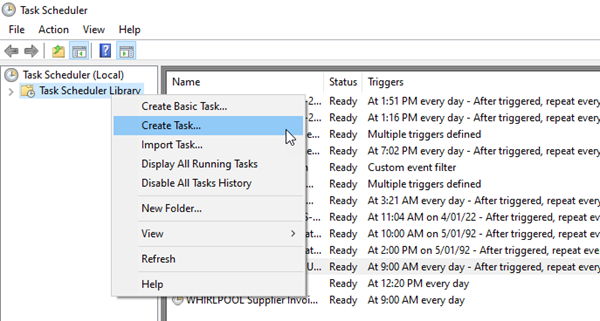
Start Task Scheduler. Right-click on Task Scheduler (local), and then click Create Task.
-
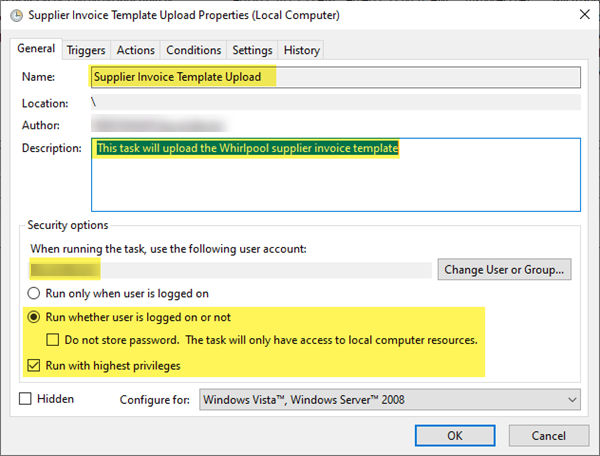
Fill in and select the highlighted fields.
-
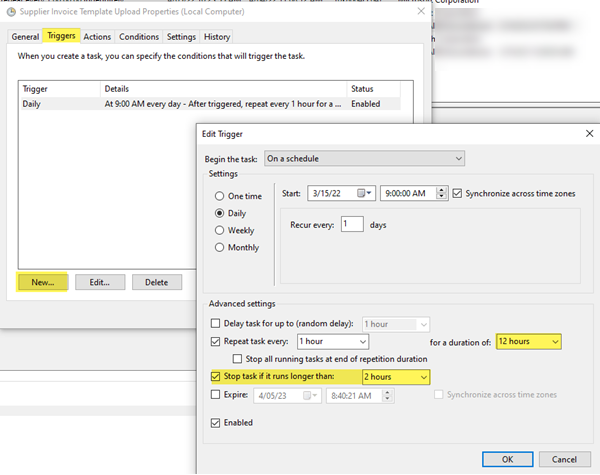
Click the Triggers tab. Click New and add a schedule. Click OK when you're finished.
-
Click the Actions tab, and then click New.
-
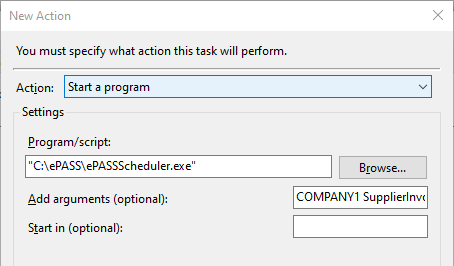
Make sure Start a Program is selected in the Action dropdown. In the Program/script field, enter the file path for ePASSScheduler.exe.
-
In the Add Arguments field, enter your argument statement based on the following:
Format[Database][Function] [Supplier Invoice Template Code][Supplier Invoice Data File Path]-
[Database]: The name of your database
-
[Function]: Use SupplierInvoice. Because the scheduler is able to import Supplier Price Lists as well, it is important to identify the function for this task. In this case, this is a SupplierInvoice import.
-
[Supplier Invoice Template Code]: This is the unique code that was given to template when you created it.
-
[Supplier Invoice Data File Path]: The location of the data file in UNC format.
-
Use the following naming convention for the Excel spreadsheet to prevent file name conflict: YYYYMMDD_HHMMSS_File Name. A sample file name would be 20220331_123120_Whirlpool.
-
If there is a file name conflict, the system will rename the file to File Name _ YYYYMMDD_HHMMSS.
Example COMPANY1 SupplierInvoice WHIRL C:\ePASS\ePASS Supplier Invoice Data Files\Supplier Invoice Template
-
-
When finished creating the task, create additional tasks for each supplier, or click OK to close the Create Task window.
Loading Imported Invoices into Serial Costing
-
Go to Purchasing > Serial Costing.
-
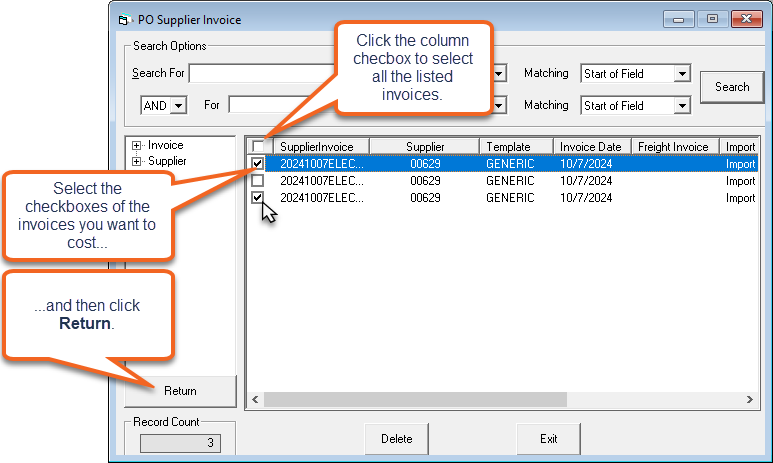
Click Invoices.
 tip
tipWhen the Invoices button is red, there are imported invoices that need to be costed.
-
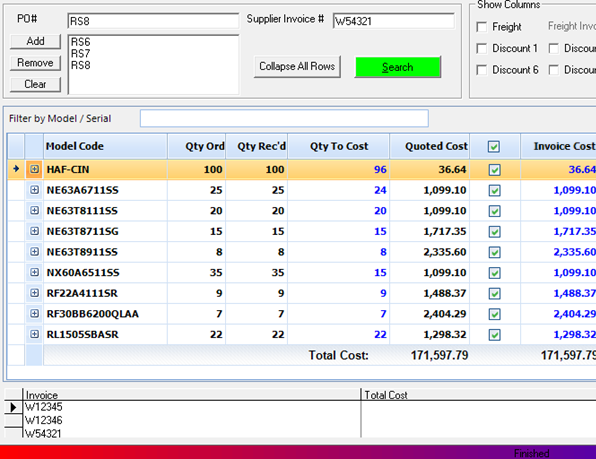
Select the checkboxes of the invoices that you want to cost and then click Return.
 tip
tipDouble-clicking an invoice line will return it and all selected invoices to the Serial Costing screen.
-
The model data from each PO is loaded into the Serial Costing screen.
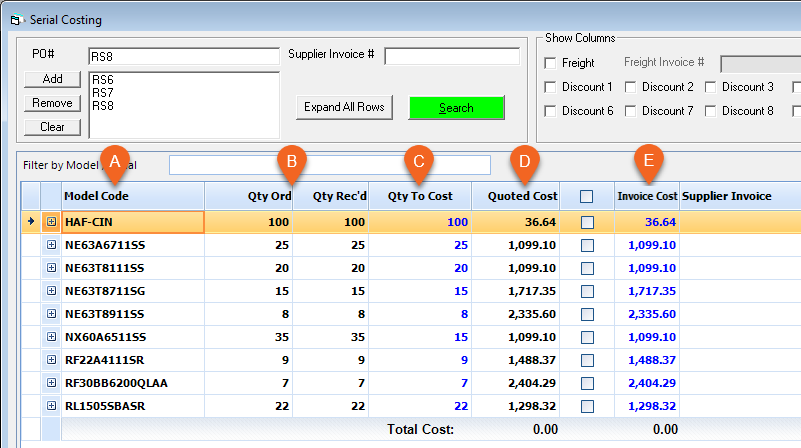
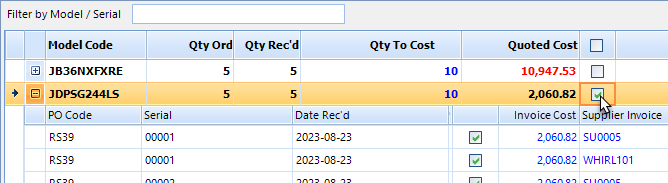
The Serial Costing screen is broken up into several columns of information:
A Model Code Each model that was ordered on the POs. B Qty Ordered/Qty Received The quantity ordered and received. C Qty to Cost The quantity of serials that need to be costed. D Quoted Cost The quoted cost for each model. E Invoice Cost The original invoice cost. -
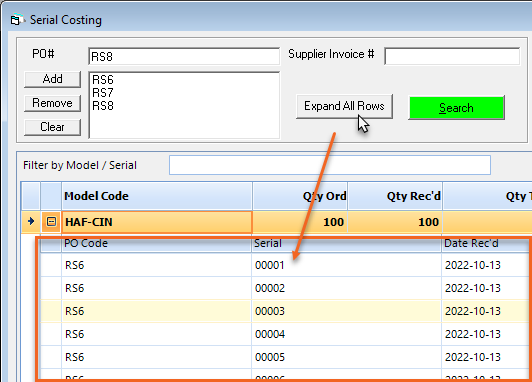
Click Expand All Rows to view the serials for each model.
Costing Each Serial
Starting with the first model in the Serial Costing window, follow this method to cost.
-
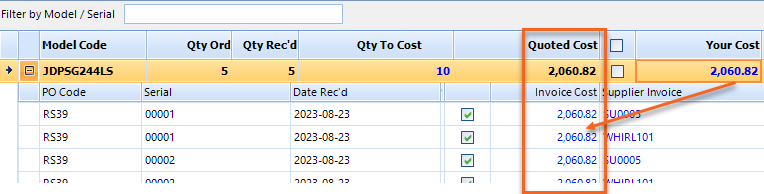
Verify that the amounts shown in Quoted Cost and Invoice Cost are the same.
 tip
tipAny discrepancies between the Quoted Cost and Invoice Cost amounts are highlighted in red.

-
Click the model's Cost checkbox.
-
Move on to the next model and then repeat steps 1 and 2.
infoIf you don't want to cost a serial, clear its Cost check box. Any serials that do not have their Cost checkbox selected will not be costed. If there are any errors during the costing process (for example, Model record is locked), error messages are displayed in the white box above the progress bar.
-
When you are finished, click Cost.

-
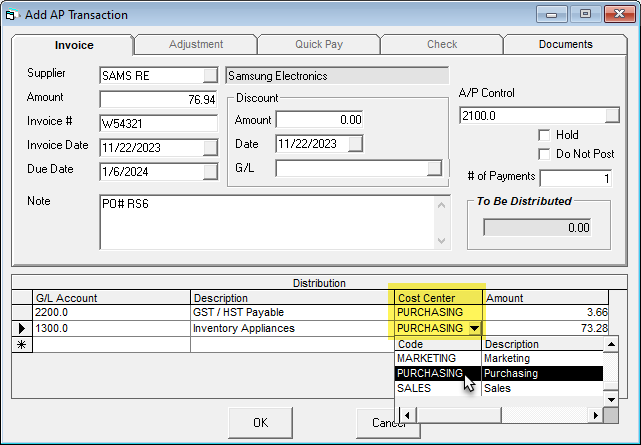
The Add AP Transaction window opens. Verify that all the information is correct in this window. If necessary, enter a Cost Center for each Distribution line. Click OK and repeat for any additional Add AP Transaction windows that open.
 info
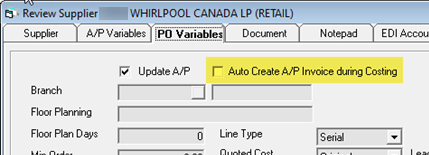
infoIn each Supplier's settings (Supplier record > PO Variables tab) you can select to auto create the AP transaction without displaying it on screen. Make sure that you are comfortable with the settings before enabling this option.
:::
The costing process is now complete.
See Also
January 14, 2025