Labelling Parts
Item label printing is found on the toolbar. It’s the button that looks like a roll of labels.

Once you’re in the item label printing window, you’ll find 4 different ways that you can print labels, each identified with separate radio buttons:
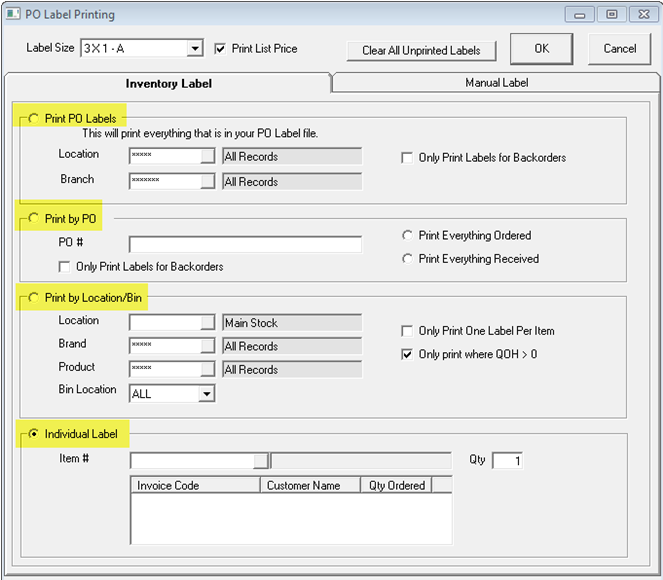
Print PO Labels: This is the option we recommend using for printing new labels on a daily basis. When you receive parts they are written to a label queue until they are printed which will clear the queue. This allows you to receive as needed throughout the day, on various POs, then when you are ready to label the parts you can just print everything in the queue.
Some companies only print labels for parts that were brought in for a customer, so they will have the invoice number, etc. printed on those parts. For stock inventory they will rely on the manufacturer’s label. If you know that the parts you stock all have good barcodes (we’ve found that some do and some don’t) then you could go this route and use the Only Print Labels for Backorders checkbox to only print for parts that were brought in for a customer.
If you are just starting to use this option for the first time, you should first click the Clear All Unprinted Labels button. EPASS starts adding to the label queue whether you print labels or not, so there could potentially be many parts already in the queue. It’s best to clear it out and start fresh.
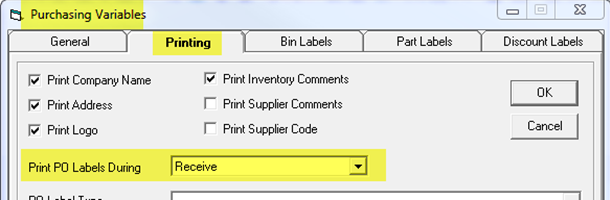
You can also change it so parts are added to the label queue when you order, instead of when you receive. We do not recommend this though, since adding to the queue during receive will ensure that you only print labels for what you actually have. If you do want to change it to write during order then you can change the following option:
Print by PO: This option will print everything ordered or received on a given PO. It prints everything regardless of when it was received though, so if you received parts on the PO over multiple days it will print them all.
Print by Location/Bin: This option is primarily for when you first start labelling your parts. You can use it to print labels for an entire location at once.
Individual Label: This option will let you print one label at a time. This is useful to replace damaged or lost labels.