Creating a Price List Template
A Price List Template is used to import supplier price list data into EPASS from an Excel spreadsheet. You can import model or item information into EPASS by "mapping" the columns of your supplier spreadsheet in the Price List Template. EPASS uses this mapping information to read each column of the spreadsheet and ensure that each piece of data is added to the correct field when you import the supplier spreadsheet.
In System Maintenance you can add, edit, review, or delete a Price List Template. Ideally, you'll create a template for each supplier that is mapped to their price list spreadsheet.
These instructions walk you through creating a new template for a supplier.
These instructions cover creating a Price List Template with the intention of importing model or item data from an Excel spreadsheet. For creating a template to import data from AVB or RetailDeck, see AVB Getting Started Guide or Configuring EPASS for RetailDeck.
Before Starting
You'll need:
- Access to System Maintenance.
- An Excel spreadsheet from your supplier with model or item data.
Creating a Price List Template
Adding a Price List Template in System Maintenance
-
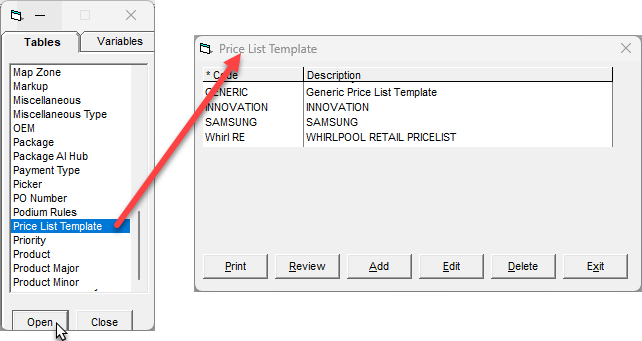
Go to Tools > System Maintenance.
-
Select Price List Template, and then click Open.
-
At the bottom of the Price List Template window, click Add. The Add Price List Template window opens.

-
Enter a unique Code and Description for this template. This should be something that will allow you to easily identify the template later.
 Note
NoteThe following characters can't be used in the import file's Description column:
- single quote ( ' )
- double quote ( " )
- percentage ( % )
- asterisk ( * )
- colon ( : )
- semi-colon ( ; )
Selecting a Model or Item Template
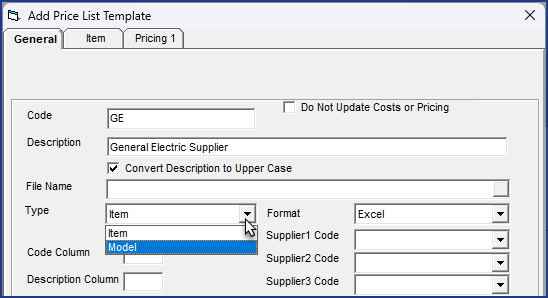
The Add Price List Template window is contextual and changes based on whether you are creating a template for a model or item supplier. Before adding any additional data, the template type should be selected first.
-
In the Type dropdown, select Model or Item.
-
Select the supplier's code from the Supplier Code dropdown. The codes in the dropdown correspond with the supplier codes that you've set up in EPASS.
Mapping the Template to the Excel Spreadsheet
The next steps are to map each column of data in the supplier's spreadsheet to the template. In Excel, columns are labeled with letters (A,B,C...) When EPASS imports data from an Excel sheet, it often needs to know which column contains which type of data—for example, column A might contain model codes, while column B contain descriptions of the models. Mapping this information in the Price List Template gives EPASS this information so that it can read the Excel sheet and import the data into the correct fields.
For example, on the Samsung Supplier Excel spreadsheet, the model code is in column B, and the model description is in column C. In the Price List Template, you would enter 'B' in the Code Column field and 'C' in the Description Column field.

Not all sections of the Price List Template need to be mapped. You only need to map the data that is present in the supplier's spreadsheet.
Starting with the General tab, go through and enter each column letter in the supplier's spreadsheet that matches a mapping field in the Price List Template. Instructions for the additional tabs are included below.

Add and Update Settings
Add Settings

These settings control several options when new models or items are added during the import.
| Setting | Description |
|---|---|
| Stock | Sets new model or items as Stock when imported. |
| Active | Sets new model or items as Active when imported. |
| Use XX for Invalid Brand/Product Codes (Add Models only) | Brand or Product codes in the Excel sheet that don't exist in EPASS are changed to 'XX' during the import. |
Update Settings

These settings control which attributes should be updated when importing existing models or items that are on the supplier's spreadsheet. If any of these checkboxes are selected, the corresponding attribute is overwritten in EPASS with the data from the spreadsheet during the import. If you don't want any of these attributes overwritten during import, leave these checkboxes unselected.
Model Tab
Warranty Months
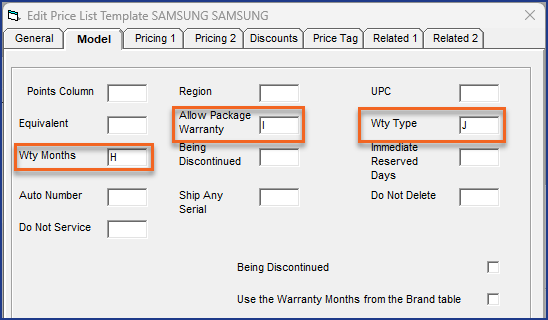
You can import the number of Warranty Months, whether the Allow Package Wty checkbox is automatically selected, and the Warranty Type the model belongs to.
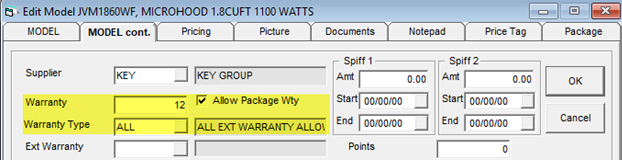
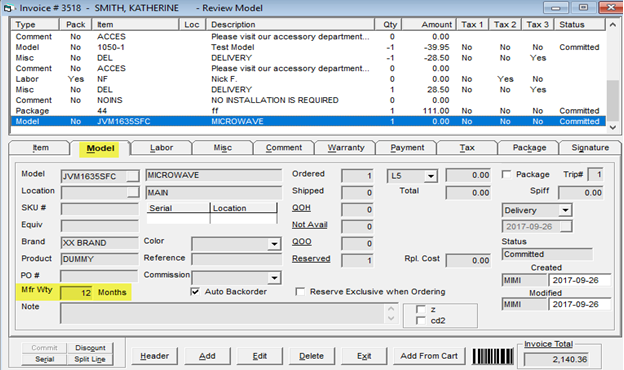
When entering the model on an invoice the warranty months will be filled in on the detail line.
Pricing Tabs
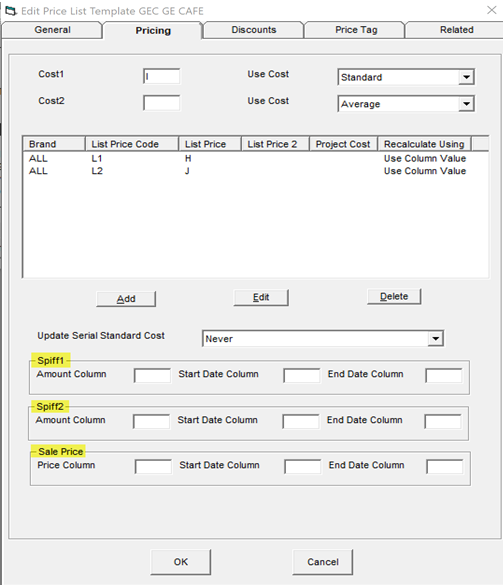
Pricing 1
Map the cost and pricing information for each model and item on this tab. Click the Add button to map list price data.

Pricing 2 (Models only)
You can import the applicable spiffs and sale price(s) from the supplier Excel spreadsheet. Fill in the column that associates to Spiff 1, Spiff 2 and/or Sale Price, as well as the Start and End date columns, if applicable. This will fill in the spiff and sale price fields on the model during the import.

Discounts Tab
On the Discounts tab, you can map the columns corresponding to the discounts from this supplier that are listed on the spreadsheet.

You can add and customize the discount names listed here in Tools > System Maintenance > Variables > Purchasing > Discount Labels.
Price Tag tab
If there are price tag descriptions included in the spreadsheet, you can map the columns to import here.
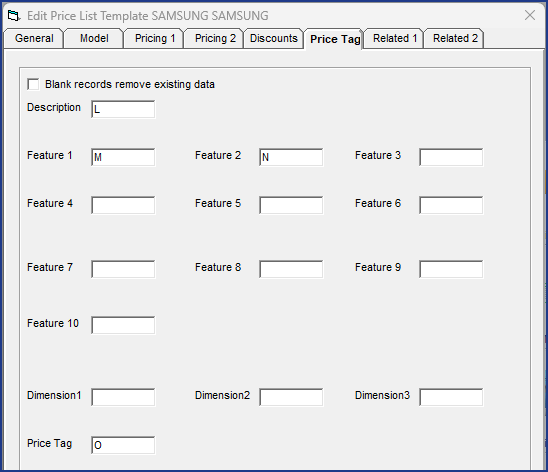
Price tag fields commonly come from your website provider or price tag program. However, if you receive this data from another source, and want to print your own price tags, you can use this tab to import the price tag data. For help with printing price tags, see Price Tags.
Related Tabs (Models only)
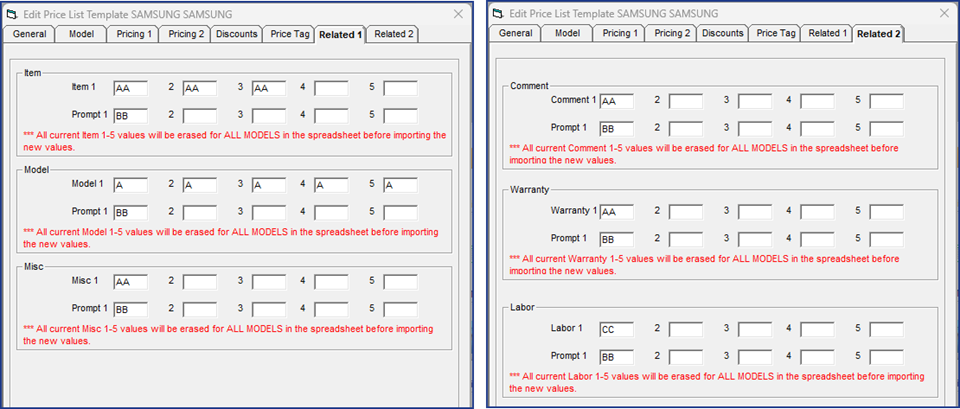
Related items allows you to attach a variety of items, models, misc., warranty, and comments to models so that when a salesperson sells a model, EPASS automatically gives them options to upsell a wide variety of related products. This makes the salesperson much more efficient and it always reminds them of the add-ons they should be soliciting, such as hose kits or extended warranties.
This feature will let you import related item/model/misc./comment/warranty (1-5 fields) as well as prompt “Yes/No” for each field.
Using this tab deletes or replaces related items/models/misc./warranties/comments, even if a model currently has all 5 filled in and you are only importing 1 column—the remaining 4 would be blank. Any data that is removed can not be undone.
See Also
November 10, 2025