
Note: If this is your first time setting up ACH payment processing, contact EPASS Support first. You will need a separate Merchant ID and there are several configuration steps that must be performed on your EPASS server by a support technician.
Updated November 1, 2024
EPASS Pay supports direct payments via ACH. Before using ACH as a payment type with your customers, there are several initial setup steps that must be completed. This guide walks you through setting up and taking payments with ACH.

Note: If this is your first time setting up ACH payment processing,
contact EPASS Support first.
You will need a separate Merchant ID and there are several configuration
steps that must be performed on your EPASS server by a support technician.
Before using EPASS Pay ACH to take payments, you must have a signed ACH Authorization form on file between your business and your customers.
EPASS does not generate ACH Authorization forms. It is your responsibility to create a suitable form that you can use with each ACH customer. Follow your local and state laws and consult with your financial institution to create a form that you can use with your customers before using EPASS Pay ACH.
Once you have an authorization form signed from the customer, you can attach a digital copy to the customer’s record in EPASS. (see Adding an ACH Authorization to a Customer’s Record in EPASS).
For reference, an example of a standard ACH Authorization form can be viewed here: https://www.nacha.org/system/files/2021-07/DP-Authorization-Form.pdf
Initial set-up for EPASS Pay – ACH follows these steps:
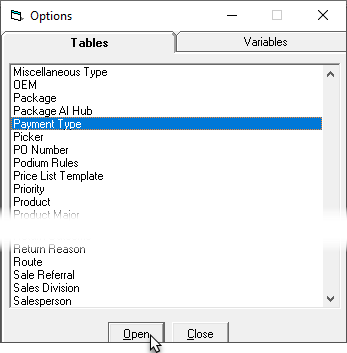
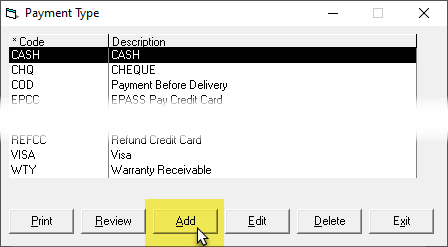
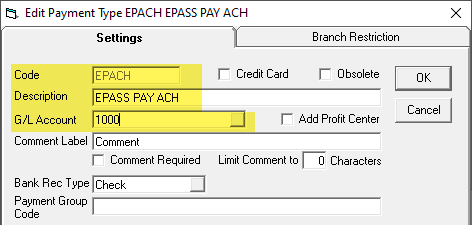
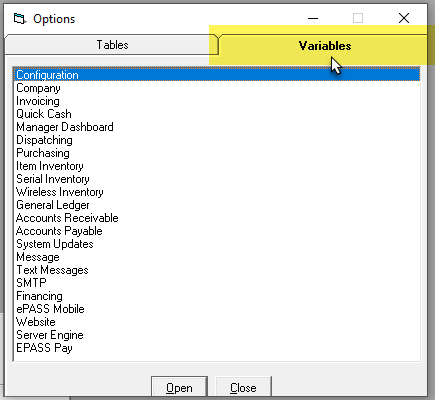
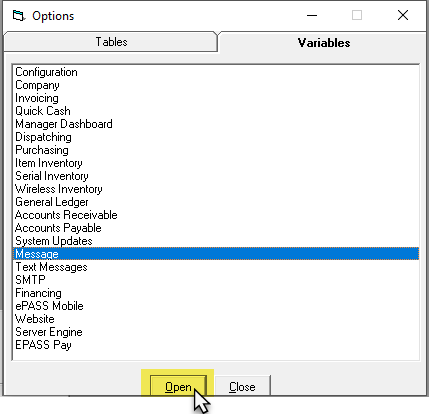

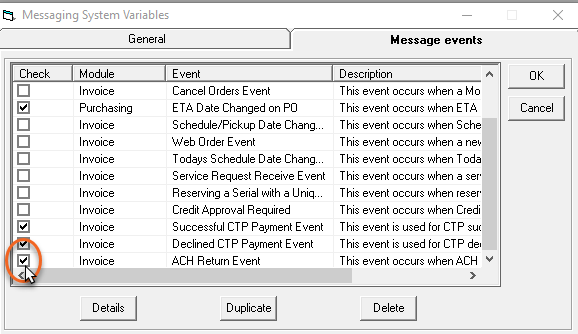
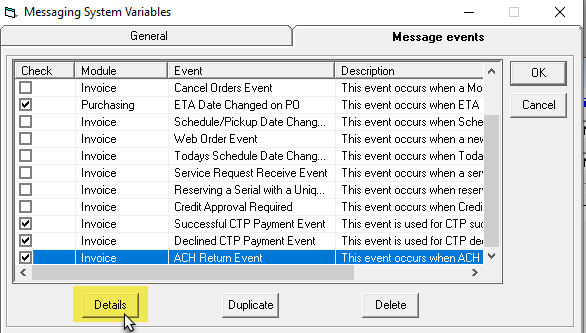
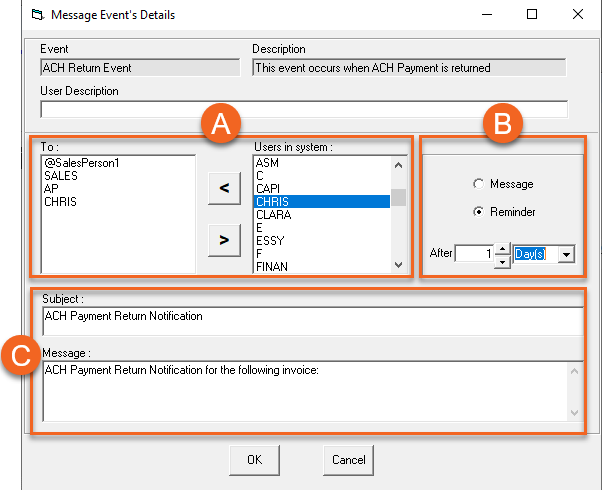
This completes initial setup of ACH in EPASS.