
Updated November 10, 2023
Finally you’ve made it to the most important part of creating a sales invoice – taking payment from the customer! There are a few different methods of payment you might accept, and there are different requirements if you are using EPASS Pay integrated payment processing or not, so this guide will be broken out into multiple sections.
What to do for an AR invoice, where there will be no payment
Taking a credit card payment using EPASS Pay
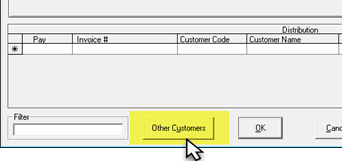
Applying a Payment to a Different Customer's Account
Nothing! Some systems require you to add a payment even when the invoice is AR, but you don’t need to do anything in EPASS. The invoice will just get finished with no payment and the balance will go to accounts receivable. If the customer made a down payment and the balance is will be on account, then just take a payment for the down payment and when the invoice is finished the remaining balance will go to accounts receivable.
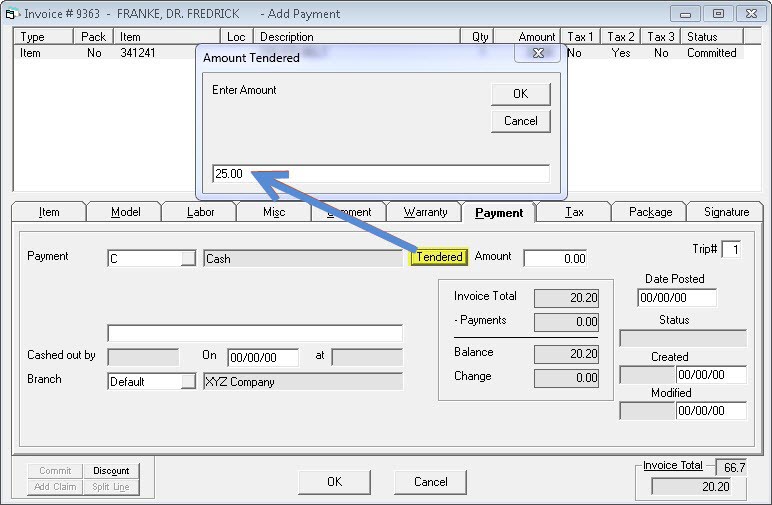
A cash payment is one of the easier payments to take in EPASS. There are only two fields that you need to fill in to take a cash payment, and potentially one button you may want to use.
First, select the cash payment type from the payment type drop down. Payment codes will vary from company to company. Then, just type the amount of the payment into the amount box, click OK, and your payment has been added.
When adding a cash payment the amount should be the amount that will be applied to the invoice, not necessarily the amount the customer gave you (if you owe them change). However, if you do want EPASS to calculate the change for then instead of entering an amount in the amount field click the Tendered button and enter the amount there.
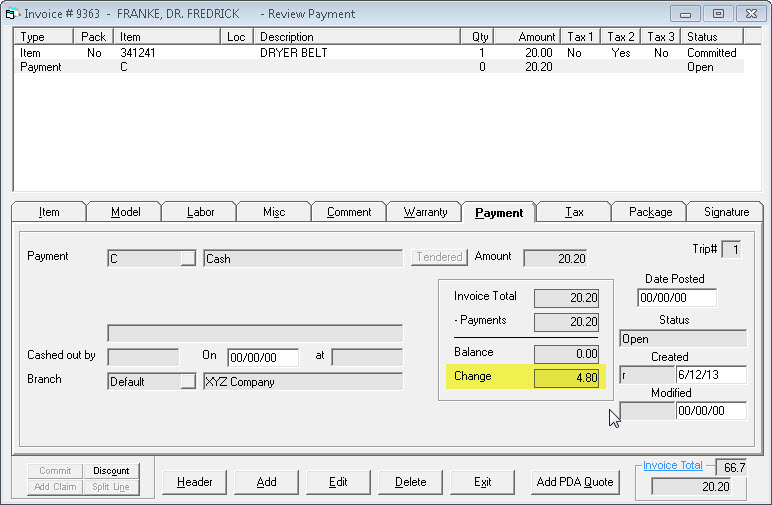
EPASS will then add the appropriate amount to the invoice and display any change that you need to give back to the customer.
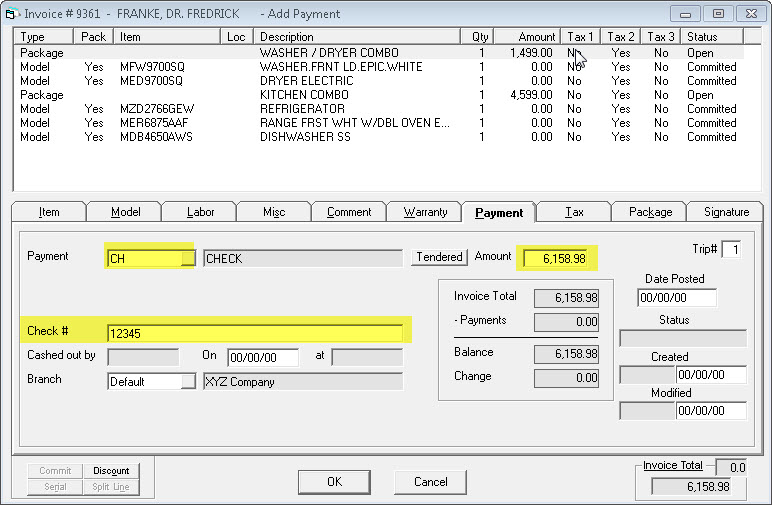
Taking a check payment only requires you to fill in two, possibly three fields. First, select the check payment type from the payment type down, then enter the amount of the check. If your check payment type is set to also require a check # (which it should be), then you’ll also want to enter the check # or it won’t allow you to accept the payment.
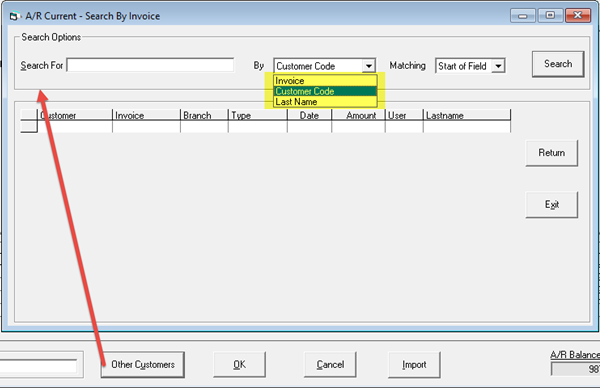
You can apply a payment, or transfer a payment, to a different customer account using the Other Customers option in AR Payment.
 Note:
There is no separate security for this option. A user who has access to
take an A/R payment is able to transfer a payment to a separate account
number.
Note:
There is no separate security for this option. A user who has access to
take an A/R payment is able to transfer a payment to a separate account
number.
Search for the customer by Customer Code (account number), Invoice Number, or Last Name.
Select the invoice from the list, and then click Return.
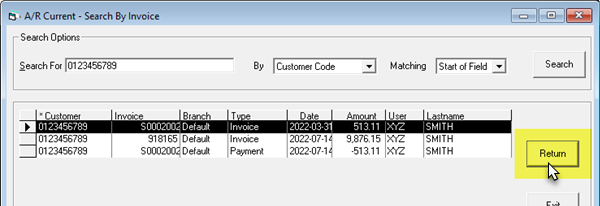
The Invoice is brought into the payment grid.
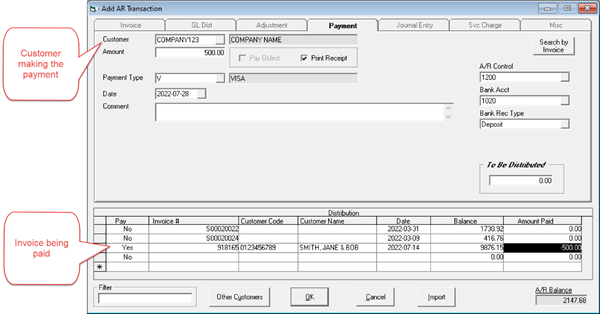
This feature is the same as taking a payment, but allows you to apply the payment to a different account.
There are a few fields that have not yet been mentioned because they are not used during the entry of the payment. Here’s a brief description of the rest of the fields.
Cashed out by/on/at: There are “cash out” reports in EPASS that allow you to balance a cash drawer, and they are typically only used if you have one or more cash drawers. If you are using those reports, then once you accept a cash out the initials of the user who “cashed out” will be filled in here, as well as the date and time that it was cashed out.
Branch: The branch where the payment was taken.
Date Posted: The date that this payment was posted.
Status: Either open or committed. Open means that the posting has not yet been done and someone with higher security could still edit or delete this payment line. Committed means that the posting has been done and this payment cannot be edited or deleted.
Created: The user who added this payment and the date it was added. This is the only Created Date in EPASS that uses the report date instead of the system date. This is to allow you to back date payments. If you ever want to see the actual date the payment was added you can run the invoice audit trail.
Modified: The user who last edited this payment and the date it was edited.