Installing the Chainway CP20 Printer Drivers
Note
When installing on additional workstations after the initial setup, skip the Set Up the Printer and Configure the Printer Connection sections.Set Up the Printer
Before installing the drivers, make sure the printer is set up and connected as per the instructions in this video.
Check the Following
- Ink and Label ribbons are installed.
- Printer is connected to the network or computer.
- If you want the printer to be used by multiple computers, connect it using an Ethernet cable.
- If you want the printer to be used by a single computer, connect it using a USB cable.
- Printer is powered on. (The power button is located on the right side of the printer.)
Download and Extract the Driver Files
You need to download and extract the driver files on each computer that will access the printer.
Note
Your printer may have come with a USB which contains the CP20_Driver.rar and CP20_Utility.rar files. If not, download the files from the links below.-
Click to download the following .rar files:
-
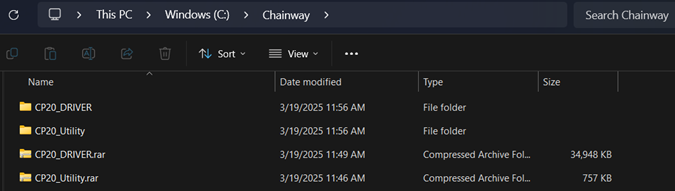
In the
C:drive, create a folder called Chainway. -
Move the two .rar files into the new folder and extract them into
C:\Chainway.Note
Your folder structure should now look like this:
Configure the Printer Connection
You need to configure the printer connection before proceeding with the driver installation.
-
Go to
C:\Chainway\CP20_Utility\Chainway_Diagnostic Tooland double-click Chainway_Diagnostic Tool.exe.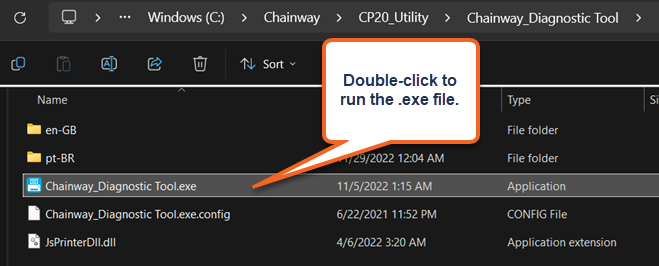
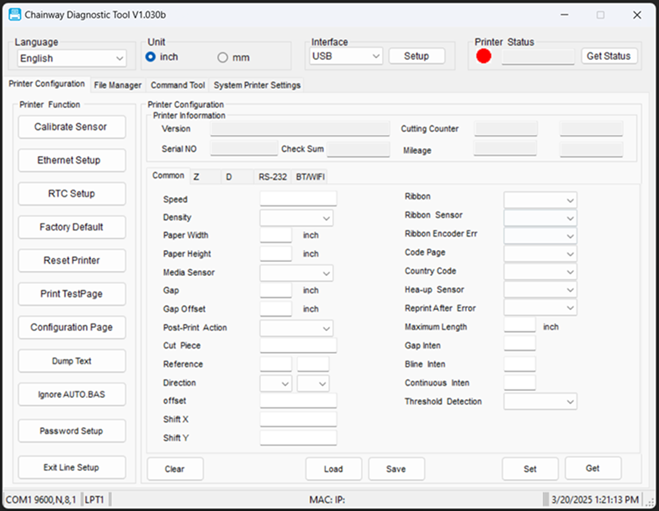
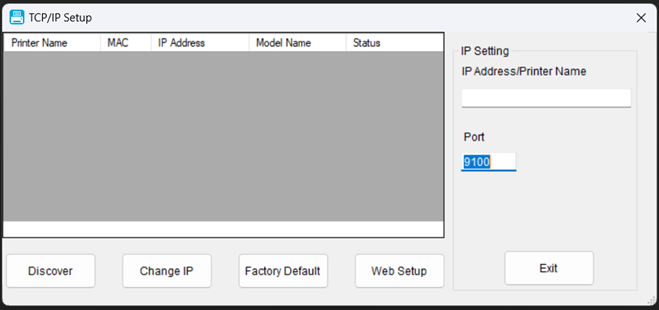
The following window appears on screen:
-
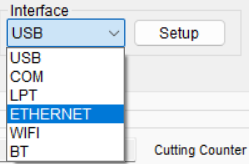
In the Interface dropdown, select the appropriate connection type. If the printer is connected via Ethernet cable, choose ETHERNET. If the printer is connected via USB cable, choose USB.
Note
If you selected USB, skip to the Install Printer Drivers section. -
Click Setup (which is located to the right of the Interface drop-down). The TCP/P Setup window appears.
TCP/IP Setup (For Ethernet Connection)
-
In the TCP/IP Setup window, in the Port field, enter 9100.
- This port needs to be open on your network and computer for printing. In most cases, it should already be accessible. If not, please contact your IT Team.
-
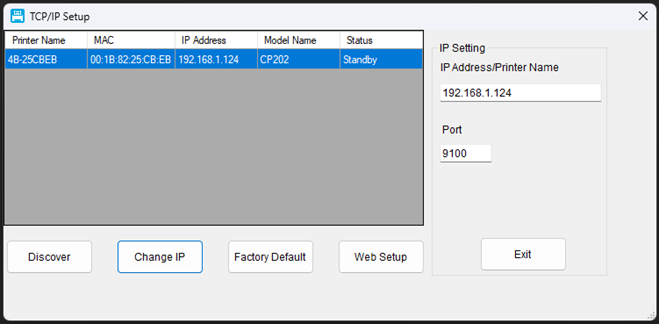
Click Discover to find the printer on your network. Once found, the CP20 printer displays in the TCP/IP Setup window.
-
Click Exit to close the TCP/IP Setup window.
-
On the Diagnostic main screen, click Get Status. A green light should appear under Printer Status on your screen, confirming that the printer is connected and ready to use.
Install Printer Drivers
Now you need to install the printer drivers on every computer that will access the printer.
-
Go to
C:\Chainway\CP20_DRIVERand locate CP20_DRIVER_M-2.exe.
-
RIght-click CP20_DRIVER_M-2.exe and select Run as Administrator. Click Yes if prompted.
-
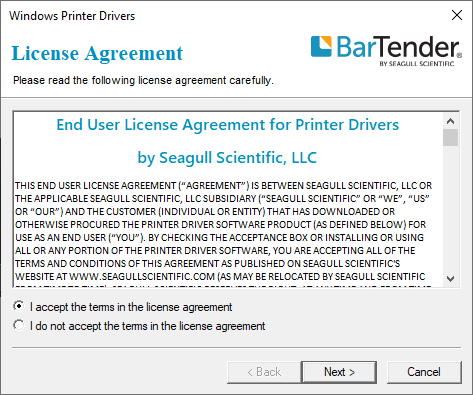
Accept the terms on the License Agreement screen, and then click Next.
-
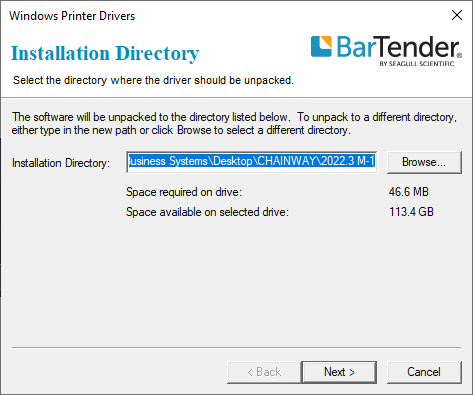
By default, the drivers will be placed on your Desktop. You can leave this as the default, and then click Next.
-
Verify that the Run Driver Wizard after unpacking drivers checkbox is selected, and then click Finish.
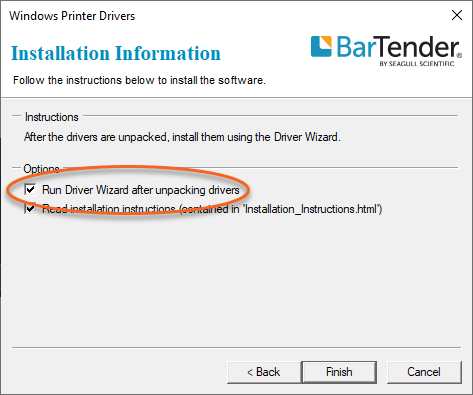
The installation files are extracted to the Desktop, and the Seagull Driver Wizard icon appears on your taskbar.

Finish the Driver Installation
-
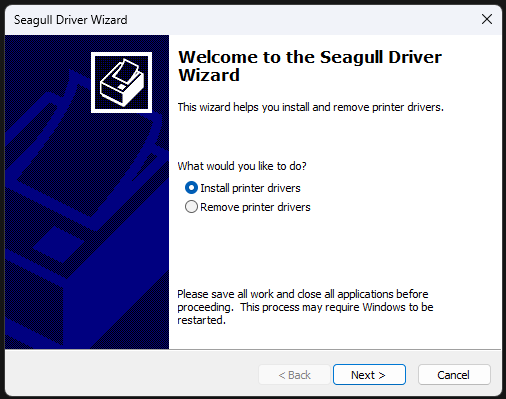
Click the Seagull Driver Wizard icon in the taskbar.
-
In the Seagull Driver Wizard window, choose Install printer drivers and then click Next.
-
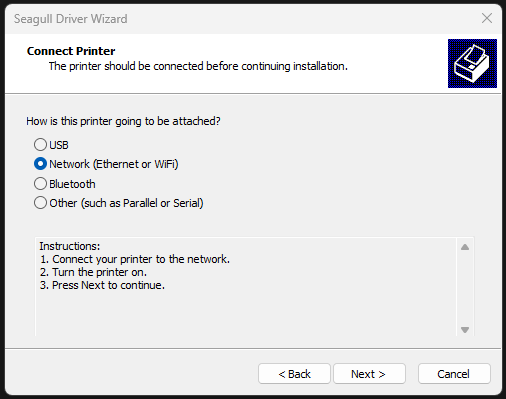
Select the connection type that corresponds to how you connected the printer (USB or Network(Ethernet)). Click Next.
-
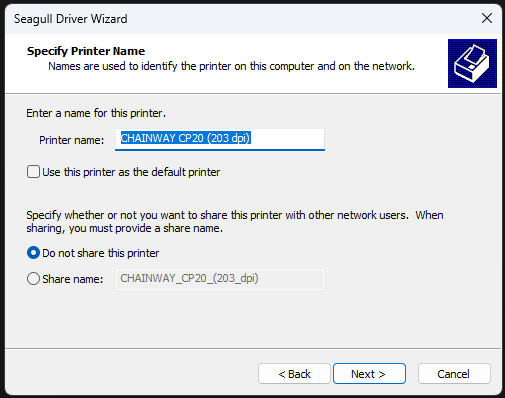
In the list of printer models, select CHAINWAY CP20 (203 dpi) and then click Next.
Note
The printer model information can be found on the label under the printer. -
With the default options selected, click Next.
-
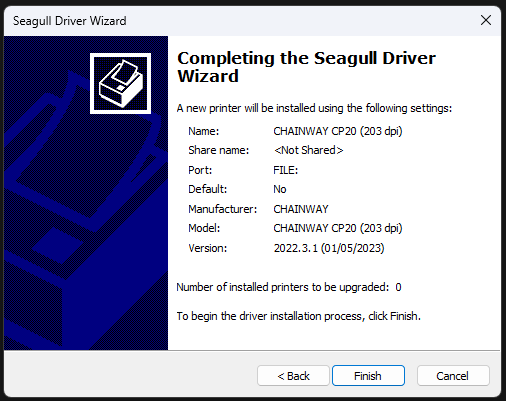
Click Finish to complete the installation. The drivers are installed on your computer.
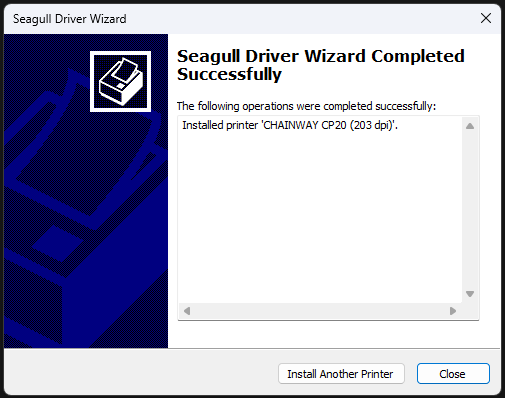
Once the installation is complete, you’ll see a successful installation message confirming that the drivers have been successfully installed.
Feedback
Was this page helpful?
Thank you! Have additional feedback? We would love to hear from you!
Sorry to hear that. Please tell us how we can improve.