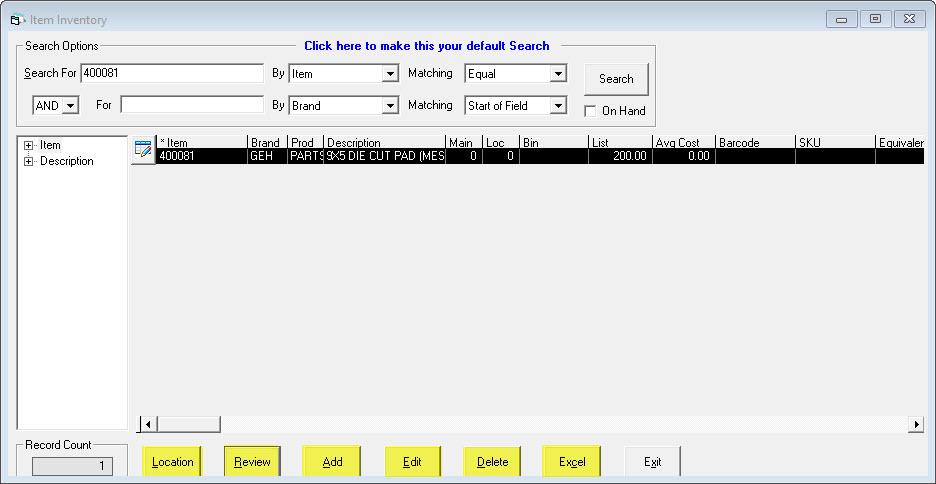

In addition to searching for items, this window allows you to review, add, edit, delete, and export the information you find. Note you cannot delete any item that has a quantity on hand, a quantity on an invoice, or a quantity on order.
Clicking this button with an item highlighted will show you a screen showing the quantity information for a given location. For more information, see Item Inventory > Location.
Clicking this button will export your search results to Excel.
When you are first creating an item, there is also a Clear Fields button beneath the Cancel button.
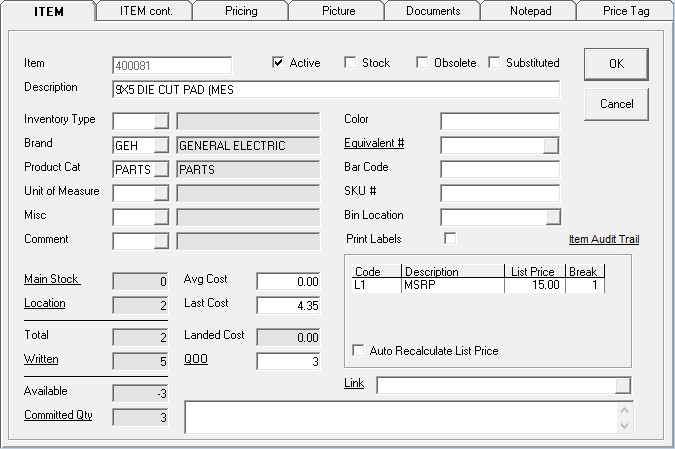
The identifier for this item. Also known as item code. There is a limit of 20 characters. This is a required field.
If this is checked, this item is active.
If this is checked, this piece is a stock item. It is an item we normally stock.
If this is checked, this item is obsolete. If an item is obsolete, you can sell the quantity you have on hand and on order but you cannot sell more.
If this is checked, this item has been substituted by another item. When this is checked, the description field becomes the Substituted to field and will show what the substituted item number is. This is similar to Item Inventory > Update Key except the Update Key function has additional options.
The description for this item. There is a limit of 50 characters on this field. This is a required field.
This is to categorize the item by inventory type code, such as Appliances, BBQ, or Lawn & Garden. The Inventory Type can have GL accounts associated with it to separate revenue.
This is the brand code. This is a required field.
This is to categorize the item by product category code. This is a required field.
The unit you purchase and sell this item as; typically, each. Are you selling each of the item, a box of the item, a foot of it, etc.?
If you have a miscellaneous code you want to automatically populate on an invoice when this item is added to an invoice, you can add it here.
If you have a comment code you want to automatically populate on an invoice when this item is added to an invoice, you can add it here.
Shows the quantity on hand of this item in Main Stock. This is a hyperlink. Clicking this will open the same window as Item Inventory > Location.
Shows how many of this item are in locations other than Main Stock. This is a hyperlink. Clicking this will open the same window as Item Inventory > Location.
Shows how many of this item are on hand in all locations.
Shows how many of this item are written on open invoices. Also referred to as Work in Progress. This is a hyperlink. Clicking this will open the same window as Item Inventory > Written.
Shows how many of this item you have available to sell. The formula is quantity on hand minus the number written to invoices.
Shows how many of this item are committed to open invoices. This is a hyperlink. Clicking this will open the same window as Item Inventory> Written with ‘Show Committed Items on Open Invoices’ checked.
Shows the calculated average cost of these items on hand.
Shows the cost of the last item received.
Shows the cost of the item once all the freights, duties, and additional import fees are added. This is a manually maintained field commonly imported through Tools > System Maintenance > Tables > Price List Templates; it is not calculated by EPASS.
Shows the quantity on order for this item. This is a hyperlink. Clicking this will open the same window as Item Inventory > Purchase.
The color of the item.
The item code for the equivalent item. This is a hyperlink. Clicking on it will open the equivalent item details.
The barcode for the item.
The SKU for the item. A SKU is an in-house item number commonly used to hide the real item number to stop people from shopping around. SKU numbers can be enabled in Tools > System Maintenance > Variables > Item Inventory > General tab > Auto Assign SKU Number. You can contact our technical support team to run utilities to populate SKU numbers for all current item inventory. Your staff does not need to know the SKU numbers; you can search by both the real item number or by SKU to bring up the same item.
The bin code location for the item.
If this is checked, labels for this item will be set to print by default. For most items, you will want labels but small items, such as screws, you may not want labels for.
Opens the audit trail for this item.
Shows the list prices setup for this item.
If this is checked, the item list price will automatically be recalculated when the cost changes. You must also enable Tools > System Maintenance > Variables > Purchasing > General tab > Recalculate Item Prices for this to happen as part of the purchasing process. This checkbox is also associated with Update Pricing on Import on the Pricing tab. In both cases they restrict pricing from being updated. Most companies have items they will always sell for $19.95 regardless of the cost and this is where these two options come into effect.
Provides a space to add an external link for the item such as a website or a PDF with additional details.
You can use this space for any additional information you want to add about this item. This note is visible in Invoice Detail to help the sales staff.
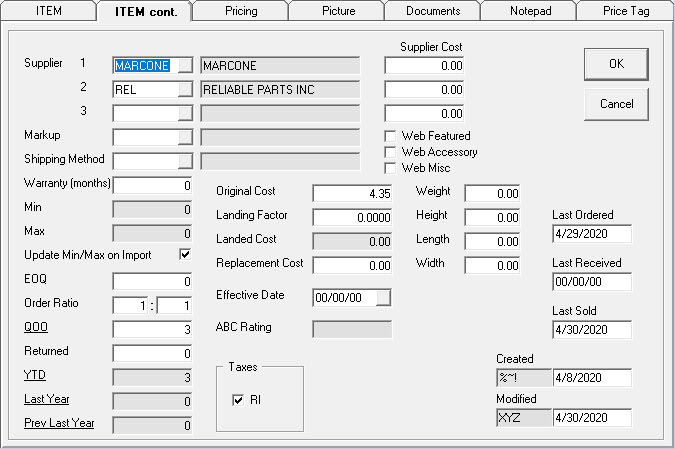
Shows where you get this item from and the related cost associated with that supplier. You can have up to 3 different suppliers per item. The first one in the list is the primary supplier of this item for you and that is the only supplier that will automatically add the item to a Purchase Order as part of the Purchasing > Reports > PO-12 Recommended Purchase Order process.
The markup code for this item. Typically, the markup is set by brand but you can change it for individual items here. See Markup Table for more information.
The code for the shipping method used. This is primarily used by parts distributors. See Shipping Method Table for more information.
How many months is the manufacturer’s warranty for this item?
The total minimum and maximum quantity you want on hand for all locations. The minimum is how many you have on hand before ordering more. The maximum is the most quantity on hand you want to have. The minimum and maximum are maintained per location in Item Inventory > Location.
If this is checked (default), the min/max for this item will be updated when running the Import Min/Max Utility. If you do not want it to be updated by this utility, uncheck this box.
Economic Ordering Quantity. If this item comes in quantities higher than 1, you want to specify the quantity here. If you have to order a box of 10 every time, this number will be 10.
The first number is the total individual items that will be received and the second number is the total you are ordering. If you order 1 box of the item and 10 items are in a box, the ratio will be 10:1. Inventory TO Purchasing.
Shows how many you currently have on order. This is a hyperlink. Clicking this will open the same window as Item Inventory > Purchase.
Shows how many of this item have been returned to the vendor through negative purchase orders this year to date.
These show the total sales for the last 3 years separating warranty and non-warranty sales. These are all hyperlinks. Each one will open the same window as Item Inventory > Sales.
Shows the original cost of the item before any importing fees are added. This is a manually maintained field commonly imported through Tools > System Maintenance > Tables > Price List Templates; it is not calculated by EPASS.
Shows the factor the original cost is multiplied by to reach the landed cost.
Only used if Landing Factor is filled in. This is the original cost multiplied by the landing factor.
Shows how much it will cost to replace this item. This is a manually maintained field commonly imported through Tools > System Maintenance > Tables > Price List Templates; it is not calculated by EPASS.
This shows the date the Replacement Cost takes effect. Informational only; EPASS does not do anything based on this date.
Not used.
Shows the taxes that apply to this item.
This is part of our Distributor Website integration and indicates if this item is shown on the website.
This is part of our Distributor Website integration and indicates if this item is marked as an accessory on the website.
This is part of our Distributor Website integration and indicates if this item is marked as a miscellaneous product on the website.
Shows the dimensions of the item.
Shows the date the item was last ordered/last received/last sold. This is system maintained.
Shows who created and modified the item and the date the action was done.
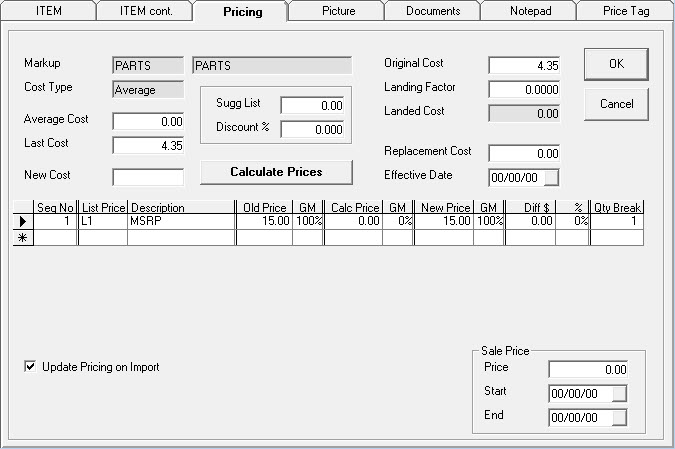
The markup code for this item. Typically, the markup is set by brand but you can change it for individual items here. See Markup Table for more information.
Shows the cost type being used by the Markup for this item.
Shows the calculated average cost of these items on hand.
Shows the cost of the last item received.
You can enter a new cost into this field and click the Calculate Prices button to recalculate the prices shown in the price table based on the new cost. The new cost will update the cost indicated by the cost type.
Only used when you receive a Suggested List and Discount % from your distributor instead of a cost. This will calculate your cost based on the values entered into Suggested List and Discount $ and then the Markup table will use that cost to calculate the list prices.
Shows the original cost of the item before any importing fees are added. This is a manually maintained field commonly imported through Tools > System Maintenance > Tables > Price List Templates; it is not calculated by EPASS.
Shows the factor the original cost is multiplied by to reach the landed cost.
Only used if Landing Factor is filled in. This is the original cost multiplied by the landing factor.
Shows how much it will cost to replace this item and the date this cost becomes effective. This is a manually maintained field commonly imported through Tools > System Maintenance > Tables > Price List Templates; it is not calculated by EPASS.
SEQ NO: The order of items in the table.
LIST PRICE: List price codes for the item.
DESCRIPTION: List price descriptions.
OLD PRICE and GM: Current price that’s listed and the gross margin based on that price.
CALC PRICE and GM: New calculated price and gross margin based on that price based on the new cost entered.
NEW PRICE and GM: You can enter a new price in here and have the gross margin calculated based on that price.
DIFF $ and %: The difference between the old price and the new price in dollars and gross margin.
QTY BREAK: For wholesale pricing when you get a lower price for buying a higher quantity. This is where you put the break between the price levels. If you use Qty Break then each price level must be populated and the Qty Break must go from smallest (at the top) to largest (at the bottom). If you put ‘1’ in for the first list price and ‘5’ for the second list price, then the customer will be given pricing level 2 if you sold ‘5’.
If this is checked, prices will be updated when you import a price list. This checkbox is also associated with Auto Recalculate List Price on the Item tab. In both cases they restrict pricing from being updated. Most companies have items they will always sell for $19.95 no matter what their cost and this is where these two options come into effect.
PRICE: What the sale price is.
START: When the sale price takes effect.
END: When the sale price is no longer valid.
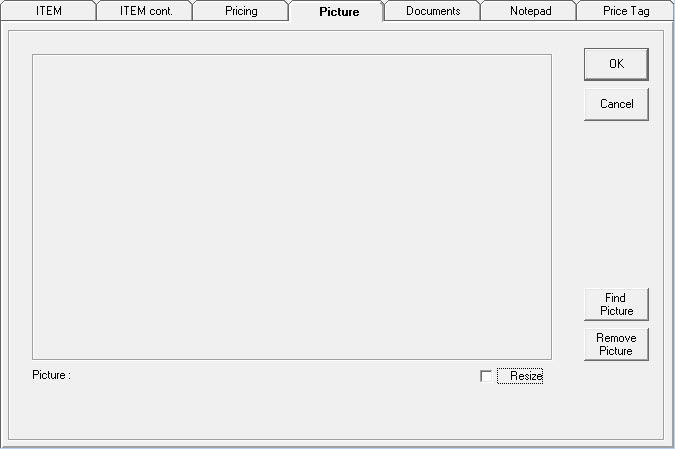
You can upload a picture of the item, if desired. In this window, you can find and remove a picture as well as resize it. Smaller pictures are best.
If you have an image attached, the path to the picture will be displayed at the bottom by ‘Picture:’ and you will see a camera icon on the picture tab.
![]()
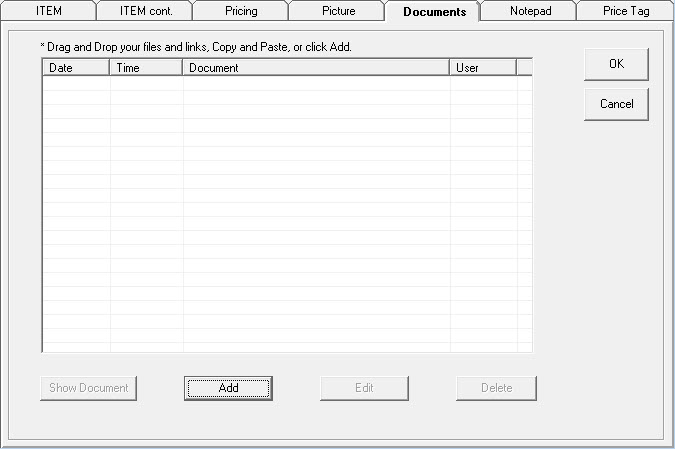
You can attach documents to the item here. You are not restricted in what you attach and EPASS doesn’t actually save the document(s) you attach here. EPASS saves the path to the document so it is important to have all documents accessible in a shared network path that everybody has access to.
You can add, edit, delete, and show documents. Like with the Picture tab, you will find an icon noting there are files attached.
![]()
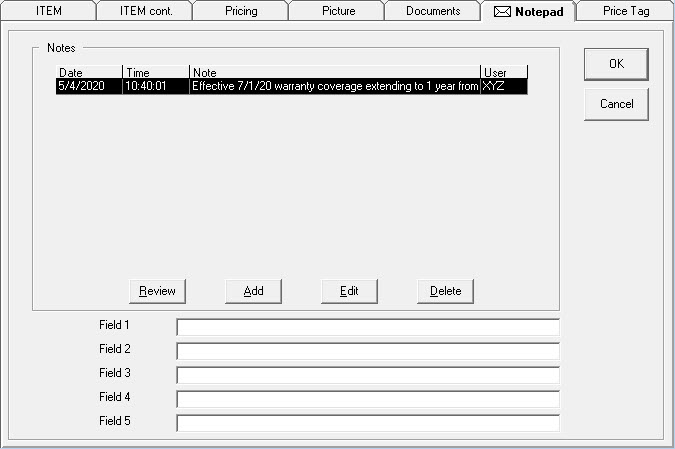
You can add a note to the item and EPASS will show you the date, time, and user that added the note. You can review, add, edit, and delete notes. You will also see an envelope icon on the tab, if there is a note.
Field 1-5 can be renamed and made required in Tools > System Maintenance > Variables > Item Inventory > Titles. These fields are useful for tracking details.

If you want to create your own price tags for printing via Crystal Reports, you can do that here. This field is open format.