 Note: Your CSV file will need to contain at least these columns:
PO number, Model, and Quantity.
Note: Your CSV file will need to contain at least these columns:
PO number, Model, and Quantity.You can print labels for product that you are receiving either by importing a file with the PO numbers, models, and quantity details, or by entering each detail manually. With some suppliers, it is possible to find out in advance what product you will be receiving; the list of products or packing list can be used to determine which labels to print.
You can import your PO details in two different ways: you can import a CSV (comma-separated values) file with the PO number, model, and quantity details or you can import files received from NEAEG (New England Appliance & Electronics Group).
Follow the instructions below for the option that you choose.
 Note: Your CSV file will need to contain at least these columns:
PO number, Model, and Quantity.
On
the toolbar, click the Print Labels
by PO
button. 
Click Import. The Serial Label Import window opens.
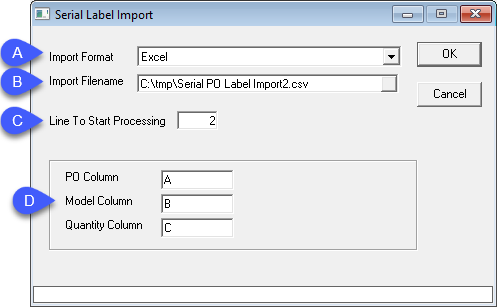
Do the following:
In the Import Format dropdown, select Excel.
In the Import
Filename field, click the Browse
 button and select your CSV file.
Enter the line number where your data starts in the CSV file (this is usually line 2, as your column titles are usually in line 1).
Enter the column letter for the PO, Model, and Quantity.
Click OK.
Your PO details are imported and ready for printing. Continue with the Printing instructions.
 NOTE:
There are three CSV files from NEAG that you need to import into the utility:
PackListHeader, PackListLine, and PackListSerials.
On
the toolbar, click the Print Labels
by PO
button. 
Click Import. The Serial Label Import window opens.
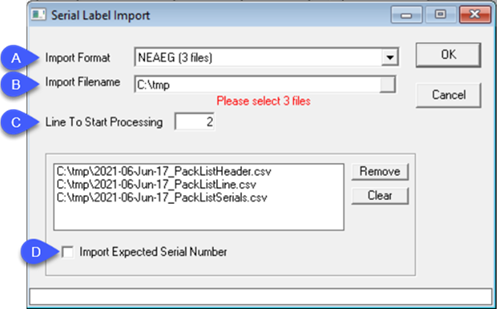
Do the following:
In the Import Format dropdown, select NEAEG (3 files).
In the Import
Filename field, click the Browse
 button and select the PackListHeader.csv, PackListLine.csv, and
PackListSerials.csv files.
Enter the line number where your data starts in the CSV file (this is usually line 2, as the column titles are usually in line 1).
Select the Import Expected Serial Number box. (If this is left unselected, the serial numbers don't print on the labels.)
Click OK.
Your PO details are imported and ready for printing. Continue with the Printing instructions.

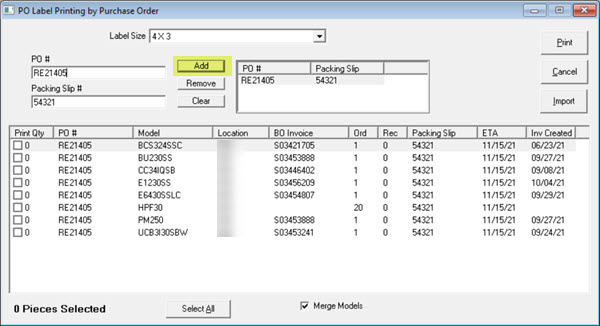
Your PO details are imported and ready for printing. Continue with the Printing instructions.
Check off all the pieces that are expected to be received. The counter at the bottom left of the screen should match the count on the packing slips.
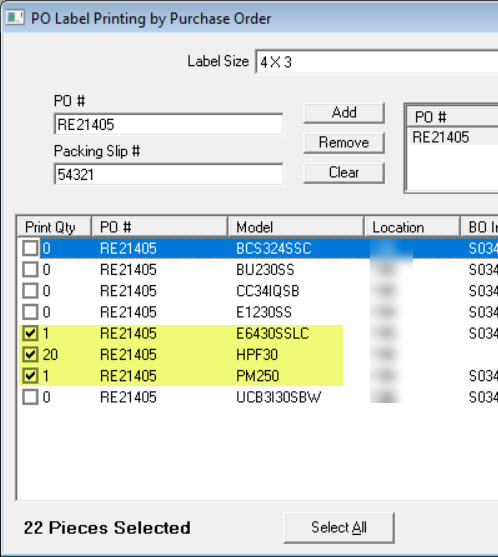
If the amount of models ordered is less than you received, you can change the quantity of labels that will print. For example, if you only received 15 of the 20 GSD3400GWW that were ordered, click on that line to highlight it, click in the Print Qty column (where the number 20 is) and you can change the quantity. It will take a second to respond for you to key in the quantity. Once the quantity has been changed, either click away from that box or press ENTER.
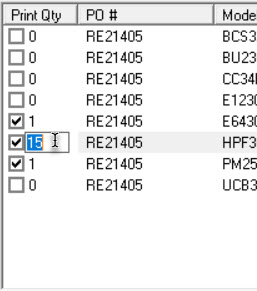
Once all the product that is expected has been checked, select your Label Size from the dropdown, and then click Print to print the labels.