Importing AP Transactions
You can import AP transactional data contained in a spreadsheet by using the AP Transaction Import Utility.
Before Starting
Before using the AP Transaction Import utility, you need to enable two security settings and map your spreadsheet data to an import template.
Enable Security Settings
There are two security settings that need to be enabled: A/P Transactions Import and Tables: AP Transaction Template.
-
Go to Tools > System Maintenance. Select User Security, and then click Open.
-
Select a User Group from the list, and then click Security.
-
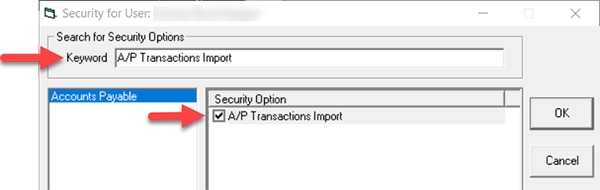
In the Keyword search box, enter A/P Transactions Import. Make sure that A/P Transactions Import is selected under Security Option.
-
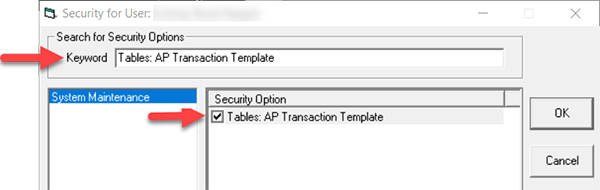
In the Keyword search box, enter Tables: AP Transaction Template. Make sure that Tables: AP Transaction Template is selected under Security Option.
-
Click OK.
Create an AP Transaction Import Template
You’ll need to create an AP Transaction Import template and map the columns in the spreadsheet.
-
Go to Tools > System Maintenance. Select AP Trans Import, and then click Open.

-
Click Add.
-
Fill out the AP Transaction Import Template screen.
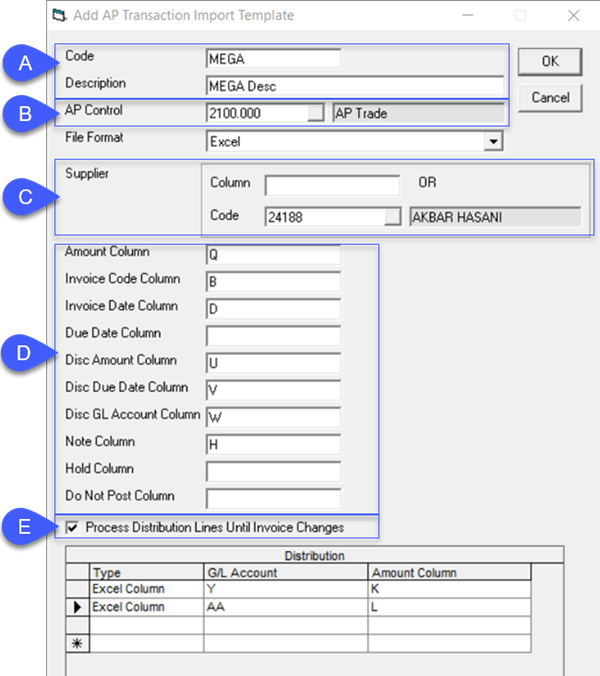
A Enter a unique Code and Description for this import template. B Select the appropriate AP account from the AP Control dropdown list. C Enter the Excel column that contains the Supplier code or select the Supplier Code from the list. D For each field, enter the matching Excel column letter. E Select this option and EPASS will process AP transactions with multiple distribution lines by totaling the amount of each line until the Supplier or Invoice number changes. -
When you are finished, click OK.
- All fields are mandatory except: Disc Amount, Disc Due Date, Disc GL Account, Note, Hold and Do Not Post Columns, and Process Distribution Lines Until Invoice Changes.
- When Disc Amount, Disc Due Date and Disc GL Account columns are blank, then the values from the Supplier table will be used instead.
- You can map the Supplier to a spreadsheet column or select the code from the dropdown list. The value in the Supplier Column can be the Supplier Code or Supplier Description.
- In the Distribution box, there are two options under the Type column: GL Code and Excel Column. If GL Code is chosen, then the GL Code must be provided. If Excel Column is selected, then column letter must be filled in.
- A template can have multiple distribution records. If these columns are empty in the import file, AP transaction records will not be created.
AP Transactions Import
To Import the AP Transactions:
-
Go to AP > Utilities > AP Transactions Import.

-
Select the template from the AP Transactions Import Template list.
-
Enter the Excel file to import in Import File Name.
-
Enter the Excel line number that your data starts on in Line to Start Processing.
-
Click OK.
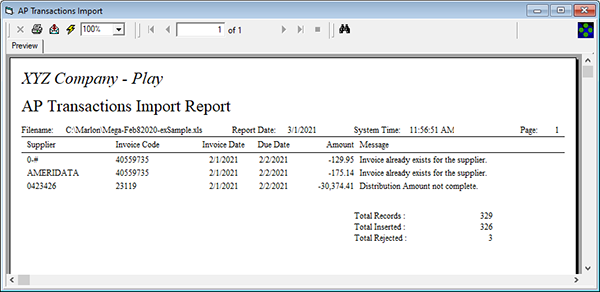
A message appears on screen confirming the successful import. If there are rejected records, then a report listing is provided.
Successful Import – All records are imported

Successful Import - Not all records are imported
November 25, 2021