Sending Text and Email Notifications to Customers
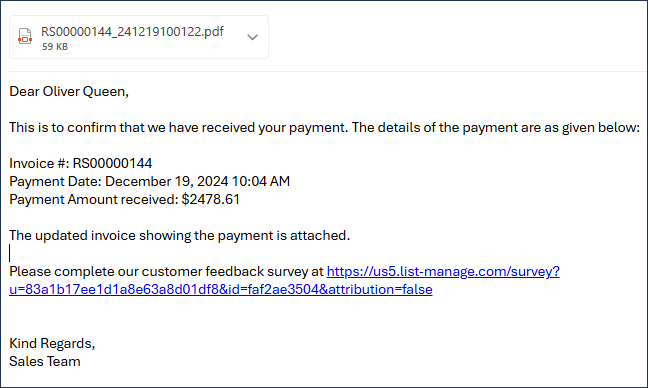
EPASS can automatically send email or text notifications to customers on successful(or unsuccessful) payments made through Click to Pay. Notification messages are customizable and can include anything you want to send to your customer to enhance the payment process, such as a thank-you message, a PDF copy of the invoice, or a link to a customer satisfaction survey.
Follow the sections in this guide to set up Click to Pay email and text notifications.
Setting Up Email (SMTP) Notifications
-
Go to Tools > System Maintenance. Click the Variables tab.
-
Click SMTP, and then click Open.

-
In the SMTP Variables window, do the following:
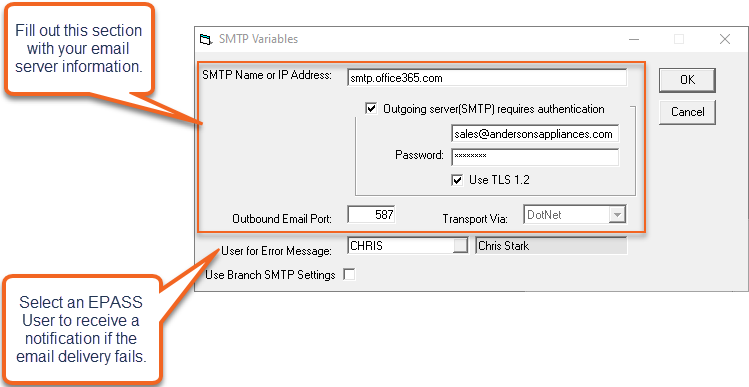
-
Click OK.
Setting Up Text (SMS) Notifications
Text notifications requires EPASS Integrated Text Messaging.
-
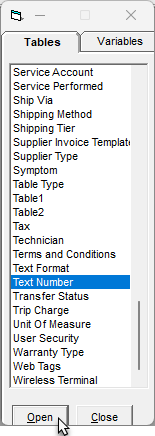
Go to Tools > System Maintenance. On the Tables tab, click Text Number, and then click Open.
-
Click Add.

-
In the Code field, enter a phone number that the text message will be sent from. (Customers will see this number when they receive the text notification.) In the Description field, enter Click to Pay or something similar to identify the number.

-
Click OK, and then click Exit to close the Text Number table.
-
Go to Tools > System Maintenance and click the Variables tab. Select Text Messages and then click Open.

-
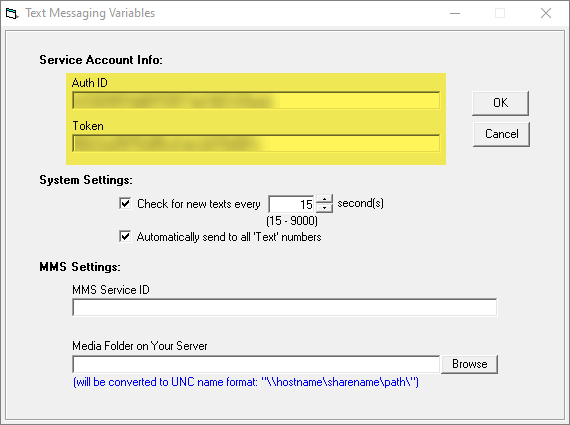
Under Service Account Info, enter your EPASS Integrated Text Messaging Auth ID and Token.
-
Click OK.
Configuring Notification Variables
-
Go to Tools > System Maintenance. On the Variables tab, click EPASS Pay and then click Open.

-
Click the CTP Notifications tab and do the following:
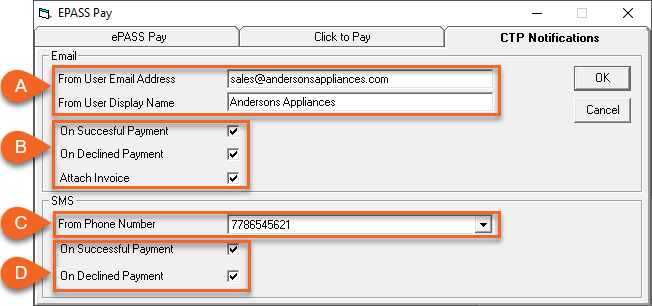
Field Description A Enter the sender address and display name for outgoing email notifications. B Select when an email should be sent (when a payment has been successfully made and when a payment has been declined). C Enter the sender phone number for outgoing text notifications. D Select when a text should be sent (when a payment has been successfully made and when a payment has been declined). -
Click OK.
Configuring Text or Email Failure Messages
In the event of an email or text notification delivery failure to a customer, EPASS Messaging can be configured to notify one or more EPASS Users.
-
Go to Tools > System Maintenance. Click the Variables tab, click Message, and then click Open.

-
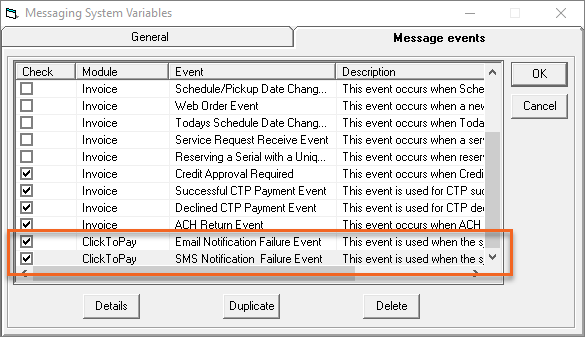
Click the Message Events tab.
-
Make sure that the checkboxes for both ClickToPay modules are selected.
-
Click ClicktoPay - Email Notification Failure Event and then click Details.
-
Do the following:
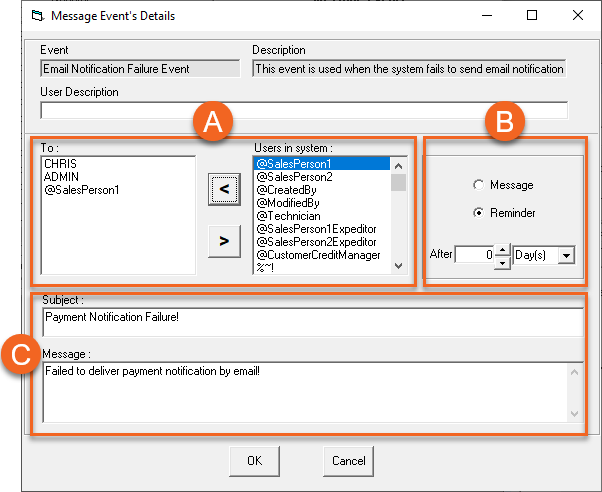
Field Description A For each user or group that should receive this message, click their name in the Users in System list, and then click the left arrow to move them into the To list. B Select whether the recipients receive a message in their EPASS Messaging Inbox (select Message) or a notification reminder pop-up when they log in (select Reminder). If Reminder is selected, enter the number of hours or days that will pass before the user receives the pop-up notification. C If necessary, edit the default Subject line and Message body. -
Click OK. Repeat step 4 for ClicktoPay - SMS Notification Failure Event.
-
Click OK to close the Message Events window.
Customizing Email and Text Messages to Customers
Default email and text message templates for customers are included in EPASS. These messages can be used 'as-is' or customized. There are 'payment received' and 'payment declined' message templates located in the Email Format and Text Format tables in EPASS.
To Customize the Email Message Templates:
-
Go to Tools > System Maintenance. On the Tables tab, click Email Format, and then click Open.
-
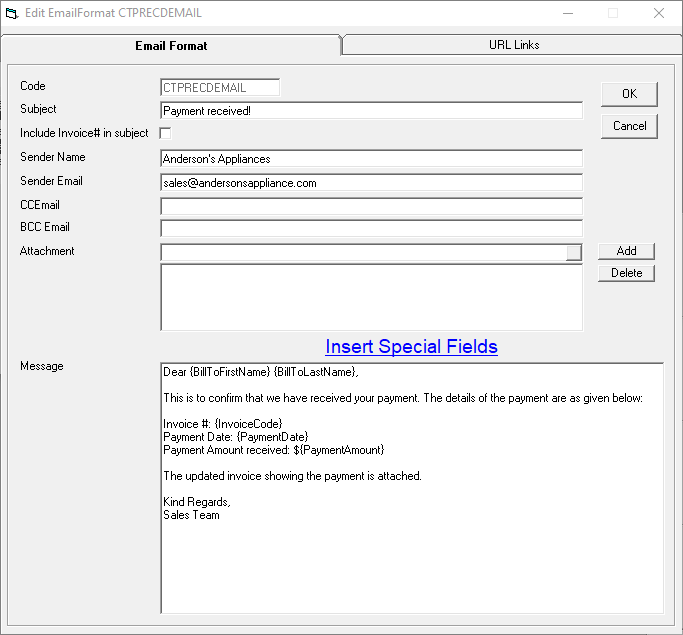
Locate the CTPRECDEMAIL and CTPDENIEDEMAIL templates. Select one and then click Edit.

-
Customize the email properties or message as needed. View Batch Email & Text for additional information on customizing email messages.
-
When finished, click OK.
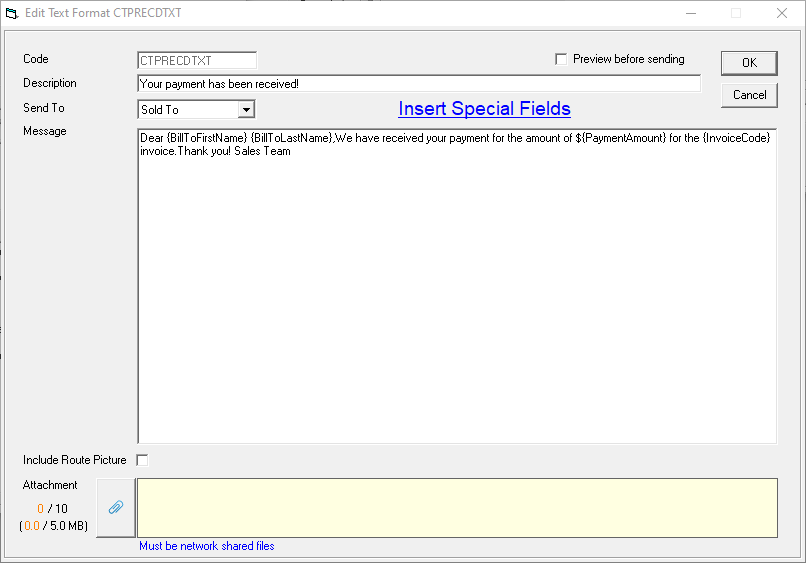
To Customize the Text Message Templates:
-
Go to Tools > System Maintenance. On the Tables tab, click Text Format, and then click Open.
-
Locate the CTPRECDTXT and CTPDENIEDTXT templates. Select one and then click Edit.

-
Customize the message as needed. View Batch Email & Text for additional information on customizing text messages.
-
When finished, click OK.
This completes the Email and Text notification setup.
See Also
- Generating a Payment Link
- Setting Up Click to Pay Event Messaging
- Sending a Payment Link by Batch Email or Text
August 11, 2025