Adding or Viewing Suppliers
In EPASS, a supplier is anyone you will be receiving invoices from or anyone you might need to write a check to. To Add or view a Supplier, go to AP > Supplier > Maintenance or Purchasing > Supplier to open the Supplier Maintenance Screen.
Viewing Suppliers
Use the search options on the Supplier Maintenance screen to search for and view supplier records.
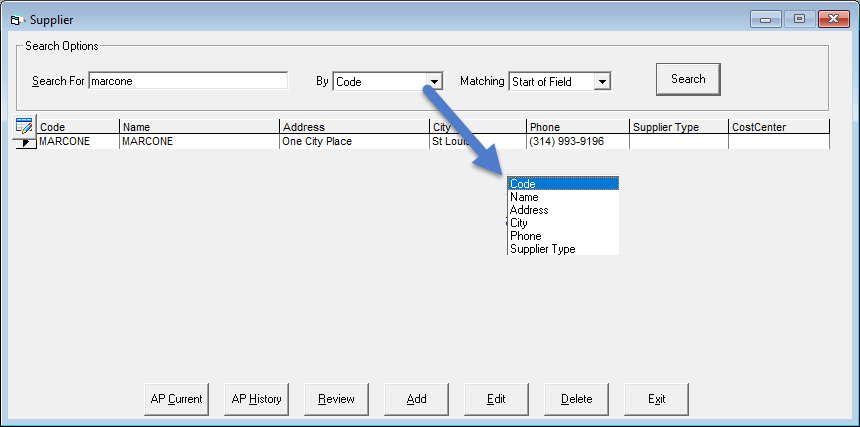
Select a supplier in the search results area and click the buttons at the bottom of the window to do the following:
- AP Current: Opens the AP current screen for the currently selected suppler. (Security dependent)
- AP History: Opens the AP history screen for the currently selected supplier. (Security dependent)
- Review: Views the supplier record in review mode. You can not edit any information while in this mode.
- Edit: Views the supplier record in edit mode. While in this mode, you can edit the supplier information.
- Delete: Deletes the supplier record. (Note: Deleting a supplier record can't be undone.)
Adding a Supplier
Click the Add button to add a new supplier record. Fill out each tab as follows:
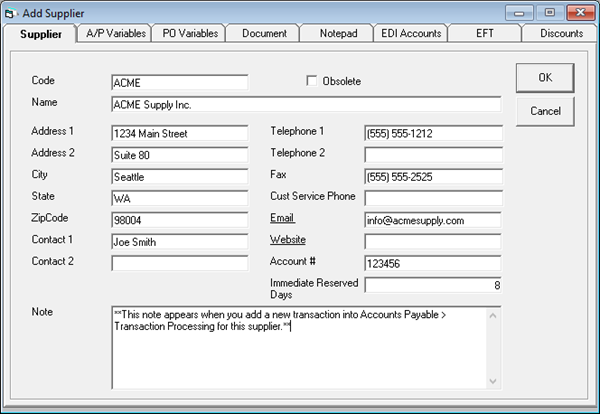
Supplier Tab
| Parameter | Description |
|---|---|
| Code | The 10 character identifier for this supplier within EPASS. It is best practice to use a short version of the company name. |
| Obsolete | Used when this is a supplier you no longer deal with. Stops you from creating new transactions for this account but keeps all the history. |
| Name | The full name of the company or person. |
| Address 1 | Street name and number. |
| Address 2 | Unit number, rural route, stn. number, etc. |
| State | State or Province. |
| Zip Code | Zip or Postal Code. |
| Contact 1 and Contact 2 | Name of your contact(s) at the company. For example, your account manager or sales rep. |
| Telephone 1 and Telephone 2 | Primary and secondary phone numbers. EPASS automatically formats phone numbers so all you need to do is type in the 7 or 10 digits. |
| Fax | Fax number. EPASS automatically formats phone numbers so all you need to do is type in the 7 or 10 digits. |
| Customer Service Phone | Place to store the customer service phone number separate from Telephone 1 and Telephone 2. EPASS automatically formats phone numbers so all you need to do is type in the 7 or 10 digits. |
| Used to store an email address for the supplier. You can separate multiple email addresses by a comma or a semicolon. Note that the title, Email, is a hyper link and clicking on it will launch Outlook with the “To:” field populated with that email address. | |
| Website | Used to store a website URL for the supplier. Note that Website is a hyperlink which will open up your web browser to the URL stored in the field. |
| Account # | Your account number with that supplier. This can be printed on checks. |
| Immediate Reserved Days | Used as part of the ATS (available to sell) calculation for models. The typical number of days it takes from when you place an order to when the product arrives. |
| Note | This note appears when you add a new transaction into Accounts Payable > Transaction Processing for this supplier.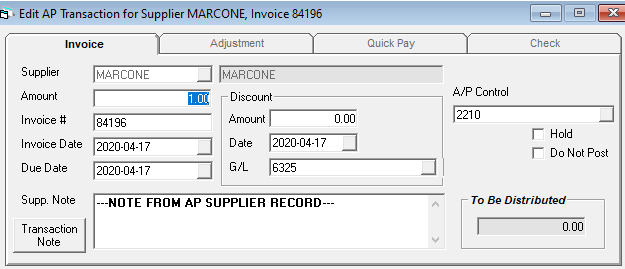 |
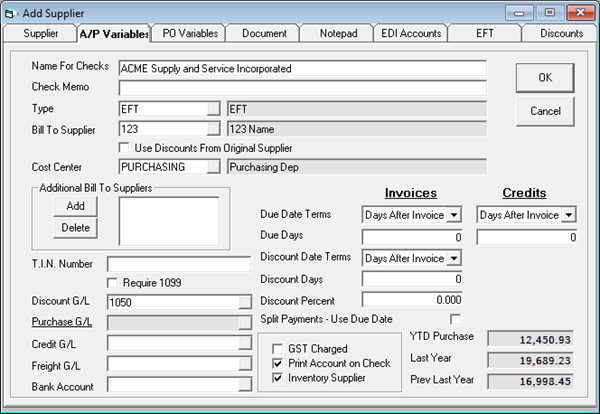
A/P Variables Tab
| Parameter | Description |
|---|---|
| Name for Checks | Enter the Supplier's full name as it should appear on a check. If this field is left blank, the Name field on the Supplier tab is used instead. |
| Check Memo | Check styles can be customized to print this check memo field if desired. |
| Type | Populated from Tools > System Maintenance > Supplier Type. A way to group similar suppliers based on how you pay them so you can run reports and checks separately for those suppliers you pay by check vs suppliers paid by credit card. |
| Bill to Supplier and Additional Bill to | Used for your inventory suppliers where you are financing the purchases. For example, you are purchasing Whirlpool product but it is being financed by Wells Fargo you would put the suppler code for Wells Fargo into the Bill to Supplier field for Whirlpool. This will let you write the PO for Whirlpool but, when it comes time to key in the AP invoice, the supplier code will flip to Wells Fargo. Additional Bill to Suppliers lets you add additional choices for who the supplier will be set as when creating the AP invoice. This also includes the supplier themselves. In the Whirlpool example you may normally go through Wells Fargo but occasionally you pay Whirlpool directly; you can add Whirlpool into the list of additional suppliers. |
| Use Discounts from Original Supplier | To use the early pay discount percent from the original supplier instead of the Bill To Supplier on an AP Invoice , select the checkbox “Use Discounts from original Supplier”.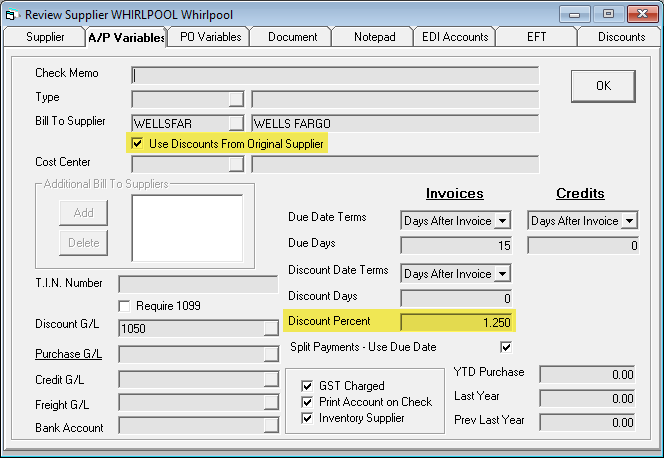 Make sure the “Update A/P” and “Auto Create A/P Invoice during Costing” checkboxes are selected on the PO Variables tab. 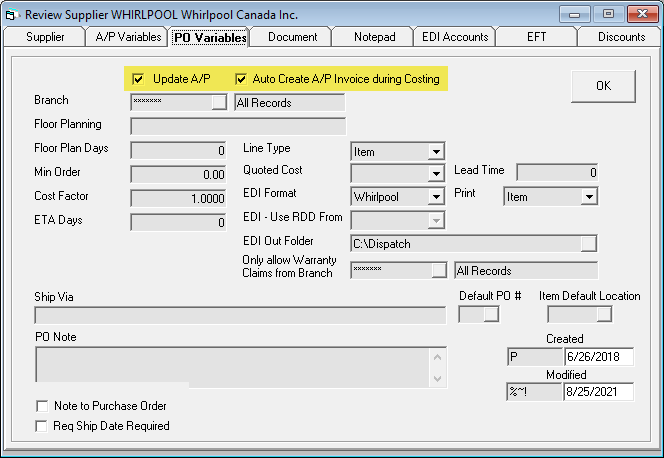 |
| Cost Center | Allows your company to monitor spending by department. Tools > System Maintenance > Cost Center. If it’s filled in and you create an invoice for this supplier, it will populate the cost center field with this value by default.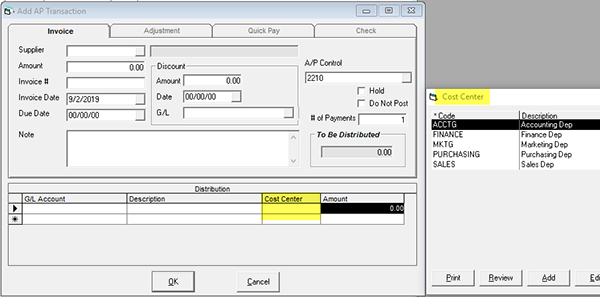 |
| T.I.N. Number and Require 1099 | Fill in the supplier’s Tax Identification Number here. Require 1099: There is a Crystal report in Help > Online Documents which will list all invoices and adjustments from Supplier History for suppliers with the Require 1099 checkbox checked |
| Discount G/L | If your supplier provides early payment discounts, this is the GL account you want those accumulated into. This can be left empty if this supplier uses the same discounts GL account as defined in Tools > System Maintenance > Variables > Accounts Payable > General tab. Do not use an inventory asset GL; we do not want to reduce our inventory because we pay our invoices early. We want to accumulate those funds to reduce our COGS or expenses. |
| Purchase G/L | Invoices are not always straightforward; there are commonly multiple GL accounts involved with multiple distributions. When you click on the Purchase hyperlink, the screen below opens up and you can start defining all the allocations. This distribution does not affect the GST calculations. GST calculations are always done in advance on the invoice total.  Distribution: Your options are Flat $ (a fixed dollar amount will be applied to the GL account), % of Invoice Total (you can allocate 10% to go to a specific GL account), % of Remainder (you might allocate ½ of the remaining balance to a GL account). In the screenshot above, notice one line that has 33.33% of remainder going to 6050 followed by 50% of the remainder going to 6050-1 and 100% of the remainder going to 6050-3. These three lines essentially divide the remaining amount in three. The first line takes 1/3 of the remainder. Now we have 2/3 left to allocate, that is why the second line takes 50% of the remainder. The last line takes 100% of the remainder because we do not want to leave any funds unallocated. |
| Credit G/L | This is the GL account credit invoices will go to. In the parts business this is important to separate since, with most credits regarding a warranty claim, we want to affect COGS not inventory asset. |
| Bank Account | The bank account can be left empty for the majority of your suppliers and it will use the default bank account in Tools > System Maintenance > Variables > Accounts Payable > General tab but, in cases where you want a supplier to use a specific bank account, fill it in. I.E. The payroll company may get paid from a payroll account or, for companies like R&D that deal in multiple currencies, you want your Canadian and US suppliers to be paid from the correct account. This is connected to the check run as the check run separates batches by the bank account. I.E. It will not pay a supplier that uses the payroll bank account when running checks from the general bank account. |
| Due Date Terms Invoices and Credit Days | These fields control how the due date is defaulted during invoice entry in Accounts Payable > Transaction Processing. Days After Invoice: Sets the due date of the invoice as X number of days after the invoice date where X is the value in the Due Days field. For example, if the invoice date was Jan. 2nd and due days was 30, the invoice due date would be set as Feb. 1st. Day in Next Month: Sets the due date as the value in Due Days for the next month. If the invoice date was Jan. 2nd and due days is 21, it would set the invoice due date as Feb. 21st. Day in Two Months: Sets the due date as the value in Due Days two months from now. If the invoice date was Jan. 2nd and due days is 21, it would set the invoice due date as Mar. 21st. Split Payments - Use Due Date: This allows you to split the payments equally and will use the same date for each future payment. If the invoice due date is Mar. 21st, and it's split into 3 payments, the future payments will be due on March 21, April 21, and May 21. |
| Discount Date Terms/Discount Days | If the supplier offers an early pay discount, these fields can be filled out to populate the early pay discount when the invoice is created. You have two selection options for Discount Date terms: Days After Invoice: this will set the discount expiration date X days after the invoice date where X is the Discount days field. For example, if the invoice date was Jan. 2nd and due days was 10 the discount would expire on Jan. 12th. Day in Next Month: Sets the discount expiration date as the value in due days in the next month. If Discount Days was 5 it would set the discount to expire on the 5th of the month after the invoice date. |
| Discount Percent | This value is used to calculate the early payment discount amount. |
| GST Charged (Canada only) | This controls if the supplier charges you GST or HST. EPASS will automatically do this calculation for you based on the amount of the invoice. For example, if the invoice was for $100 and in AP variables GST is set at 5% it would automatically write a distribution line for $4.76 to the GST paid GL account. |
| Print Account on Check | If selected, this option will print the value in the Account # field onto the check. Note not all check layouts support this option. |
| Inventory Supplier | This option controls if you are able to create a PO for this supplier or define this supplier on items or models. |
| YTD Purchase/Last Year/Prev Last Year | YTD purchase shows the total amount of business you have done with this supplier in this calendar year. Last year is the amount done in the previous calendar year and Prev Last Year is the year before that (2 years ago). You need to run Accounts Payable > Utilities > Year End Roll each calendar year end for these numbers to be accurate. |
PO Variables Tab
| Parameter | Description |
|---|---|
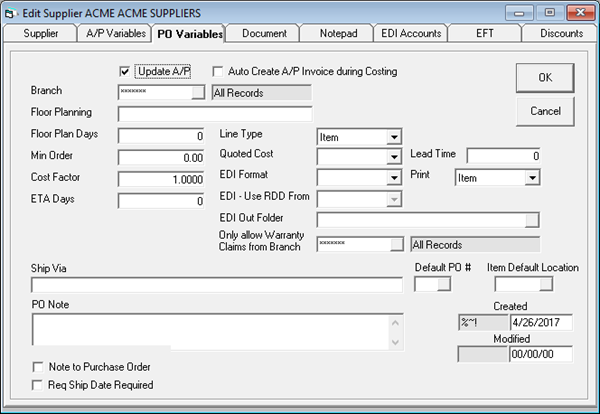
| Update A/P | When checked, at the end of costing a purchase order and the PO screen is closed, EPASS will launch into AP add invoice. If the person who costs purchase orders is not the same person that will be entering the invoice into Accounts Payable or the person is not detail oriented enough to appreciate the importance of entering an invoice into Accounts Payable, you will not want to use this option. |
| Branch | When set to a specific branch, only invoices from the same branch can make warranty claims against this supplier. It is used if you have service departments in separate regions to ensure they are making the claims against the correct supplier. |
| Floor Planning | If you floor plan inventory from this supplier, this would be filled out with the name of the financing company. This will be defaulted as serial numbers are received from this supplier. |
| Floor Plan Days | The number of days for floor planning. This will set the Floor Plan Due Date field on serial numbers as this many days out from the date it is received. |
| Min Order | Sets the minimum dollar amount a PO can be to be ordered. If the quoted cost on the PO is less than the min order value, you will receive a warning message when closing the PO. |
| Cost Factor | Used as part of the costing process on purchase orders. It takes the cost of the product and multiplies it by the cost factor to get the total cost for you. It is commonly used for import duties or currency exchange. For example, if you where a Canadian company purchasing from a vendor in the United States who charged you in USD, the cost factor would be the exchange rate between USD and CAD. |
| ETA Days | Sets the default ETA Date on purchase orders created for this supplier as this many days from the date ordered. |
| Line Type | Sets the default option when adding product to the PO. |
| Quoted Cost | Sets the cost value the PO Quoted cost will be populated with. |
| EDI Format | Used if you are working with Marcone or Whirlpool to automatically upload your POs to their systems. |
| Only Allow Warranty Claims from Branch | In a multi branch operation, each branch probably has their own Service Center Number and may purchase their parts from a supplier in a different region. This will make sure the warranty claims are only made to this supplier by the branch in their territory. |
| Lead Time | Used as part of the SN-43 Suggested Ordering Report. Typically, only used by furniture companies due to the significant lead time needed to bring product in. |
| When printing, emailing, or exporting a purchase order, what value should it print. This option is used where you have a generic item or model number in EPASS for something such as washer hoses to make it easier for your sales staff but you have the real item or model number in the equivalent field since you cannot order it as ‘washer hoses’. There are 3 options: Item: this prints the item or model code. Equivalent: If the equivalent field is populated, print that value; otherwise, print the item or model code. SKU: If SKU is populated, print that value; otherwise, print the item or model code. | |
| Ship Via | How the product is getting to you. Shows on the purchase order header. Will also be displayed on the PO when printed or saved as a PDF. |
| PO Note/Note to Purchase Order | This field will show, when creating a purchase order, on the PO header in the supplier note field. Will also be displayed on the PO when printed or emailed. |
| Default PO# | Populated from Tools > System Maintenance > PO Number. Used to separate your different kinds of purchase orders such as appliances versus items. |
| Item Default Location | The default location items are received into for purchase orders from this supplier. When adding an item onto a PO it will set the location to this value. |
| Created/Modified | Created shows the user ID and date that this supplier was created. Modified is shows the user ID and date who last edited this supplier. |
Document Tab
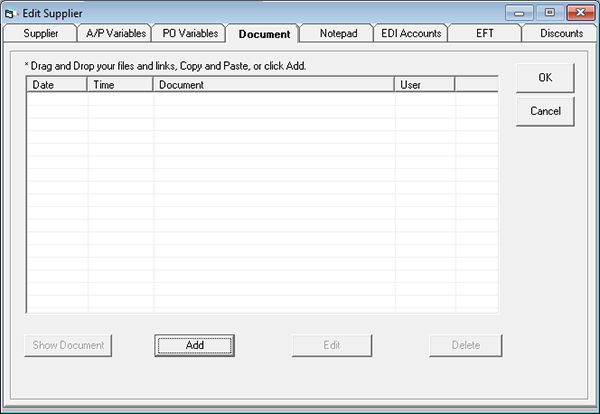
Here you can attach a link to a file stored on your network. Note, this does not make a copy of the file and store it in the database; it only stores the path to the file. This means, if is taken from your local computer and dragged into the documents tab, only when on that particular computer will that file be accessible.
EPASS suggests creating a network share which all users have access to and any files that are going to be attached to the documents tab be stored within that folder so that all users will have access to them.
Notepad Tab
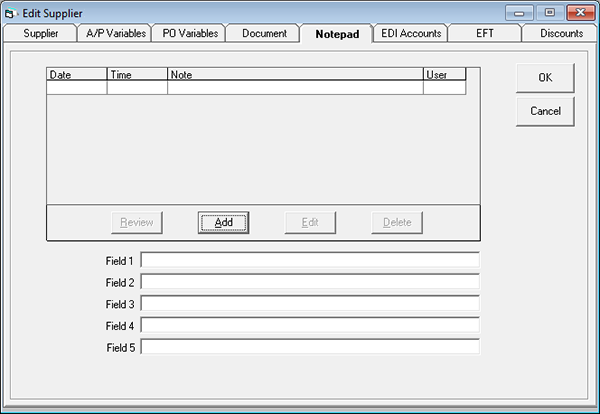
The notepad lets users store notes related to this supplier. These are internal notes and not printed out on anything the supplier would see.
Field 1 to Field 5
These five fields are free to be used as your company wishes. There are no reports within EPASS that directly look at these fields but a custom crystal report can be made to search these fields and then pull the relevant data for you. The field names can be redefined and made required in Tools > System Maintenance > Variables > Accounts Payable > Titles tab.
EDI Accounts Tab

Used for Warranty EDI integration with Service Bench, Service Power and others.
Adding Item EDI Accounts

Select a brand code, then fill out the account number field. If the manufacturer has several brands under the same account, be sure to add a record for every brand. This is the suppliers account number with the manufacturer.
Account Description is an optional field.
Adding Serial EDI Accounts

Custom feature. Not used.
EFT Tab
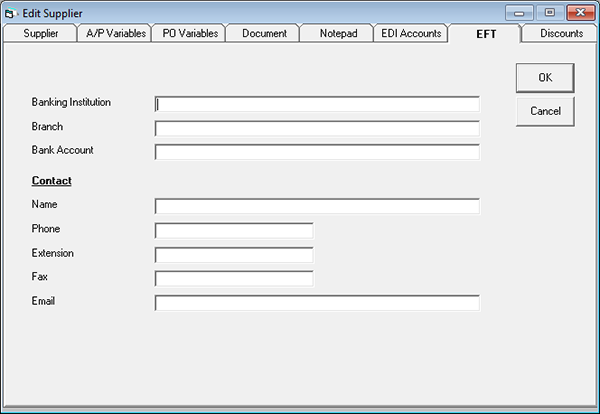
If you are using the EFT integration with your bank, this is where you fill in the supplier’s banking information.
Contact
Here you can fill in the information for the Payables person with that supplier.
Discounts Tab
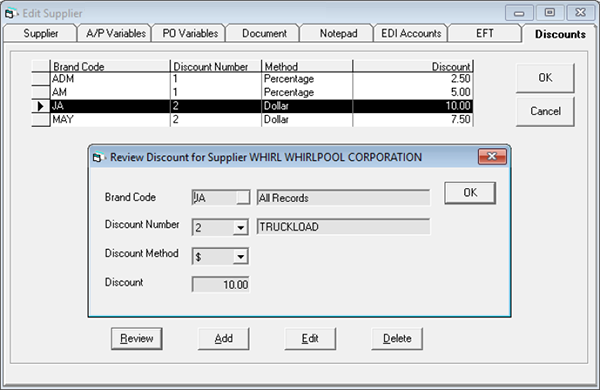
Only for Serial Inventory.
Used if you are using Tools > System Maintenance > Variables > Purchasing > Discount Labels tab “Discounts by Supplier”. Discounts by Supplier is more geared towards volume rebates and related truckload or negotiated discounts. The key to supplier level discounts is it allows you to define multiple discounts within Whirlpool, I.E. 2.5% for Admiral and 5% for Amana.
See Also
October 9, 2025