Interstore Transfers
Using Interstore Transfers is a combination of auto transfer requests (receiving something that needs to go to another location, reserving something that needs to go to another location for delivery/pickup, etc.), manual transfer requests (for display product), reviewing and accepting/declining transfer requests, batch transfers on the scanner, and receiving transfers at their destination.
System Maintenance Variables
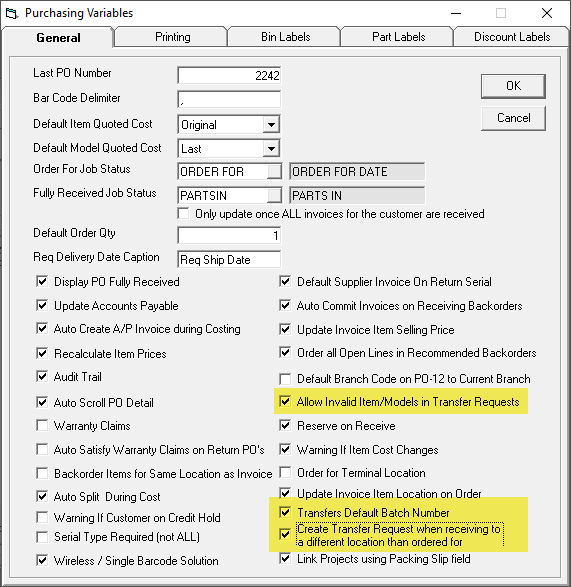
Allow Invalid Item/Models in Transfer Requests: This determines if you want to allow non models/items to be requested through transfer requests. For example, requesting stationary, cleaning suppliers, toilet paper, etc.
Transfers Default Batch Number: When you add a manual transfer request, this determines if the batch number defaults to the currently selected batch. Not commonly used nor it is it recommended.
Create Transfer Request when receiving to a different location than ordered for: If you create a PO and order some models for a store then, with this option turned on, when you receive the product, it will automatically generate a transfer request telling you to send it to the store. This option is for orders that are not linked to an invoice.
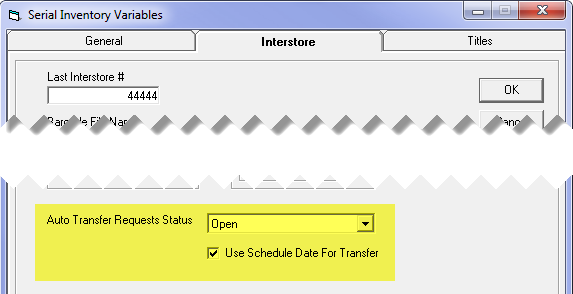
Auto Transfer Requests Status: This is the status that will be used for auto transfer requests, which are generated from reserving serial numbers to an invoice. Use this if you want to differentiate auto requests from manual requests.
Use Schedule Date for Transfers: If this is checked (default) then the transfer request will be required to arrive by the delivery/pickup date of the invoice. If unchecked, it will be required to arrive the day that the serial gets reserved.
User Security
There are security options related to adding/requesting in EPASS, maintaining and printing requests in EPASS, and then separately there are options related to actually transferring product using the scanner.

Various Edit security options: You can control if a person can only edit open requests, meaning once they have been transferred or printed they can no longer be changed. Also some people may be able to edit all statuses (not recommended for most people). Edit quantity determines if they can change the quantity of a transfer request but allowing that means you won’t know what the quantity originally was.
Split: This is the preferred way to change quantity; split the line (from 2 into two lines of 1 and 1 for example) then one line can be accepted and the other can be rejected.
Change Status: Can they change to accepted, rejected, etc.
Transfer Report: This is the report of what is going to be transferred and is what will be used to start the batch transfer on the scanner.
The transfer related security options for the scanner:
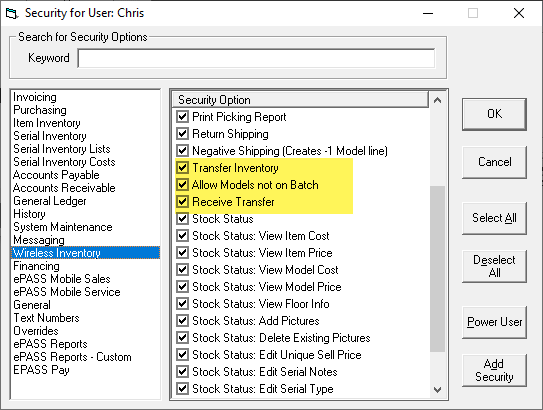
Allow Models not on Batch: If you want to tightly control your transfers then you would not allow this, as it would let them transfer anything whether it was part of the printed transfer request report or not.
System Maintenance Tables
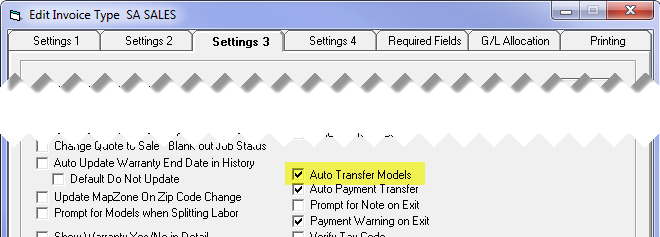
In order for the system to automatically generate transfer requests when reserving serials, you need to turn on Auto Transfer Models for the Invoice Type. Then when someone requests a serial that is in a location other than the location they are shipping out of (designated on the invoice model line), it will automatically generate a transfer request to move it to the shipping location in time for delivery.
There are several system status for transfers but you can also define your own statuses to help you manage requests. You can add/edit/delete statuses in System Maintenance > Transfer Status.
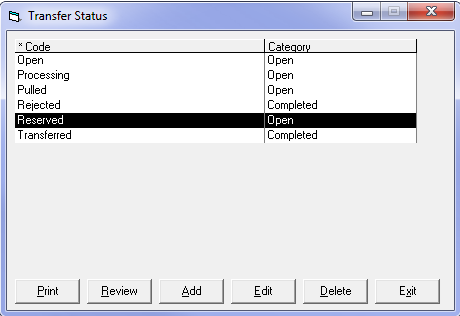
Each status must be assigned to a category; either open or finished. The system uses the category to decide what can be done with each request.
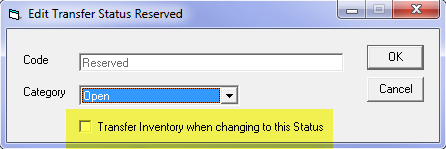
Transfer Inventory when changing to this Status: This option is if you want to use transfer requests in a more simple manner, without using the scanners to receive the transfer. If this is checked and you change a transfer request to that status, it will automatically transfer that serial number into the location it was requested to move to.
Transfer Requests
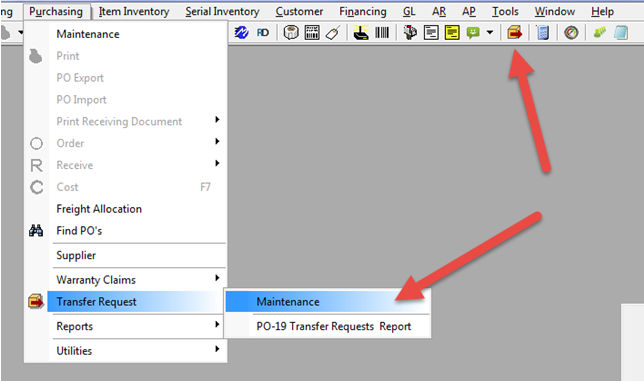
Transfer Requests Maintenance can be accessed through the Purchasing menu, and single transfer requests can be made using the button on the toolbar.
The Transfer Requests Maintenance screen provides 3 search levels, giving you a variety of ways you can search for requests. How you search for requests will depend on how often your transfer trucks run, which locations they are going to, etc.
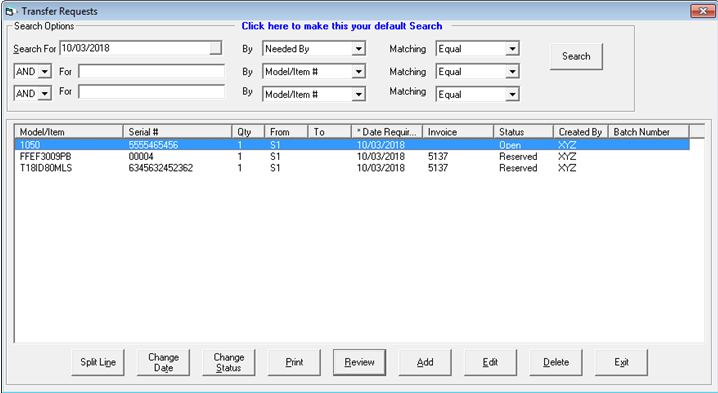
In the screenshot above, you’ll see two requests with a status of Reserved and one with a status of Open. The Reserved requests are auto transfer requests and they used the status that was defined in Serial Inventory variables. The Open request is a manual transfer request.
To Add a Manual Transfer Request:
- On the Transfer Request maintenance screen, click Add.

Model/Item: There are model/item buttons which will go to maintenance and let you search for the model/part number.
Serial/Invoice: These are automatically filled in for an auto request, but can also be entered for manual requests. If you are requesting to transfer a serial from the warehouse to a showroom (not connected to an invoice), it is recommended not to select a serial number. If you leave the serial number field blank, you can select any serial number in the location of the correct serial type; however, if you select a serial number as part of the entry, you are specifying the exact serial number to be transferred. It will be treated as an exclusive reserve.
From/To: The location that the product should come from and the location it is being transferred to.
Needed By: This is the date that the product needs to arrive at the “To” location by. For auto requests this might be the delivery/pickup date or date reserved.
Status: Status of the transfer. This defaults to open.
Note: Reason for the transfer.
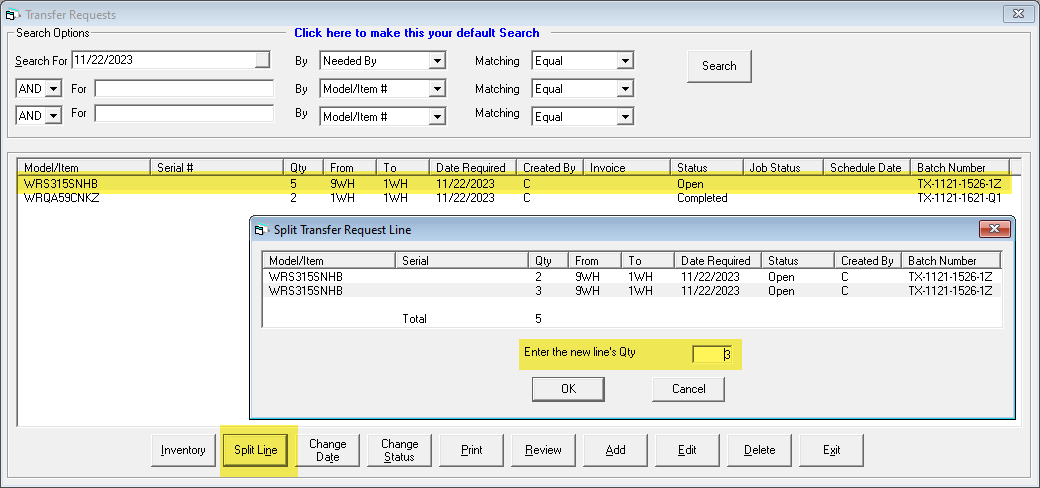
Split Line can be used if more than 1 is requested but you want to split them in order to accept/reject some, or possibly change the date for some, etc.
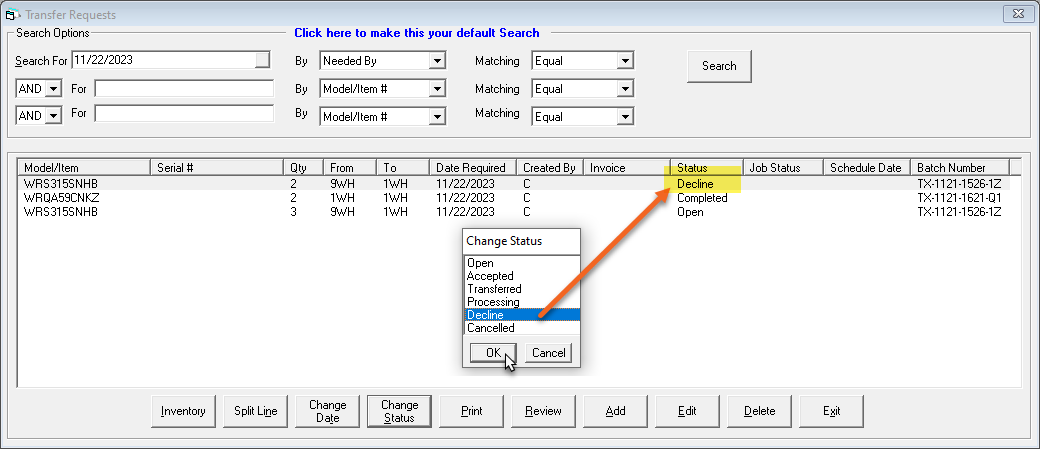
Change Status is used to change the status of one or multiple requests (using multi-select). The screenshot below shows one request being rejected after the split was performed.
Once the requests have been organized and any refusals have been changed to Declined status, you would then print the transfer request report for what you’re going to transfer.
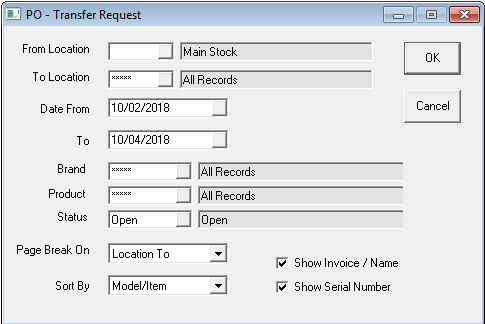
From/To Location: Choose the locations you are doing a transfer for. If you have one distribution center then a common way to run it is for all TO locations but then page break on the TO location so that each store gets their own page.
Date From/To: This looks at the date the transfer is required by, so if you don’t do a transfer run every day make sure you pull everything up to the next transfer day.
Status: This is a multi-select, so you can choose open as well as reserved (if you use that status for auto transfers). Also once you generate a batch, if you ever need to re-print the batch, you’ll also want to include processing status.
Page Break On: The default is Location To, which is the most common option.
When you run the report, it will preview on screen like most EPASS reports do. What is unique to the transfer report though is the “Generate Batch & Print” button at the top of the page:
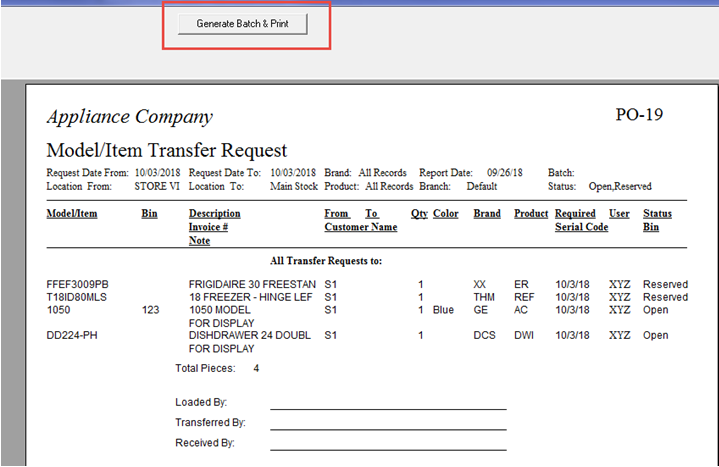
You should use this button to print the report rather than the regular print button. This button will create a unique batch number for everything on the report then add a barcode to the report that is the batch number. The batch number is then used when you batch transfer out of the warehouse and onto a truck.
Once you click Generate Batch & Print, it also changes the status of everything on the report to Processing. This lets anyone in Transfer Requests know that this transfer has been initiated and, if any other requests come in afterwards, they can be printed as their own separate batch, since the status of the new requests will be Open.

Once the batch has been generated you’ll see the status changed to Processing:

The next step is to use the scanner to do the Batch Transfer:
- Scan the Batch Number barcode on the PO-19 Transfer Request report
- Scan the location that you are transferring the product to. We recommend that you scan to a truck location, then when the truck arrives at the store the product is transferred from the truck location into the store.
- Scan the product that is being transferred. As you scan each piece, the system is validating the following:
- That it is part of the batch. If not, you’ll get an error that it is not on the batch.
- That it is reserved for an invoice on the batch and, if not, whether or not the reservation can be swapped with a serial that is reserved for the invoice, or an available serial. The swapping will automatically occur if possible, and if not possible they will be stopped.
- That it is not exclusively reserved to some other invoice, or the invoice on the batch does not have another serial exclusively reserved.
As each piece is transferred the transfer request status is updated to Transferred. Once all pieces have been transferred, the scanner will stop asking for product barcodes and will ask for the next batch instead. If it is still asking for product barcodes then you have not scanned everything on the batch.

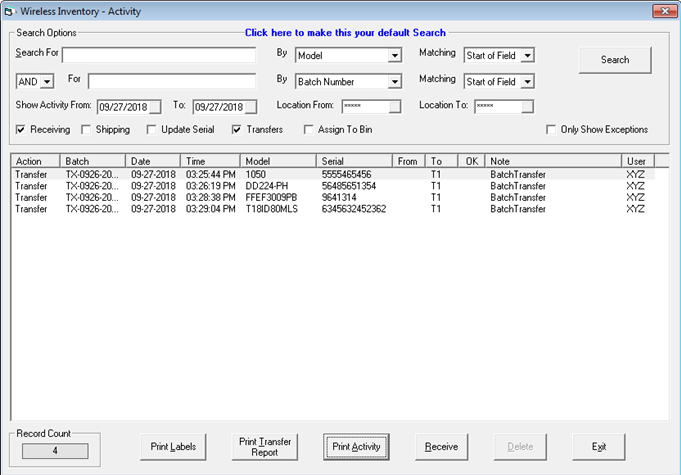
If you check the Wireless Activity screen you will see the transfers. A note has been added to differentiate batch transfers from regular transfers.
Once the product arrives at the destination, you would do a Receive Transfer either on the scanner or in EPASS, under the Wireless Inventory menu. For a Receive Transfer, you will scan or enter the batch number then scan or select all of the inventory that is being received. This will put it into the destination location and as long as this is the final (“To”) location it will mark the transfer request as Completed.

Receive Transfer with EPASS WMS
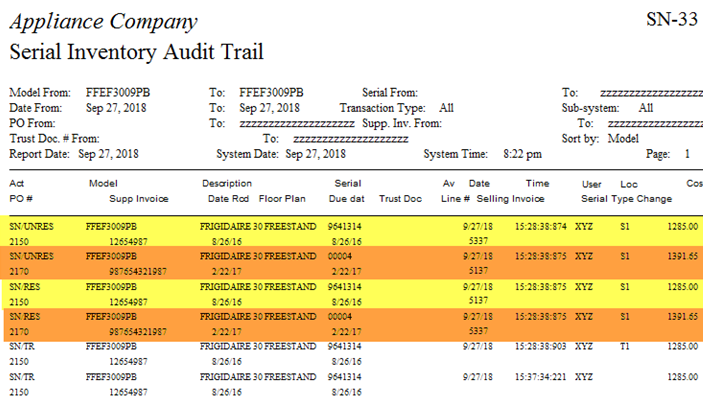
All reservation swaps throughout EPASS are also audited on the SN-33 Audit Trail and also written to the invoice notepad that the serial numbers involved were reserved to.
Below is an example of a swap written to the audit trail. You can see the two serial numbers involved (one in yellow, one in orange). There is an unreserve and a reserve for each one since each of them were unreserved from one invoice and then reserved to another.
March 5, 2024