Item Min/Max Analysis
Item Min/Max analysis is the combination of a report/export that analyzes item sales data and an import that will bring min/max levels back into EPASS.
IN-28 Min/Max Analysis Report
The first step in setting your min/max levels is to run the IN-28 Min/Max Analysis report. This is how you will extract the data that will help you decide on new min/max levels.
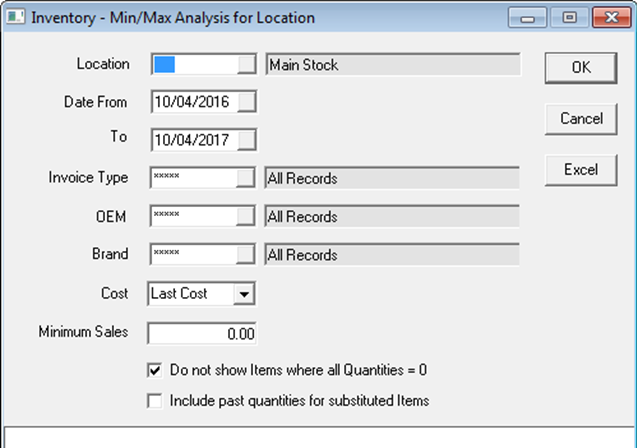
Location: This is the location that you want to analyze/set min/max levels for. You can only run it for one location at a time.
Date From/To: The report looks at finished invoices so this date range is based on finish date. You can choose to run for the last few months, the last year, or for seasonal inventory you might want to run it for a period from last year.
Minimum Sales: Only include items that meet the given minimum sales within the last year. For example, if you only sold $5 worth of one item, you likely don’t want to stock it.
Include past quantities for subbed items: If this is checked, it will include the previous part number quantities from substituted items. For example, part 1 was subbed to part 2 so we will show part 2 on the report but quantities will be from part 1 AND part 2. Using this option will make the report take longer to run.
Clicking OK will preview the report in EPASS, which you might want to do if you are just looking at the data. If you are planning to set your min/max levels now then you should click the Excel button to export directly to Excel.
Here is a sample of how it exports to Excel:

QOH: Current quantity on hand in the location specified.
All Locations Last YTD: Quantity sold last year in all locations.
YTD: Sales in the location specified (also for the date range specified).
Min/Max: Current min/max for the location specified.
Inv: The number of invoices that made up the YTD quantity. In the first row, 12 were sold on 12 invoices (1 per invoice), but in the third row 8 were sold all on one invoice. In the third example, since there was only 1 invoice, you likely would not set a min/max, even though 8 were sold.
BO: The quantity was backordered, meaning you didn’t have it in stock to commit it to the customer right away. It is considered backordered if it was not committed either the same day or the next day after it was added to the invoice, and we do take weekends into consideration (so added on Friday then committed Monday would NOT be considered backordered).
This data should help you make an informed decision on how to set your min/max levels. Let’s take a quick look at the three rows in the example above.
Row 1: 12 sold on 12 different invoices and all 12 were backordered. You probably want to keep at least one of these in stock.
Row 2: 27 sold on 24 different invoices and 16 were backordered. Currently has a 1/1 min/max. If 16 were backordered even with a 1/1 min/max you probably need to bump that up.
Row 3: 8 sold on 1 invoice and they were backordered. If there was just one big order you would not likely want to stock this item.
After you have gone through the spreadsheet and changed the min/max quantities directly in Excel, you are now ready to import those quantities back into EPASS.
Import Min/Max Utility
The Import Min/Max Utility is used to bring those quantities back and update your inventory.
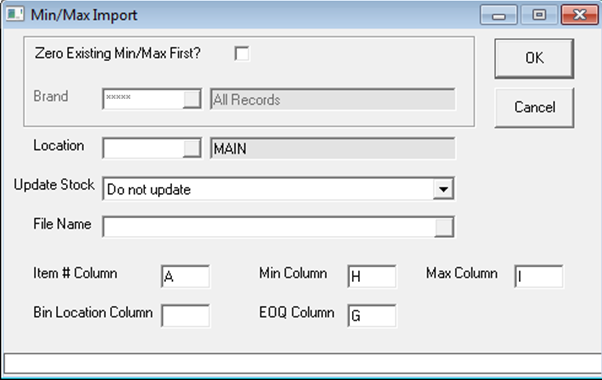
Zero Existing Min/Max First: When you ran the IN-28, if you had only exported items with a certain sales amount, or you had excluded items where all quantities were 0, then it’s possible (and quite likely) that some items that already have a min/max level were not exported. This means they no longer meet your requirements to have a min/max level and they should probably be set to zero. Checking this box will first zero out min/max levels (in this location) before it imports your new min/max.
Brand: If you ran your IN-28 only for a certain brand, then make sure you only zero out the same brand here. If this is left as ALL and you are only importing one brand, then you’ll end up zeroing out all of the rest of the brands in this location.
Update Stock: If you want this list to also set the Stock checkbox on the items, then you can choose “Make all items Stock”.
Columns: Make sure the column letters match up with the appropriate columns in the spreadsheet.