Adding a Model to an Invoice
When adding a model there are a few key fields that must be filled in.
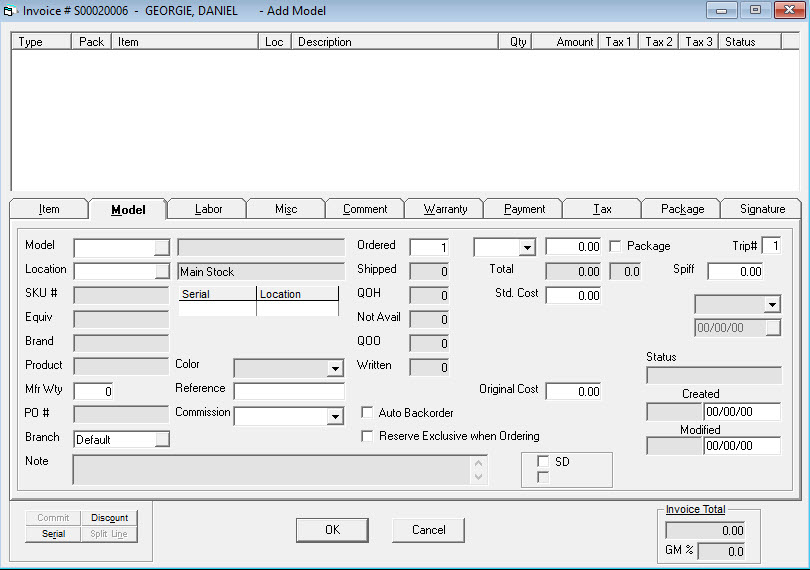
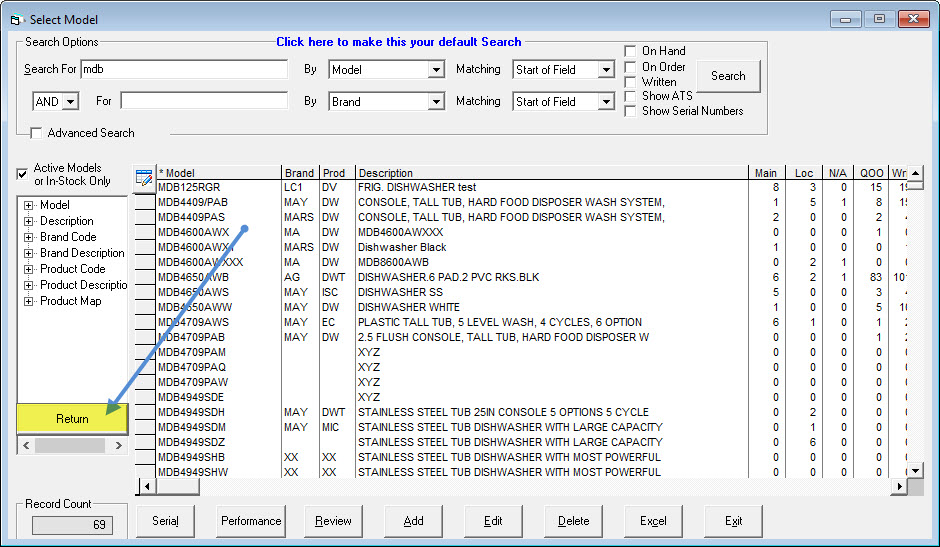
Model: This is where you enter the model number that you would like to sell. If you know the full model number just type it in then hit tab to go to the next field. If you don’t know the model number you can either hit the F2 button on the keyboard, or click the small button ![]() to go to a full serial inventory search, where you can search by model number, description, etc. Once you have found the model you’re looking for either double click it on the Serial Inventory Maintenance screen, or click the return button in the bottom left corner.
to go to a full serial inventory search, where you can search by model number, description, etc. Once you have found the model you’re looking for either double click it on the Serial Inventory Maintenance screen, or click the return button in the bottom left corner.
Once the model has been selected, either by typing it in or by using the search, you will now see many of the information fields about the model are filled in.
Ordered: This is the quantity that you are selling. Let’s enter 1 for now.
List Price drop down: This field defaults to the pricing level that this customer is set to get. You can have many different pricing levels, but typically they are coded L1, L2, L3, etc. If you choose a different pricing level here, then it will change the selling price appropriately. This is only used to allow you to easily select a pricing level, it does not save this value with the model line; it only saves the actual price that was entered.
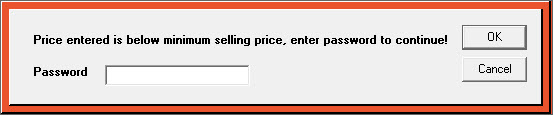
Selling Price: You can change the selling price by typing it in here. If you try to sell below the minimum sell price that has been set for this model you will be asked to enter an override password.
Location: This is the location that the model will be shipped out of, or will be picked up from. You can set up default delivery and pickup locations for each terminal and you can also override the location by changing it here.
Those are the key fields you’ll need to enter to sell a model.
Reserving a Serial Number
Reserving a serial number will ensure that your customer gets the product they ordered. Some employees will have high level security that will allow them to unreserve a serial number, but for the most part once a serial number has been reserved it is yours.
Reserving a Serial: Security Options
If sales staff are unable to reserve a serial number, you may have to enable two security options.
- Go to Tools > System Maintenance. On the Tables tab, select User Security, and then click Open.
- Select a User or Group from the list, and then click Security.
- In the Keyword field, enter
reserve stock. Select Reserve Stock Serial for Invoice. - In the Keyword field, enter
reserve non-stock. Select Reserve Non-Stock Serial for Invoice. - Click OK.
Overriding Serial Reserving Rules
If you need to allow some staff to override payment and schedule rules, you can apply three security options to their user account or group: Reserve Serial - Override Serial Type, Reserve Serial - Override COD Balance, and Reserve Serial - Override Max Days Out.
About Overriding Serial Type
Each Invoice Type has a setting to allow specific serial types to be reserved on an invoice of that type. For example, a COMMERCIAL Invoice Type can be configured to only allow commercial serials to be reserved on commercial invoices. If a user attempts to reserve a non-commercial serial, EPASS prevents them from doing so.
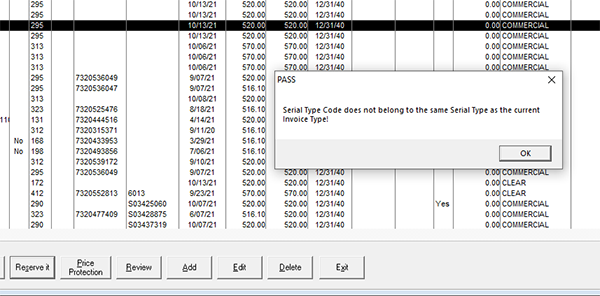
Overriding this rule allows a user to reserve a serial regardless of the serial type restriction on the invoice type
About Overriding COD Balance and Maximum Days Out
Each Invoice Type can be configured to prevent serial reserving unless the COD balance is paid. The maximum number of days out that a serial can be reserved can be configured as well.

Overriding these rules allows users to reserve serials to COD invoices with an outstanding balance and remove the limit to the maximum days out.
To Apply the Security Options
-
Go to Tools > System Maintenance. On the Tables tab, select User Security, and then click Open.
-
Select a User Account or Group from the list, and then click Security.
-
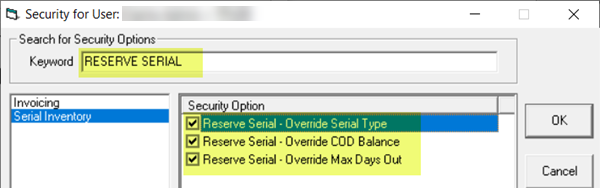
In the Keyword search box, enter RESERVE SERIAL. In the list on the left, click Serial Inventory.
-
Select Reserve Serial - Override Serial Type, Reserve Serial - Override COD Balance, and Reserve Serial - Override Max Days Out.
-
Click OK.
EPASS will no longer prevent users with these security options from reserving serials that don't meet the Serial Type, COD Balance, or Max Days Out rules.
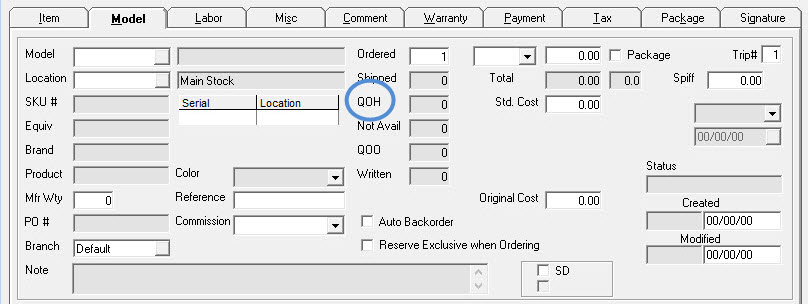
To reserve a serial number, there must be inventory in stock that is not already reserved. If the QOH (Quantity On Hand) field is greater than zero, you have some in stock. Click the QOH hyperlink to look at the inventory.
Once the serial number screen is open, you’ll see all the inventory for that model, as well as a breakdown by location on the left side. To reserve a serial number, highlight the one you want and click the Reserve it button.
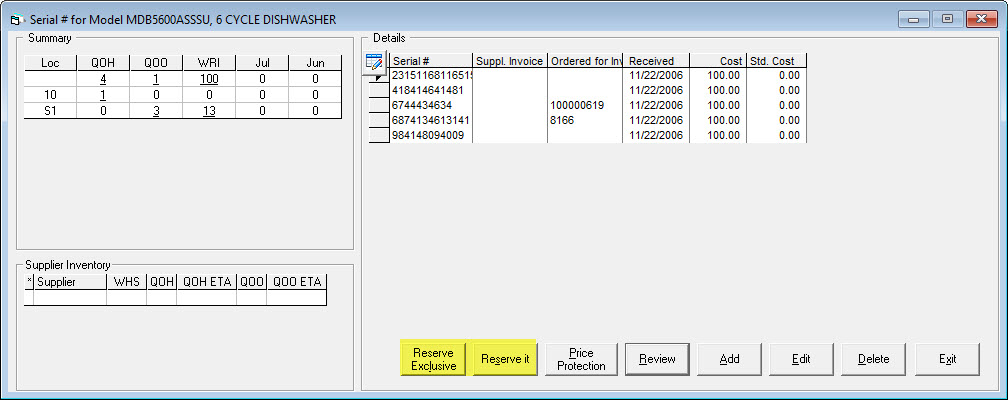
If the serial number already has an invoice in the “Ordered for Invoice” column, that means it is already reserved for another invoice and you cannot reserve it. Either choose another one that is available or talk to someone who has security to unreserve to see if one can be freed up for your customer.
Once you’ve reserved your serial number, you will see your invoice number in the Ordered For Invoice column. If you sold more than 1 model on this invoice line, you can reserve as many serial numbers as you need. Once you’re finished, just click the Exit button to close this form and go back to the invoice.
Deleting a Model with a Reserved Serial from an Invoice
Enabling or preventing a user from deleting a stock or non-stock model with a reserved serial number from an invoice is controlled by two security options:
- Go to Tools > System Maintenance. On the Tables tab, select User Security, and then click Open.
- Select a User Group from the list, and then click Security.
- In the Keyword search box, enter
STOCK MODEL. Select or clear Invoice Detail - Del Stock Model w Rsvd Serial and Invoice Detail - Del Non Stock Model w Rsvd Serial.
Additional Fields
| SKU# | If you use your own internal SKU numbers for models, it will show up here. You can enter either the model number of the SKU # into the model field and it will find that model. You can also press the small arrow button |
| Equiv | If there is an equivalent model number, it will show that model number here. You can also press the small arrow button |
| Brand | The brand for the selected model. |
| PO# | After the model has been sold on the invoice, if it is then ordered the purchase order number will show up here. |
| Mfr Wty | This is the number of months of manufacturer warranty for the selected model. |
| Note | This is a note related to the selected model. It is typically used as a more detailed description that includes some of the features for that model. |
| Color | The color of the selected model. Not all companies maintain the color for every model so it is quite commonly blank. |
| Reference | This is an open field that you can use to relay something to the purchaser. This field will show up on the ordering reports. |
| Shipped | The quantity that has been shipped on this model line. As each serial number is either scanned out or manually shipped this number will go up. |
| QOH | The current quantity on hand for the selected model. |
| Not Avail | The current quantity that is marked as not available for this model. These are not included as part of the QOH. Typically these are either floor models or damaged models. |
| QOO (hyperlink) | The current quantity on order for this model. Click the QOO hyperlink to view a table listing details of each PO that the model is ordered on. 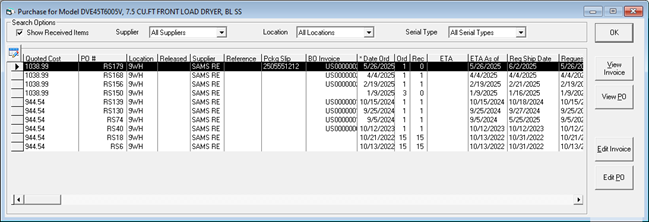 You can customize the columns in the table and view specific information, such as the Quoted Cost of the model, by clicking the Change Columns button. |
| Reserved | The total number that have been sold and not yet shipped. |
| Total | The extended selling price for this model line. Quantity multiplied by the selling price. |
| Std/Average/Last/Rpl Cost | The various costs for this model. These only displayed if the current user has security to see them. |
| Package | Designates if this model is part of a package or not. This is covered in full in Selling a Package on an Invoice. |
| Trip# | This is only applicable for a service invoice where a model was sold. It designates which trip it was sold on. |
| Spiff | The spiff amount for the selected model. |
| Status | Open or committed. A model on an invoice should always have a status of committed. If it is open, that means the model was probably locked when it was added to the invoice and it will not show up on ordering reports. You should edit the model line and click OK to have it commit, if you ever see an open status. |
| Tax (checkbox) | This designates if tax will be charged for this model or not. If there is a tax exemption number on the invoice, that will override this and tax would not be charged. There is a security option that can control whether a person can check/uncheck the tax box. |
| Created | The user who created this model line and the date it was created. |
| Modified | The user who last modified this model line and the date it was modified. |
See Also
- Creating a Sales Invoice
- Adding an Item to an Invoice
- Adding a Misc Charge to an Invoice
- Adding Extended Warranty to an Invoice
- Taking a Payment
June 10, 2025